MD + MM Editor

MM

Monomachine Editor

User guide · version 0.9.0

Future Native Audio · mdmm.dev
The chapters follow the Monomachine manual's order. Every sentence is our own.

ContentsMonomachine Editor

Contents

  1. 1Introduction, philosophy, highlightsWhat the Monomachine is, what the Monomachine Editor adds to it, and how this guide writes about controls.
  2. 2User interface and connectorsThe Monomachine's panel, keyboard and sockets, and where each control is on the editor's page.
  3. 3The LCD user interfaceWhat the fields of the LCD in the top bar show, and where the rest of the machine's screen went.
  4. 4Quick startPick a pattern, play it, play the keyboard, draw notes, record live and lock a value on a step.
  5. 5Monomachine overviewSix synth tracks, the sequencer, the MIDI tracks, and the keyboard modes poly, multi trig and multi map.
  6. 6Synthesis arrangement: kits and machinesThe machine families, the kit that holds six machines and their settings, and how to load, save, copy and clear kits and machines.
  7. 7Track effectsThe amp, filter, equaliser, sample rate reducer and delay that every track has after its machine.
  8. 8Low frequency oscillatorsThe three LFOs of each track: where they point, when they start, their shape, speed and depth.
  9. 9Additional kit settingsAssign performance controls to parameters, set how a track's notes and glides behave, and play all six tracks from one keyboard.
  10. 10The pattern sequencer: pattern operationChoose a pattern, chain patterns, and set the length and speed of the pattern that plays.
  11. 11Composing a patternWrite notes in the piano roll or record them live, and copy, move and clear notes, pages, tracks and patterns.
  12. 12TempoSet the tempo by hand or by tapping, and follow a DAW or an external clock.
  13. 13Parameter locksGive a parameter its own value on single steps, draw the values in the lock lane, and record them while the pattern plays.
  14. 14Advanced sequencer controlChoose which envelopes a trig fires, and write trigs that carry only a pitch or only locks.
  15. 15Additional sequencer featuresArpeggiator, transpose, swing, slide, the mute window and poly mode.
  16. 16The MIDI sequencerWrite notes, velocities and controller values for the six MIDI tracks.
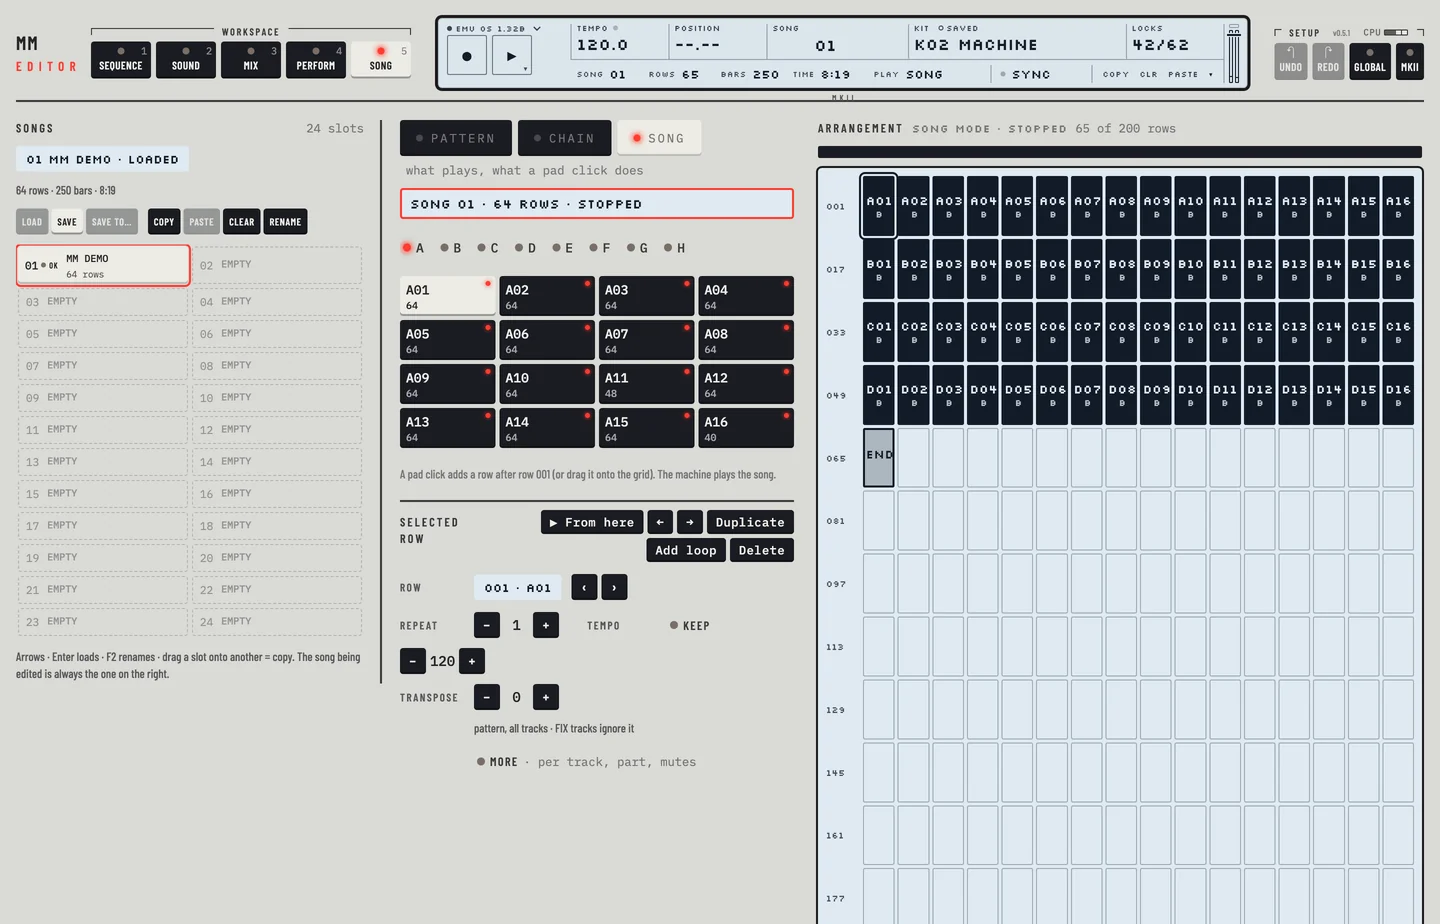
  17. 17The song modeArrange patterns into songs of up to 200 rows, with repeats, transposes, parts, mutes, tempo changes and loops.
  18. 18RoutingSend tracks to the mix buses and outputs, feed effects from other tracks or the audio inputs, and choose the routing mode.
  19. 19Global settingsThe machine's own settings: MIDI channels, sync, routing, the multi map, and the SysEx import and export.
  20. 20Early startup menu, technical informationWhat the machine's startup menu does, and what to do in the editor instead.
  21. 21Appendix A: machine referenceEvery machine you can put on a track, with the knobs of its synthesis page.
  22. 22Appendix B: MIDI control referenceThe MIDI messages the Monomachine understands, and where the editor sends or shows them.
  23. 23Appendix C: SysEx referenceThe SysEx messages of the Monomachine, and where the editor sends or reads each one.
  24. 24Beyond the hardwareWhat the editor does that the Monomachine itself does not have, or does in its own way.
1. Introduction, philosophy, highlightsMonomachine Editor

1

Introduction, philosophy, highlights

MM manual pp.1-1 to 1-3

The Monomachine is a six-track synthesizer and sequencer made by Elektron. Each of its six synth tracks plays one machine, a sound generator of its own kind, and runs it through its own filter, effects and three LFOs. A sequencer with 64 steps per pattern plays the six tracks and six more tracks of MIDI notes.

The Monomachine Editor puts the whole instrument on one web page. It runs the real Monomachine operating system, OS 1.32B, from a firmware image you supply. The page edits the machine and shows what the machine reports. The sound comes from the firmware, not from a copy of it.

The editor runs as a standalone application and as a VST3 or AU plug-in. It has two engines. The emulator runs the firmware on your computer. The HW MIDI engine edits a real Monomachine over MIDI with the same page.

HIGHLIGHTS

The machine's main features, and where each one is in the editor:

  • Six synth tracks with a sequencer. The Pattern and Kit workspaces edit the six tracks of a kit and their patterns.
  • Six MIDI tracks. The switch in the track rail changes between the synth side and the MIDI side. The MIDI tracks have their own page of settings.
  • Machines. Five synthesis families (SuperWave, SID, DigiPRO, FM+ and VO), the basic GND machines and the FX machines. The machine picker on the Kit workspace lists them by family.
  • FX machines. Through, gate reverb, chorus, dynamics, ring modulator, phaser and flanger process audio from the inputs or from other tracks instead of making sound. Set their input in the Mix workspace and their parameters in the Kit workspace.
  • One delay per track. It is tempo synchronised. Its controls are in the Effects groups of the Kit workspace.
  • Three LFOs per track. They sit at the foot of the Kit workspace.
  • Twelve arpeggiators. One for each synth track and each MIDI track. They are in the Pattern dock under Arp.
  • Real-time control. Every value box on the page is live. A value you drag reaches the machine as a controller message at once.
The Kit workspace
The Kit workspace
The six MIDI tracks, each with its own roll

DIGIPRO USER WAVEFORMS

The DigiPRO machines of an MKII play 64 waveforms, and the MKII lets you load your own. The editor picks a waveform from 1 to 64 in the wave fields of the DigiPRO machines. The DigiPRO card of the GLOBAL page lists the 64 positions and loads, saves, renames, copies and erases the user waveforms: see "DIGIPRO MANAGER" in chapter 19.

The PLATE entry of the engine menu (the first key of the LCD) switches the editor between the MKI and MKII plate. The MKII adds the user waveforms and the DigiPRO double draw and ensemble machines. On the MKI plate the machine picker greys those two machines out and says "MKII only".

CONVENTIONS

This guide writes controls in a fixed way.

  • Bold names a control on the page: Mix, Effects.
  • [SPACE] and [⌘] name a key of your computer. [⌘] is [CTRL] on Windows and Linux.
  • <PLAY> names a field or light on the LCD at the top of the page.
  • The manual's names for the machine's own keys, such as [FUNCTION] and [TRIG], appear where the editor does it differently, with the editor's way beside them.
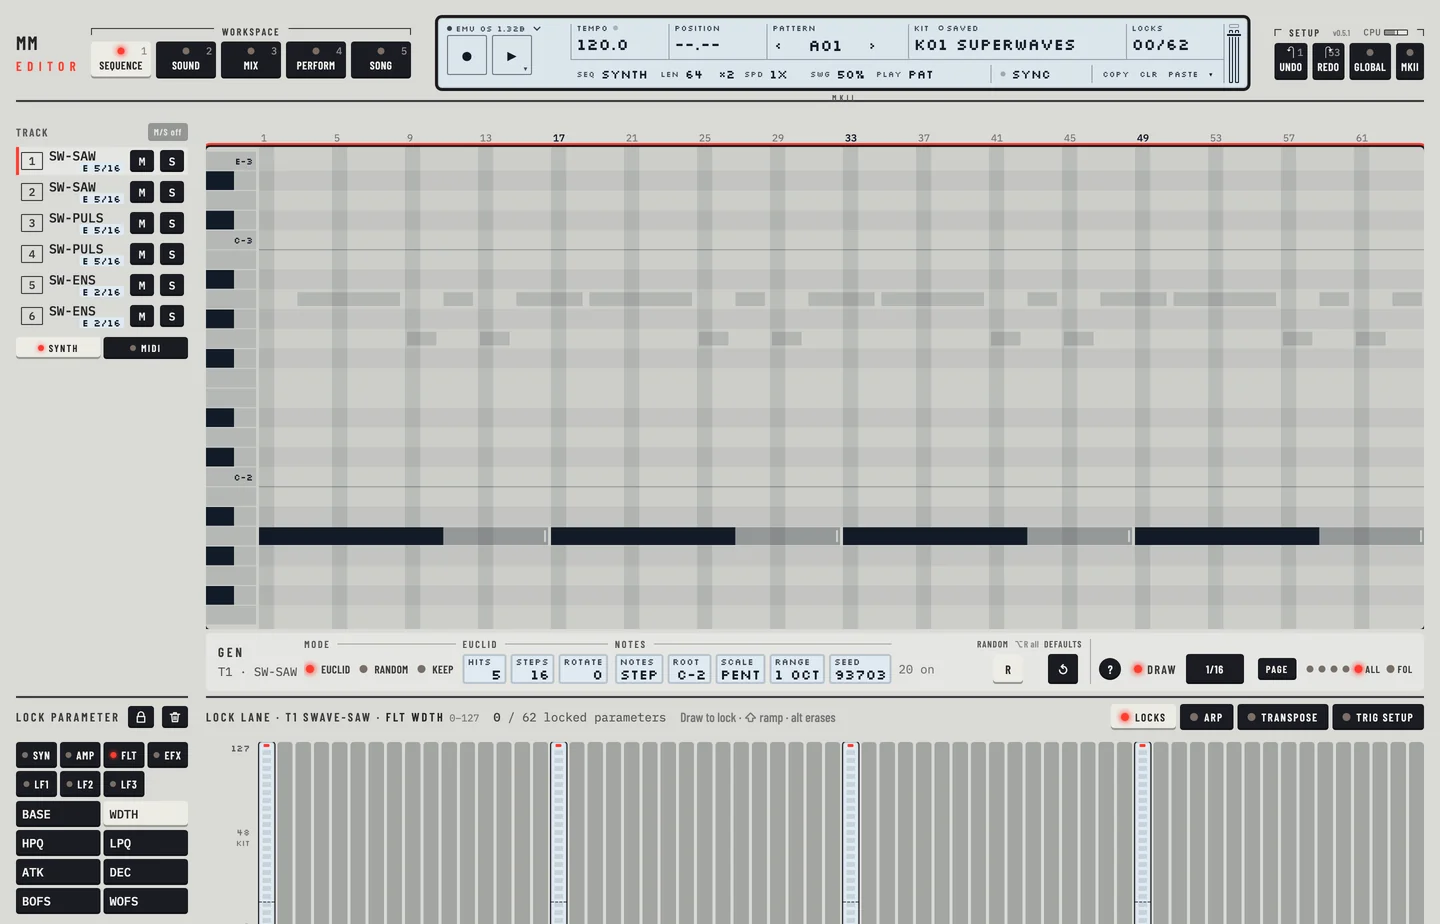
The Monomachine Editor
2. User interface and connectorsMonomachine Editor

2

User interface and connectors

MM manual pp.1-4 to 1-9

The Monomachine has a front panel of keys and knobs, an LCD, a keyboard on the SFX-6 and a row of sockets at the back. The editor has none of these as pictures. Its page holds the same functions as controls of its own, and this chapter names, for each part of the machine, the control that does its job.

The page has a top bar and a body. The top bar holds the workspace tabs, the LCD with its two lines, and the setup keys Undo, Redo, Global and Learn. The MKI / MKII plate is in the engine menu of the LCD. The body shows the track rail on the left and the workspace on the right.

The Monomachine Editor

The workspaces are Pattern, Kit, Mix, Perform and Song. Press [1] to [5] to go to one. A sixth workspace, Control, appears only when the plug-in has MIDI mapping on, and it is pressed with [6].

MASTER VOLUME AND LCD

The machine has one master volume knob. The editor has none: the application or the host sets the output level.

The LCD of the machine is the LCD in the top bar. It holds the fields <TEMPO>, <POSITION>, <PATTERN>, <KIT> and <LOCKS>, the record and play keys, and a second line of fields that changes with the workspace. Chapter 3 describes it.

The machine's own screen is not shown after start-up. What it would show is spread over the page.

LEVEL AND DATA ENTRY

On the machine the LEVEL knob sets the level of the selected track and the eight DATA ENTRY knobs set the parameters of the page shown. In the editor every parameter is a value box.

  • LEVEL is the LEVEL fader of each track in the Mix workspace.

To set the level of a track:

  1. Click Mix.
  2. Drag the LEVEL fader of the track. The level follows the fader.
  3. Press [⌘] + [Z]. The fader goes back to where it was.
  • A value box changes when you drag it up or down, or sideways. Each pixel of drag is one step.
  • Turn the mouse wheel over a value box to step it, one step a notch.
  • Click a value box and press the arrow keys to step it ([↑] or [↓]).
  • Double-click a value box to set it to its default.
  • Hold [⌘] and click a value box to type its value, or press [ENTER] on a value box that has the focus. Type the value and press [ENTER], or press [ESC] to leave it as it was. A box that shows names takes a name, for example SAW for an LFO's wave, in small or capital letters. PAN takes L12, C or R5. A value the box cannot show is refused, and the field says what it takes. Each typed value is one undo step.

To type a value:

  1. Click Kit and pick a track in the rail.
  2. Hold [⌘] and click a value box. A field opens over it with the value it shows.
  3. Type a value and press [ENTER]. The box shows it and the machine has it.
  4. Hold [⌘] and click the box again and type 999. The field stays and refuses the value.
  5. Press [ESC]. The field closes and the value is as it was.
  6. Double-click the box to set its default, then press [⌘] + [Z] to take the default back. Press [⌘] + [Z] once more to take back the typed value in one step.

The machine's accelerated edit, where you press a knob and turn it for larger steps, is a different gesture here. Hold [⇧] while you drag for fine steps, a quarter as fast. Hold [⇧] while you turn the wheel, or press Page Up or Page Down on a focused value, to step by ten.

DATA PAGE

The machine has seven DATA pages for each track: SYN, AMP, FLT, EFX, LF1, LF2 and LF3. It shows one at a time on its eight knobs. The Kit workspace shows every page of the selected track at once, in groups of a few values. The Pattern workspace has the page tabs SYN, AMP, FLT, EFX, LF1, LF2 and LF3 in the track rail. They choose the parameters the lock lane edits.

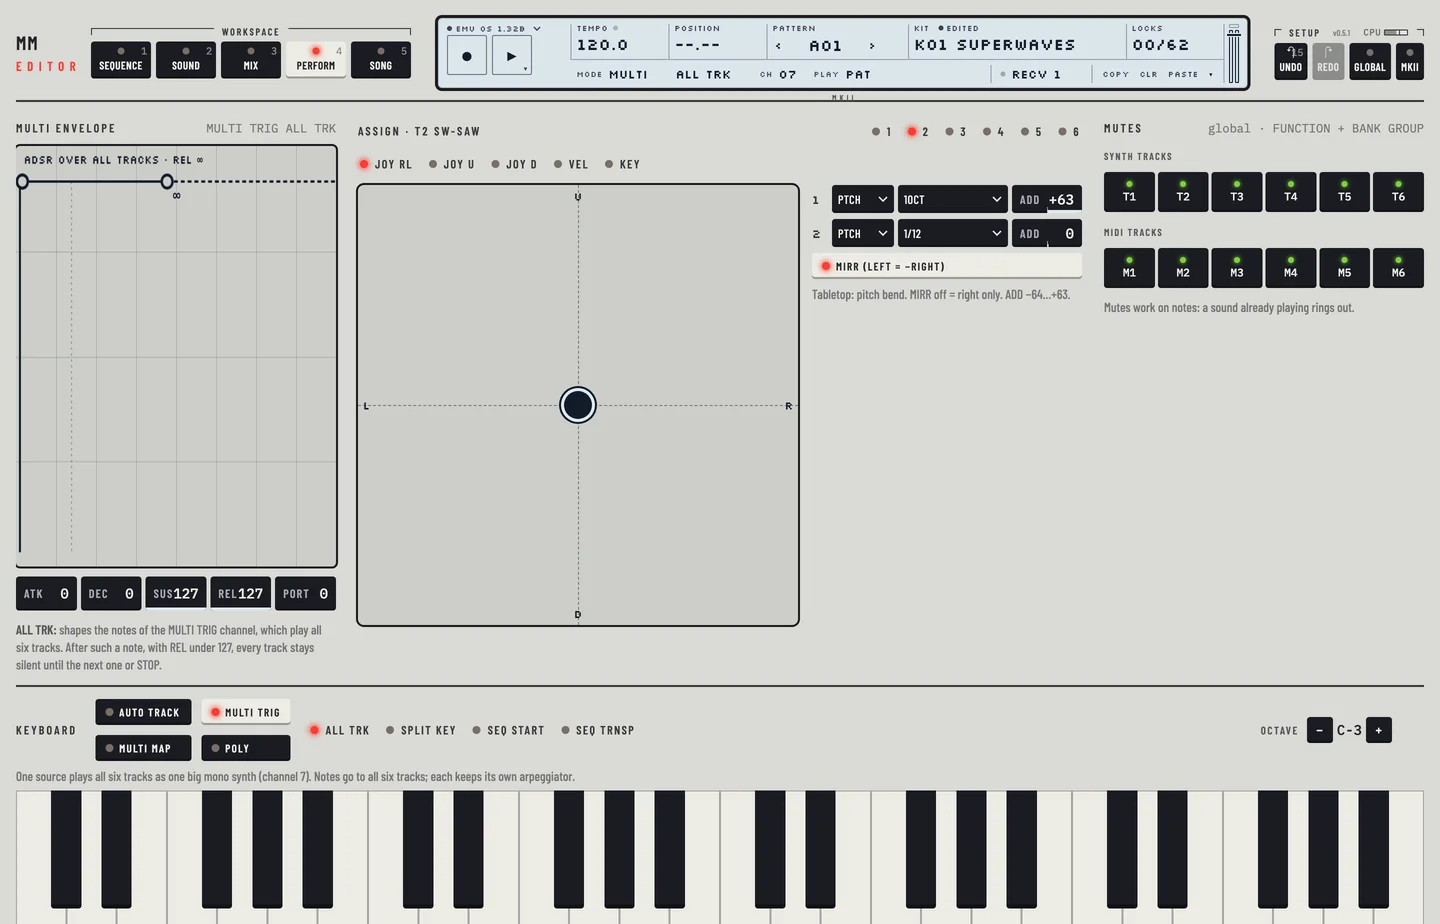
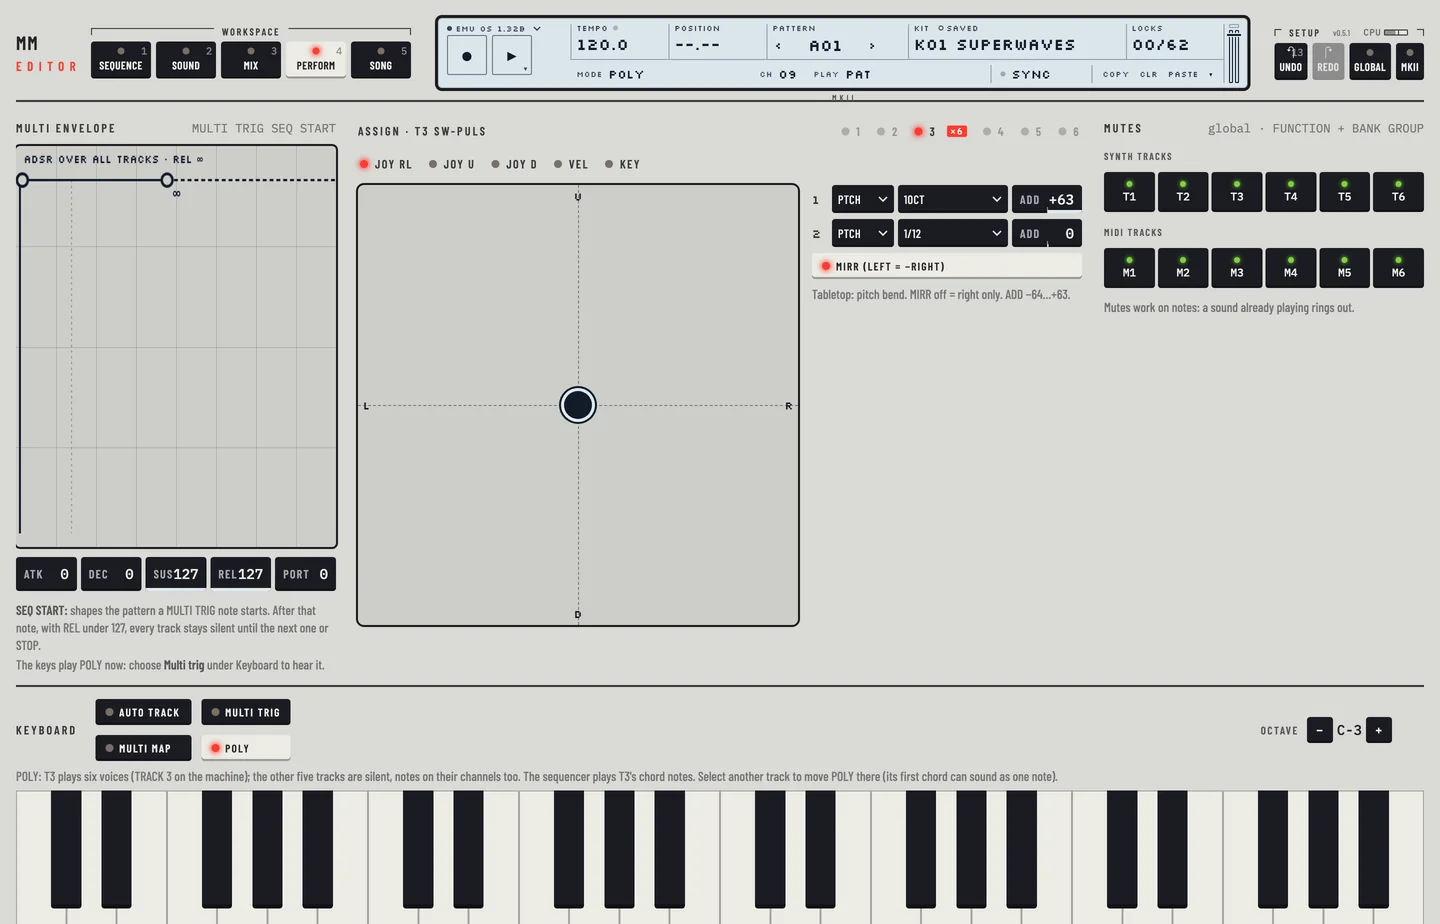
Pressing both DATA PAGE keys on the machine opens the multi envelope. In the editor the multi envelope is the first card of the Perform workspace. What it shapes depends on the multi trig mode of the kit, which the card names: see chapter 9.

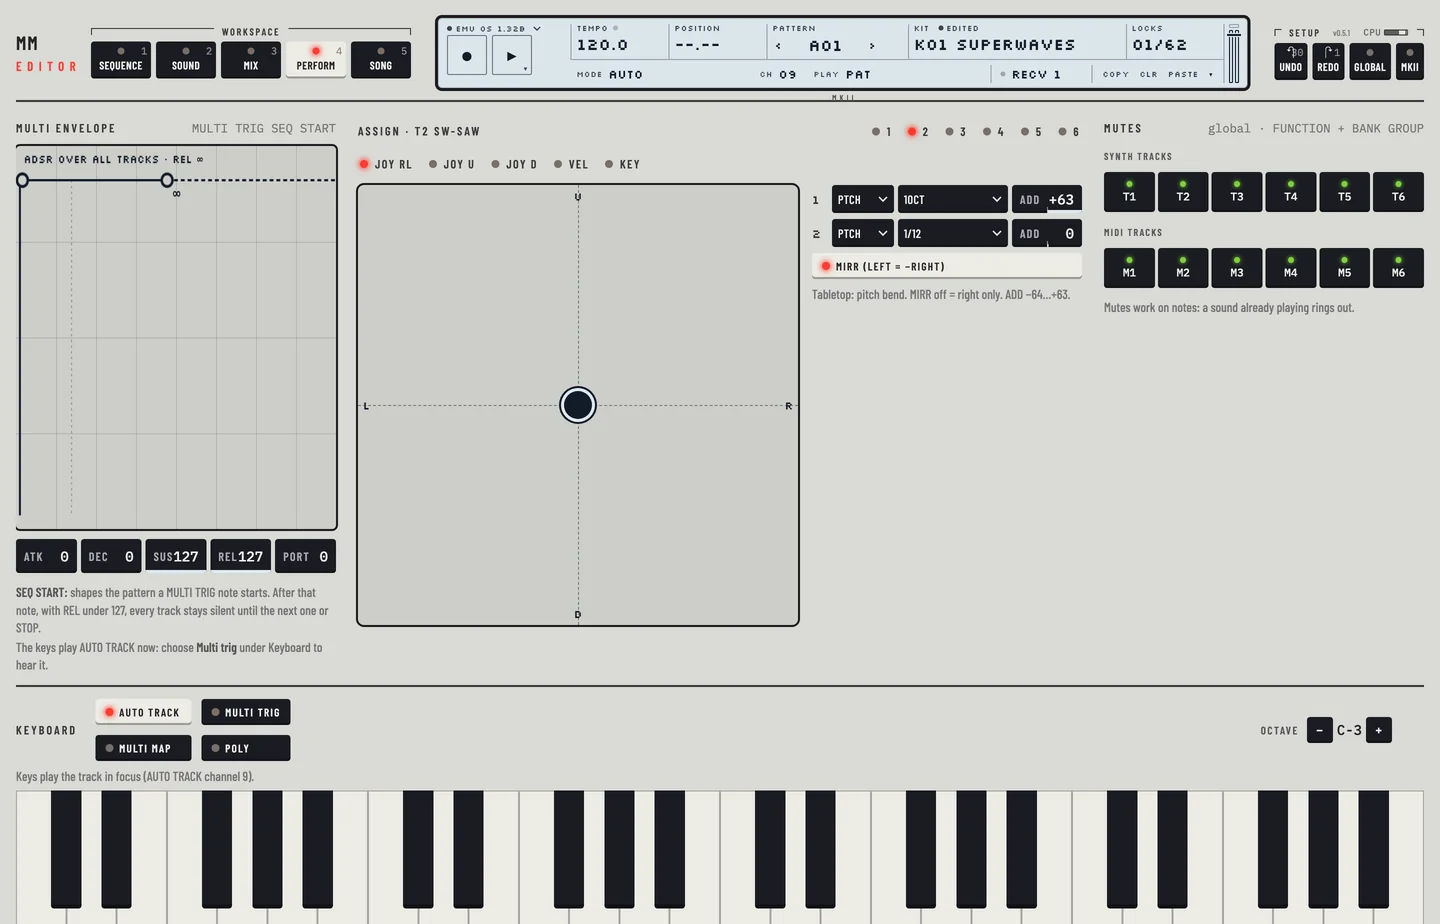
The Multi envelope card in the Perform workspace

To see what the multi envelope shapes:

  1. Click Perform. With the keys on Auto track, the Multi envelope card names the multi trig mode of the kit and says to choose Multi trig.
  2. Click Multi trig, then the mode SPLIT KEY. The card says the envelope has no effect there.
  3. Click ALL TRK. The card says it shapes the multi trig notes and when it silences every track.
  4. Click SEQ START. The card says it shapes the pattern that a multi trig note starts.
  5. Click the first mode again, then Auto track.

TRACK KEYS

The six TRACK keys select the track you edit.

  • Click a track in the rail at the left of the page.
  • Press [↑] or [↓] to select the track before or after.
  • In the Mix workspace, click the track's node in the routing graph.
  • Play the track from a MIDI controller with FOLLOW PLAYED TRACK on in the engine menu. See "THE SELECTED TRACK FOLLOWS THE LAST TRACK PLAYED" in chapter 24.

To mute a track, click M in its rail row or press [M]. Click S to solo it. Drag across several M keys to mute or unmute each track you cross as the first one became.

To prepare mutes, hold [⇧] and click M on the tracks. Each track shows + or X for the change it will make. The changes apply when you let go of [⇧]. This is the machine's mute window.

  • [⌥] + [M] mutes every track. When none is audible it unmutes every track.
  • [0] unmutes and unsolos every track. The M/S off key at the head of the rail does the same.
  • The Mutes card of the Perform workspace lists all twelve tracks, T1 to T6 and M1 to M6.

A muted track dims in the rail. The selected track is lit.

To mute and solo tracks:

  1. Click Mix, then click M on track 1. The track is muted. Click M again to unmute it.
  2. Click S on track 3. The other synth tracks are muted. Click S again and the mutes are as before.
  3. Drag across the M keys of tracks 1 to 3. Each track you cross changes as the first one did.
  4. On the keyboard press [M]: the selected track is muted. Press it again to unmute it. Press [⌥] + [M] to mute every synth track and [0] to unmute every track.
  5. Click M/S off in the rail to unmute and unsolo every track.

TEMPO KEY

The <TEMPO> field of the LCD is the tempo window of the machine. Drag it up or down: a pixel is half a beat per minute, and [⇧] makes it a tenth. With the field focused, the arrow keys step it.

To tap a tempo, press [⇧] + [B]. The editor uses the average of your last taps. On every workspace except Pattern a plain [B] taps too. On Pattern that key switches the piano roll's Draw mode.

To tap a tempo on Pattern:

  1. Press [⇧] + [B] five times, about half a second apart.
  2. <TEMPO> follows your taps. Draw mode stays as it was.

FUNCTION KEY

The machine's [FUNCTION] key gives the other keys a second job. The editor has no such key. The second jobs are separate controls on the page, or they follow a modifier key of your computer. Hold [⌥] and the keys it changes say what they do then: <CLR> becomes the clear of the whole pattern, for example.

KIT AND SONG KEYS

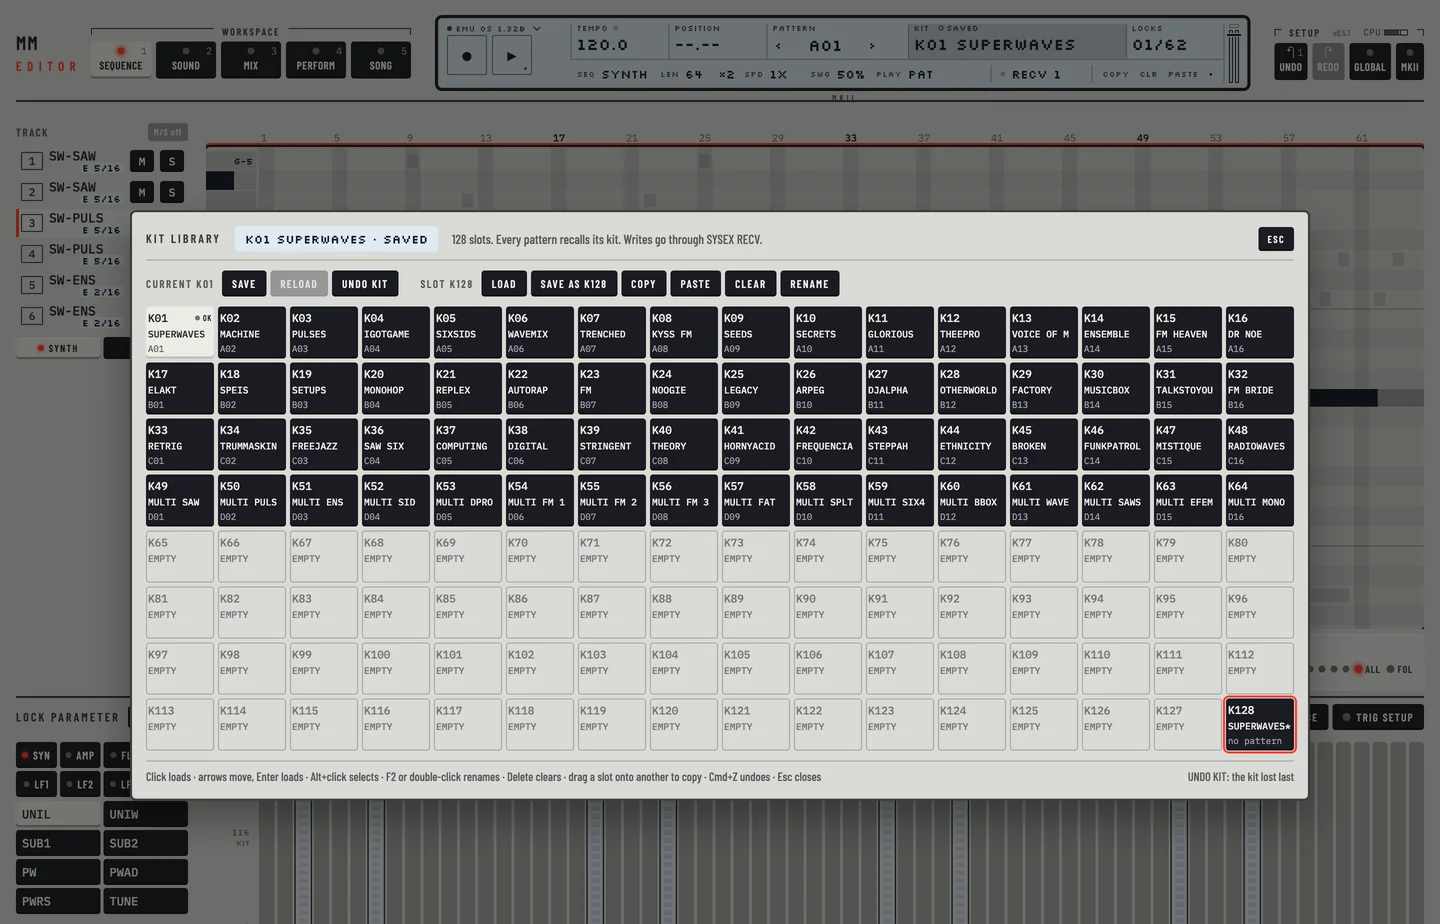
On the machine [KIT] opens the kit menu. In the editor click the <KIT> field of the LCD to open the kit library. Chapter 6 describes it.

  1. Click <KIT> on the LCD. The kit library opens.
  2. Click another kit. It loads.
  3. Click the first kit again, then press [ESC].
The kit library
The kit library

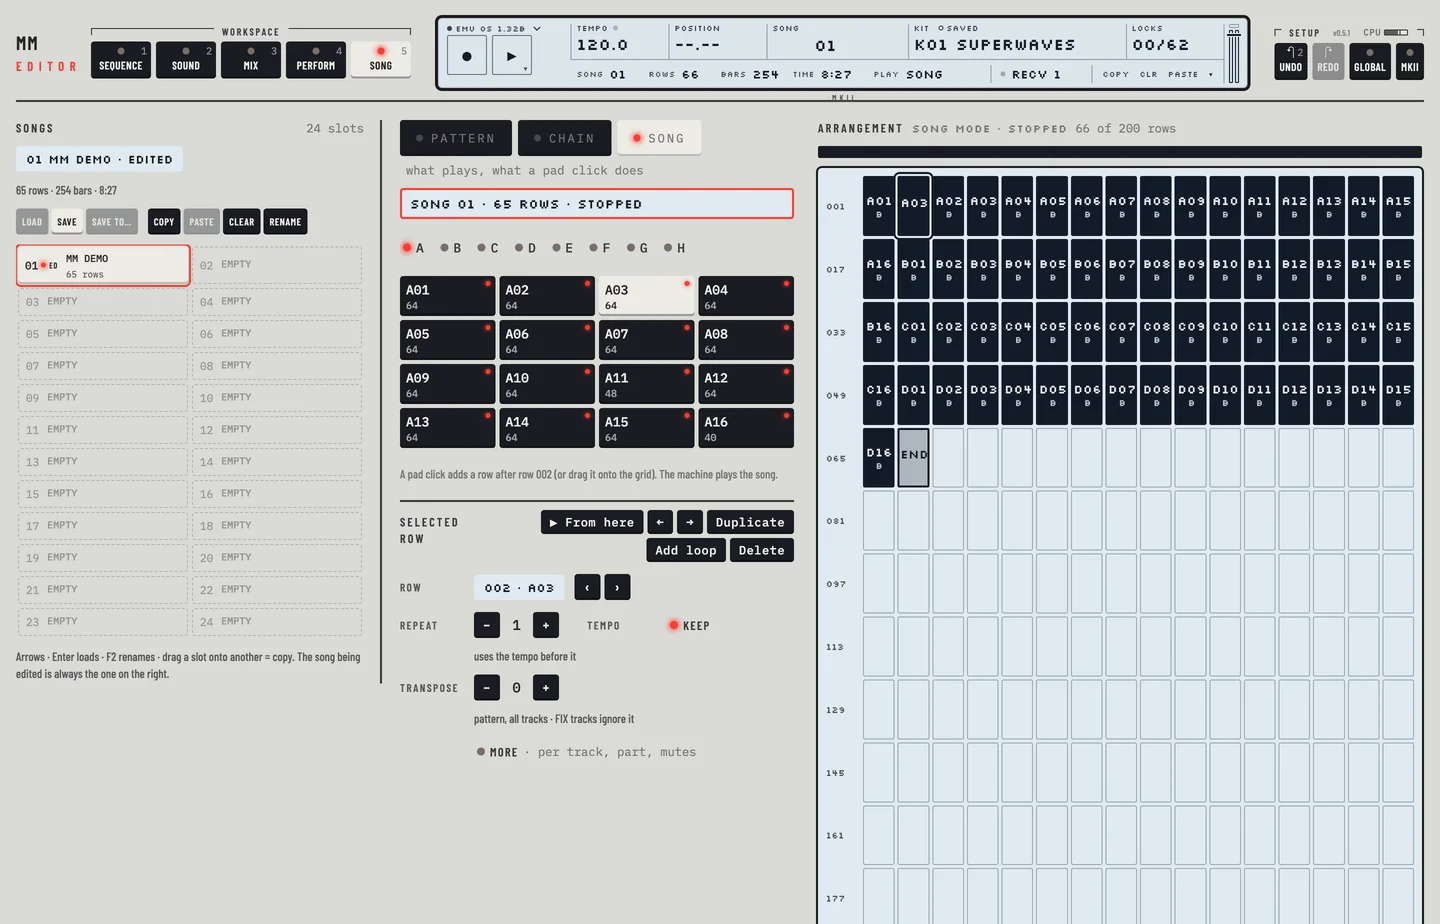
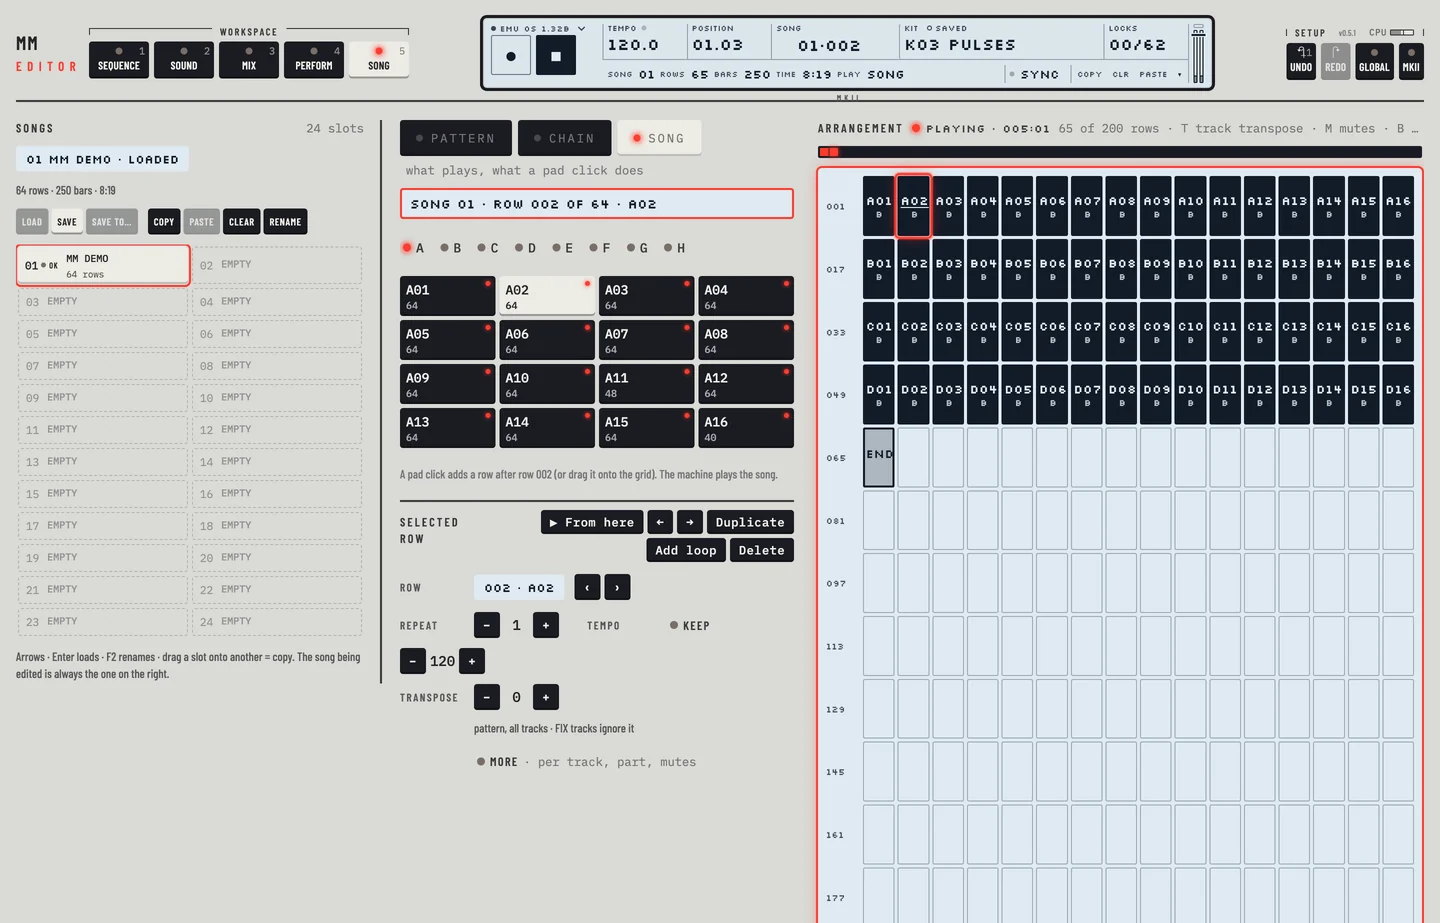
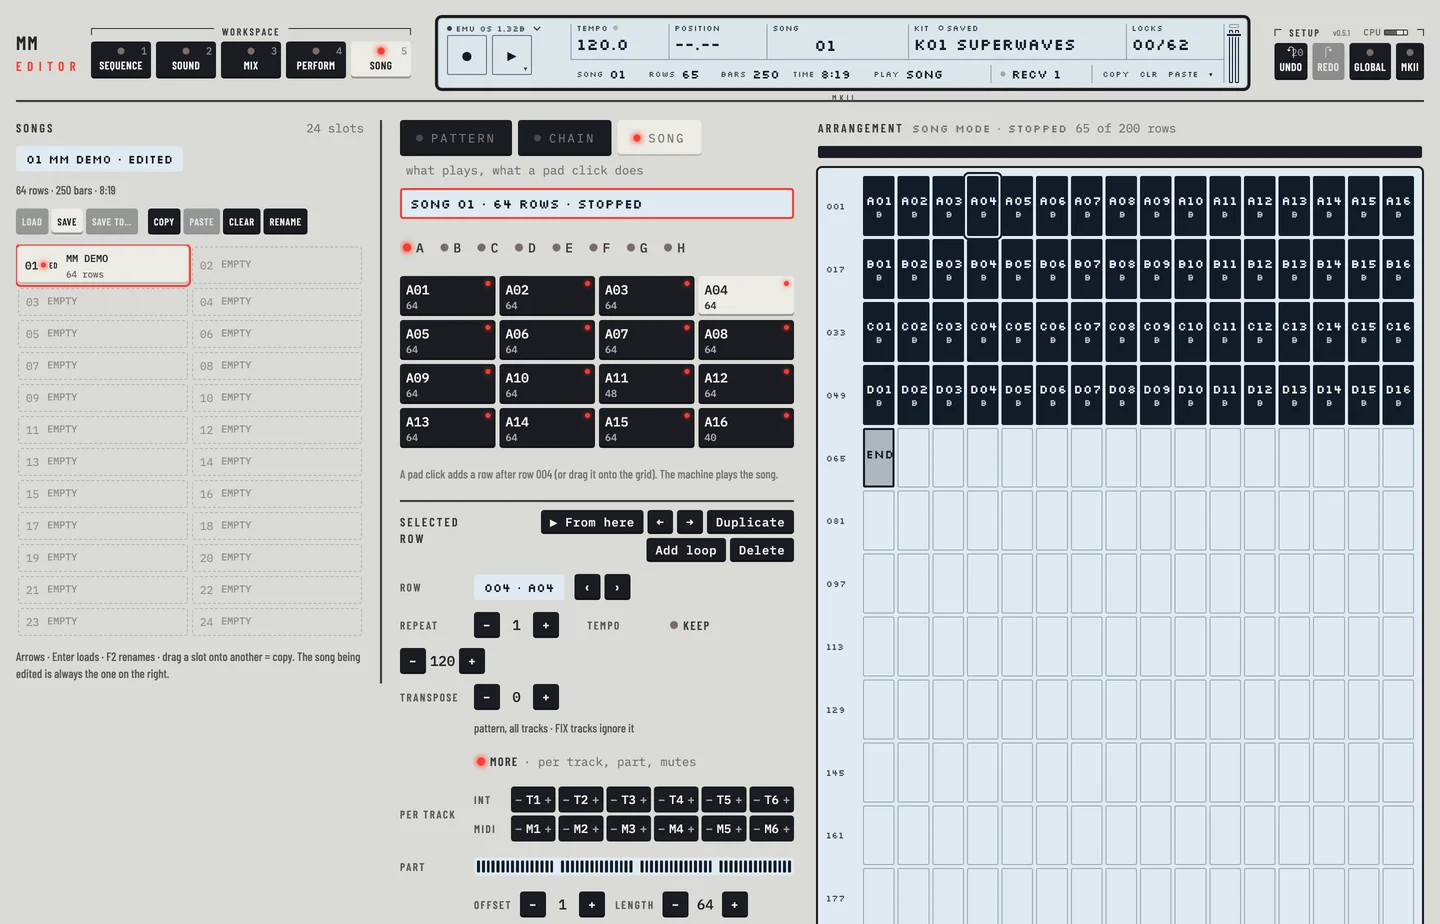
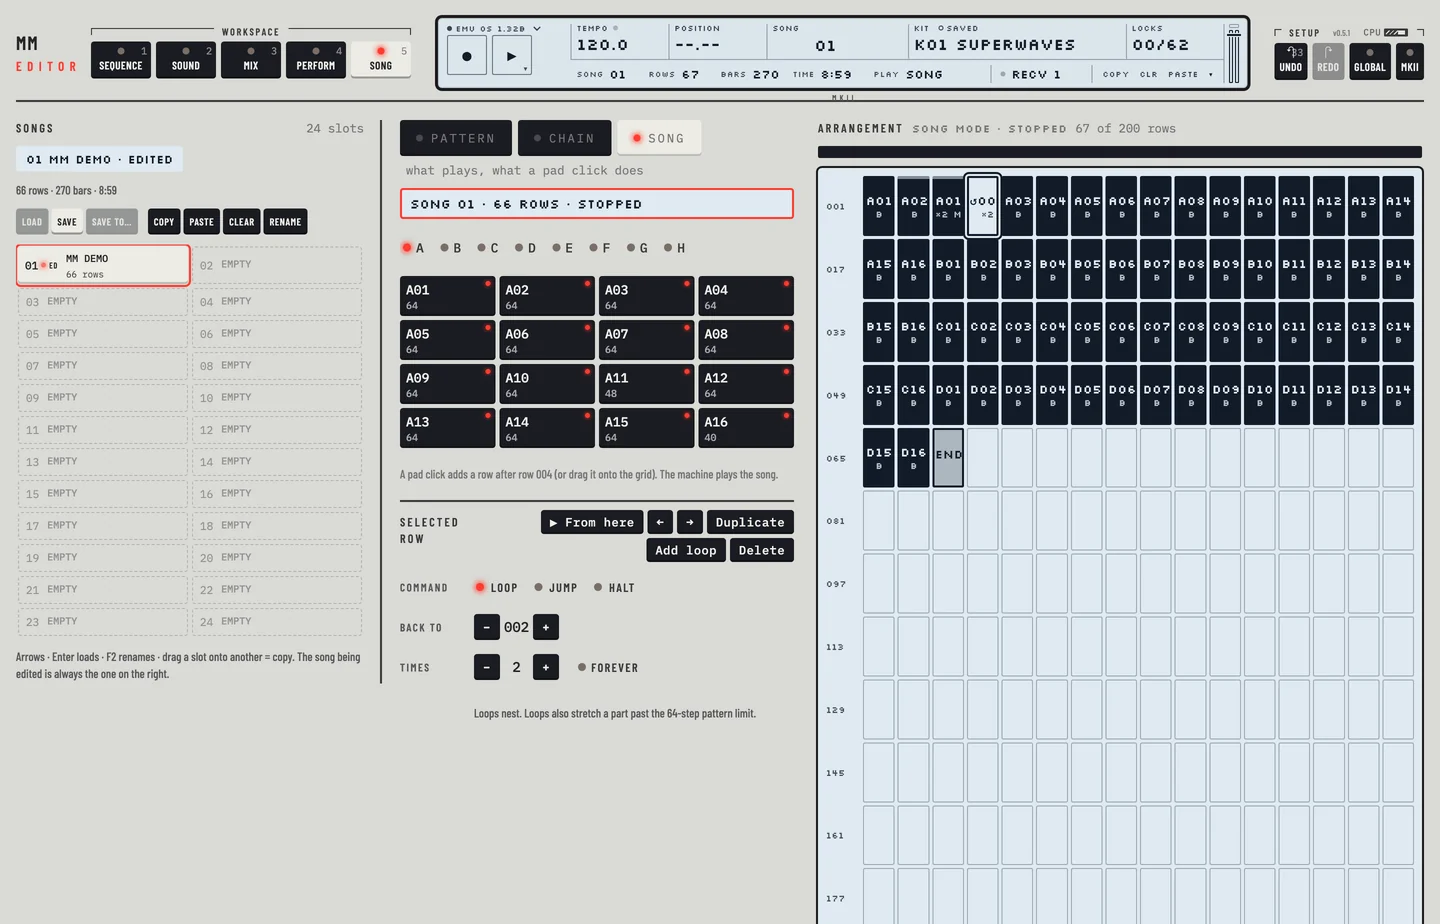
The Song workspace ([5]) is the song menu: see chapter 17.

[FUNCTION] + [KIT] opens the global menu. In the editor open it in one of three ways:

  • click Global in the top bar;
  • choose GLOBAL… in the engine menu, the drop-down at the left of the LCD;
  • press the GLOBAL link in the AUDIO / MIDI panel.

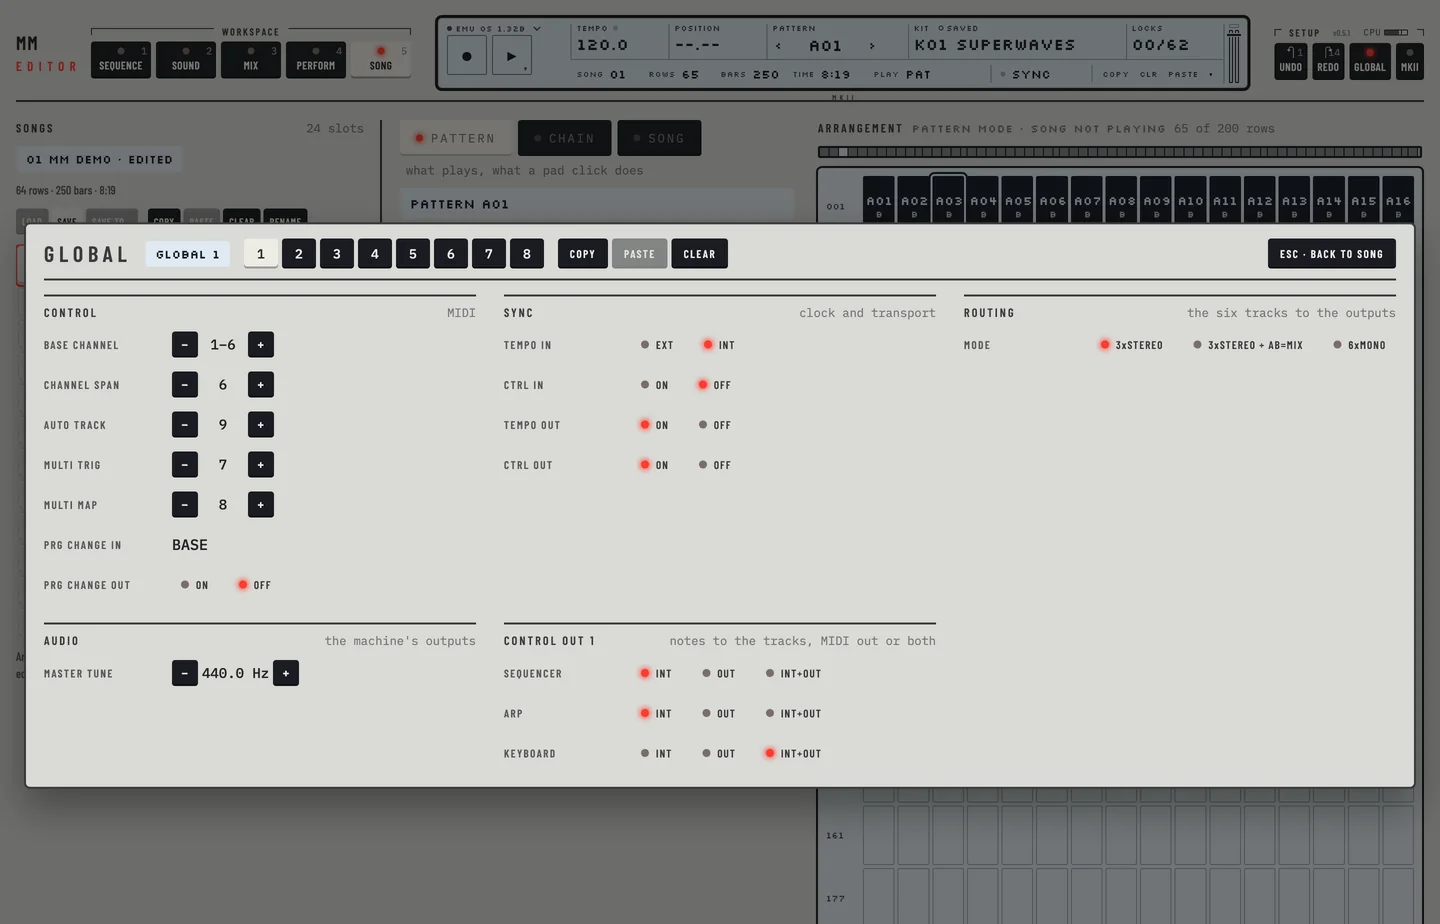
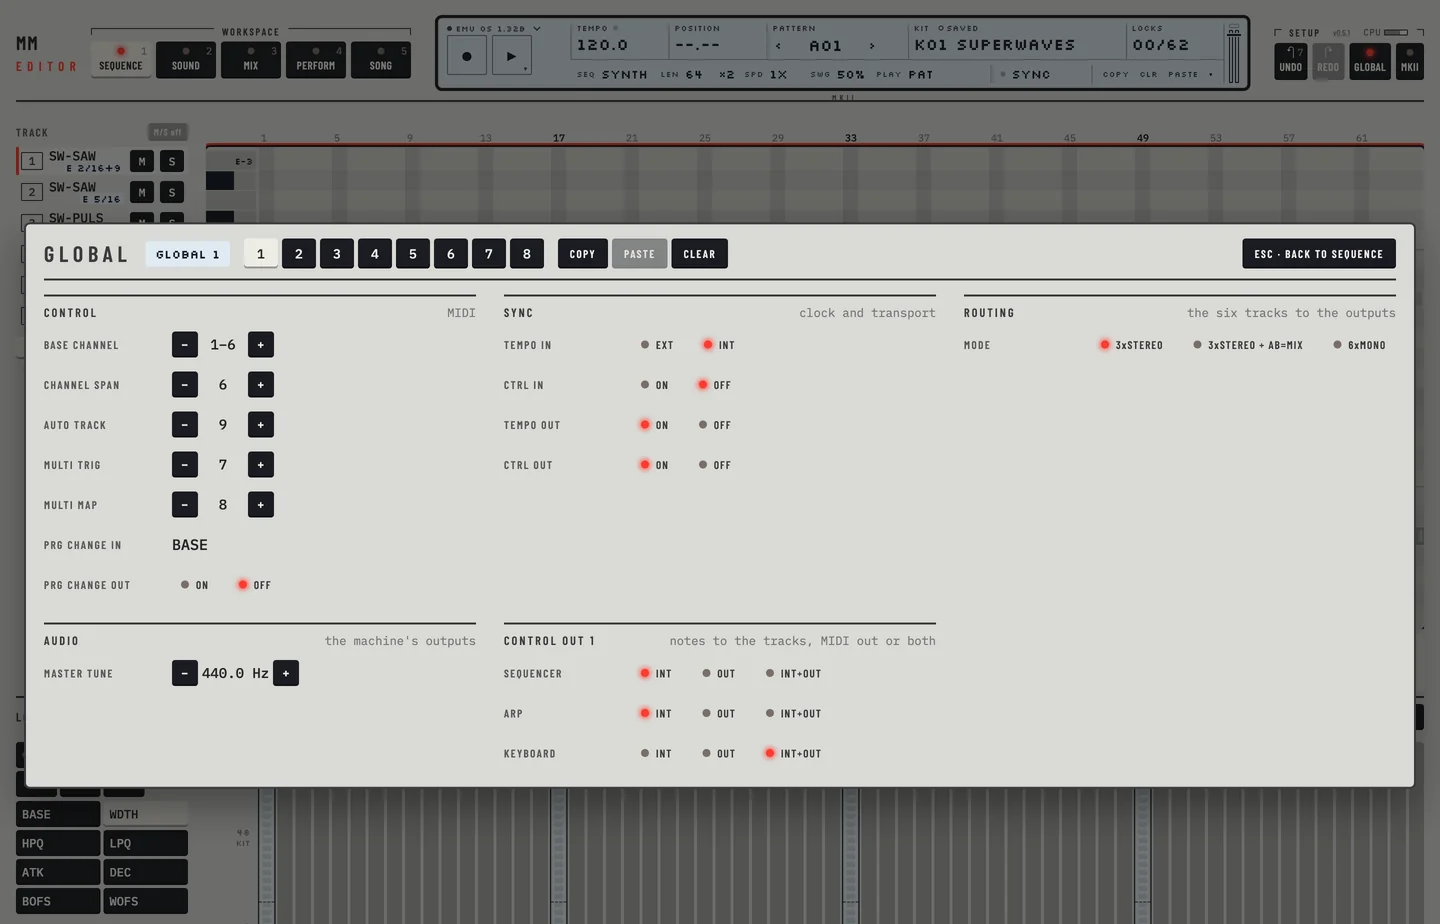
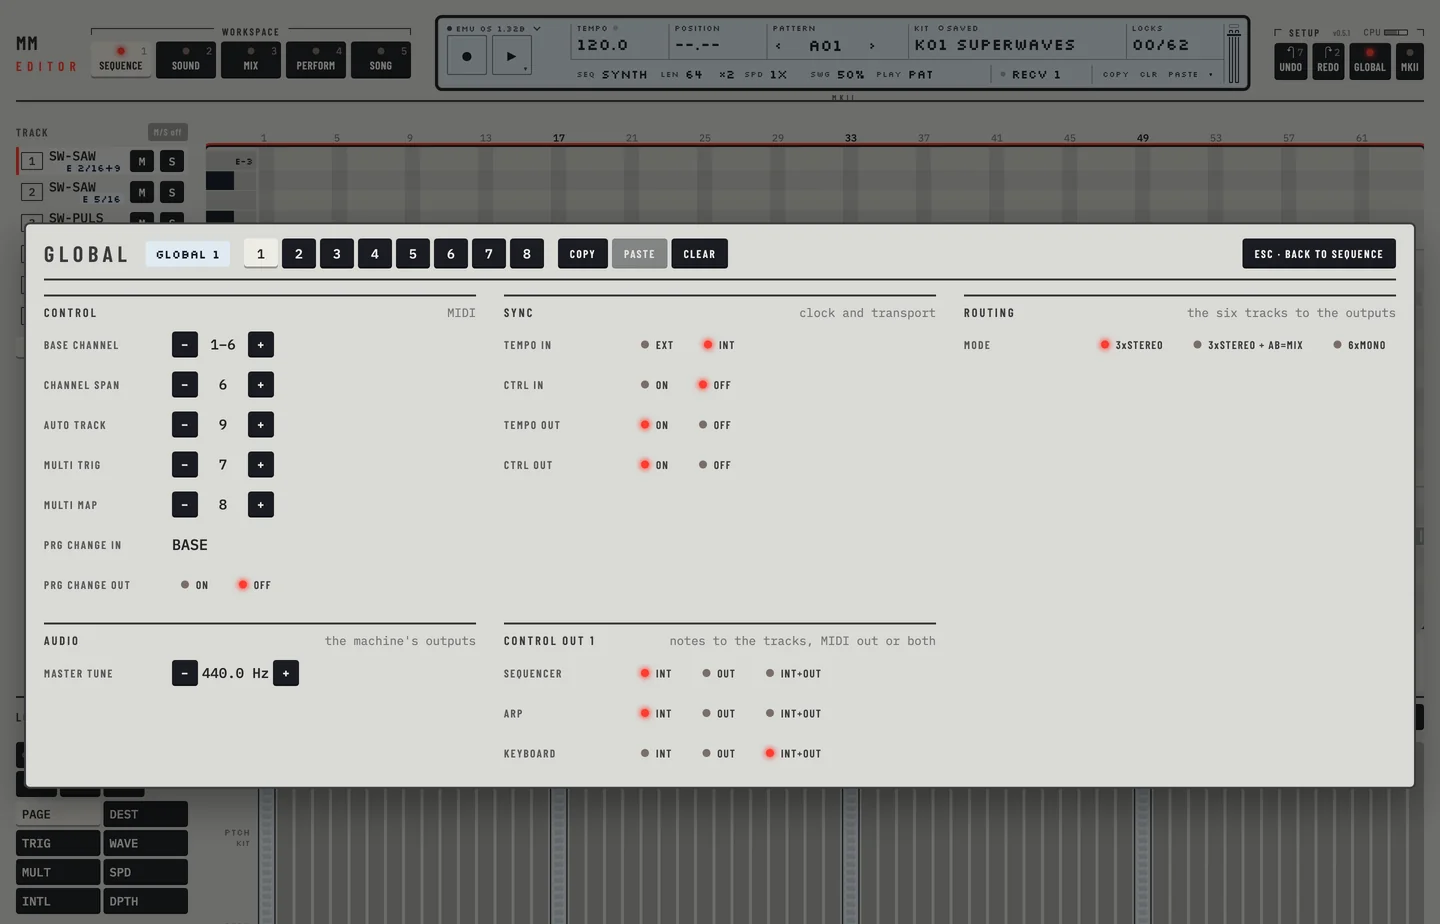
The GLOBAL page opens over the workspace. It holds the eight global slots and the Control, Sync, Routing, Audio and Control out 1 settings, the master tune among them. [ESC] goes back to the workspace. Chapter 19 describes it.

  1. Click Global in the top bar. The GLOBAL page opens under the top bar, over the workspace.
  2. Click the Mix tab. The page closes and Mix shows.

TRIG KEYS

The sixteen TRIG keys play notes and set trigs. In the editor:

  • The keys [A S D F G H J K L] play the selected synth track, from any workspace. They are the white keys C to D. [W E T Y U O P] are the black keys above them.
  • Press [Z] or [X] to move the octave down or up, from −4 to +6. The A key then plays any note from MIDI 0 to 120, and the keys above it stop at 127. Press [C] or [V] to step the velocity through 20, 40, 60, 80, 100 and 127.
  • The on-screen keyboard in the Perform workspace plays notes by click or drag.
  • Clicking in the piano roll of the Pattern workspace plays the pitch.

To set a trig on a step, as the TRIG keys do in grid mode, click the piano roll, or open the step menu (the ⋯ on a selected step, or a right-click).

On the machine, [BANK] + [TRIG] picks a pattern. In the editor click the <PATTERN> field of the LCD for the pattern chooser, or the ‹ and › keys beside it. Chapter 4 describes picking.

  1. Click › beside <PATTERN>. The next pattern is selected.
  2. Click ‹. The pattern before it is selected again.

To play notes from the keyboard:

  1. Click Pattern and pick track 1 in the rail.
  2. Press [A]. Track 1 plays.
  3. Press [W], [T] and [P]. They play C♯, F♯ and the D♯ an octave up from the [A] key's C. [A] and [S] still play C and D.

PATTERN AND SONG KEY

[PATTERN/SONG] switches between playing a pattern and playing a song. Click <PLAY> in the second line of the LCD. It reads PAT or SONG, what the machine reports, and each click switches. The Song workspace has the same switch.

[FUNCTION] + [PATTERN/SONG] switches POLY mode. In the editor the Perform workspace has a Poly key in the Keyboard card. Poly mode plays the track selected on the machine with [TRACK]; the editor presses that key for the track you select. Chapter 5 describes poly mode.

  1. Click Perform.
  2. Click the key of track 3 in the title of the Assign card, then click Poly. The machine's poly mode is on, on track 3.
  3. Click the key of track 5. Poly mode moves to track 5.
  4. Click Auto track to switch poly mode off.

To switch between pattern and song:

  1. Click Song.
  2. Click the SONG key. The machine reports song mode.
  3. Click the PATTERN key. The machine reports pattern mode.

ENTER, EXIT AND ARROW KEYS

The machine's [ENTER/YES] and [EXIT/NO] confirm and cancel. The editor asks in dialogs on the page: answer with the dialog's buttons, and close one with [ESC].

The arrow keys of the machine move the cursor and set the octave of the TRIG keys. In the editor [←] or [→] and [↑] or [↓] step a focused value, and [Z] and [X] set the octave of the note keys.

BANK KEYS

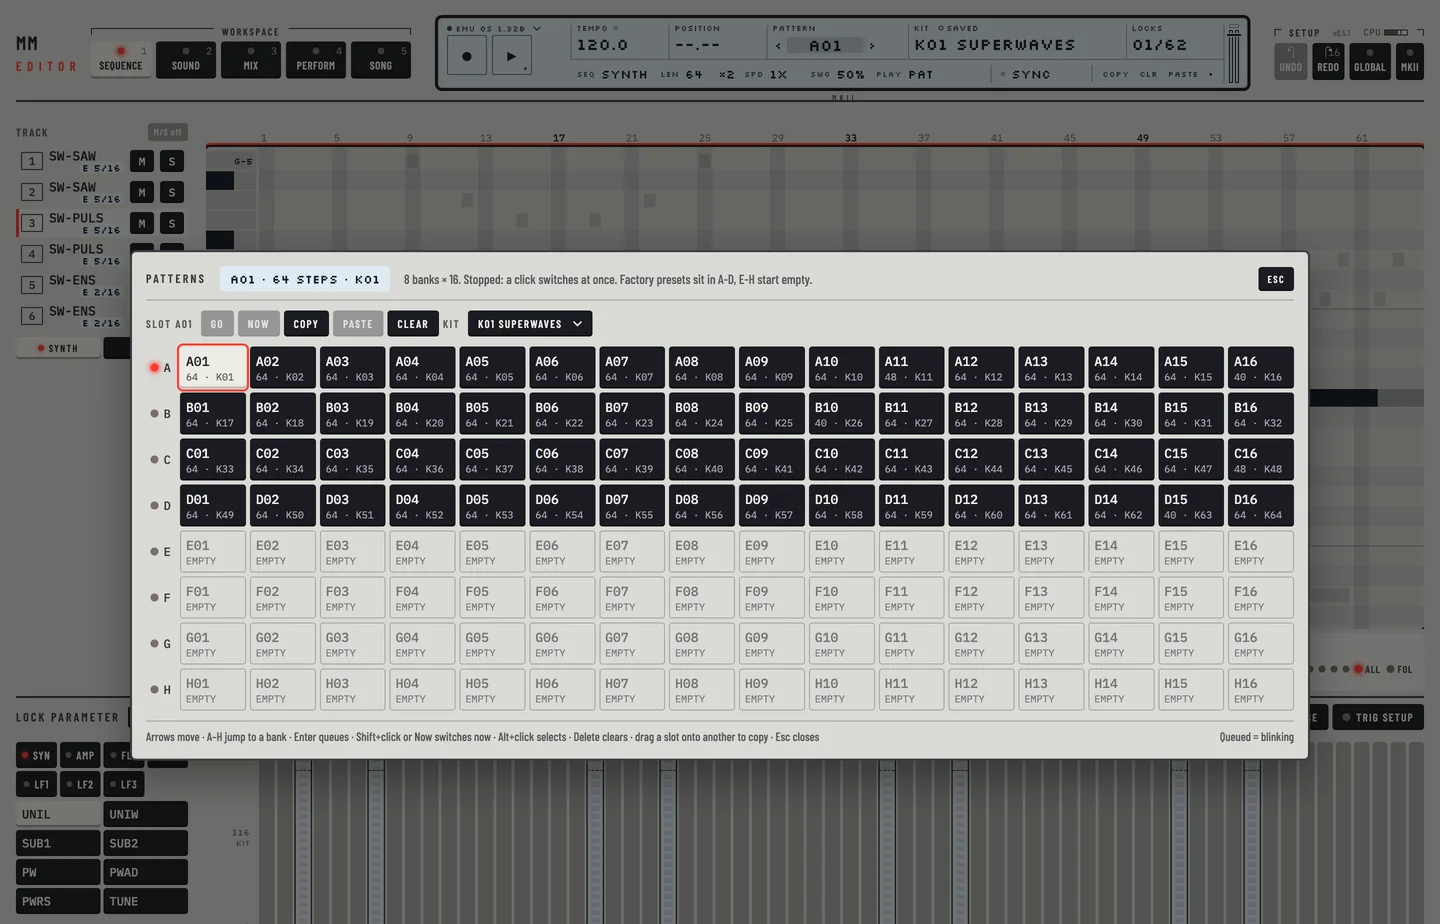
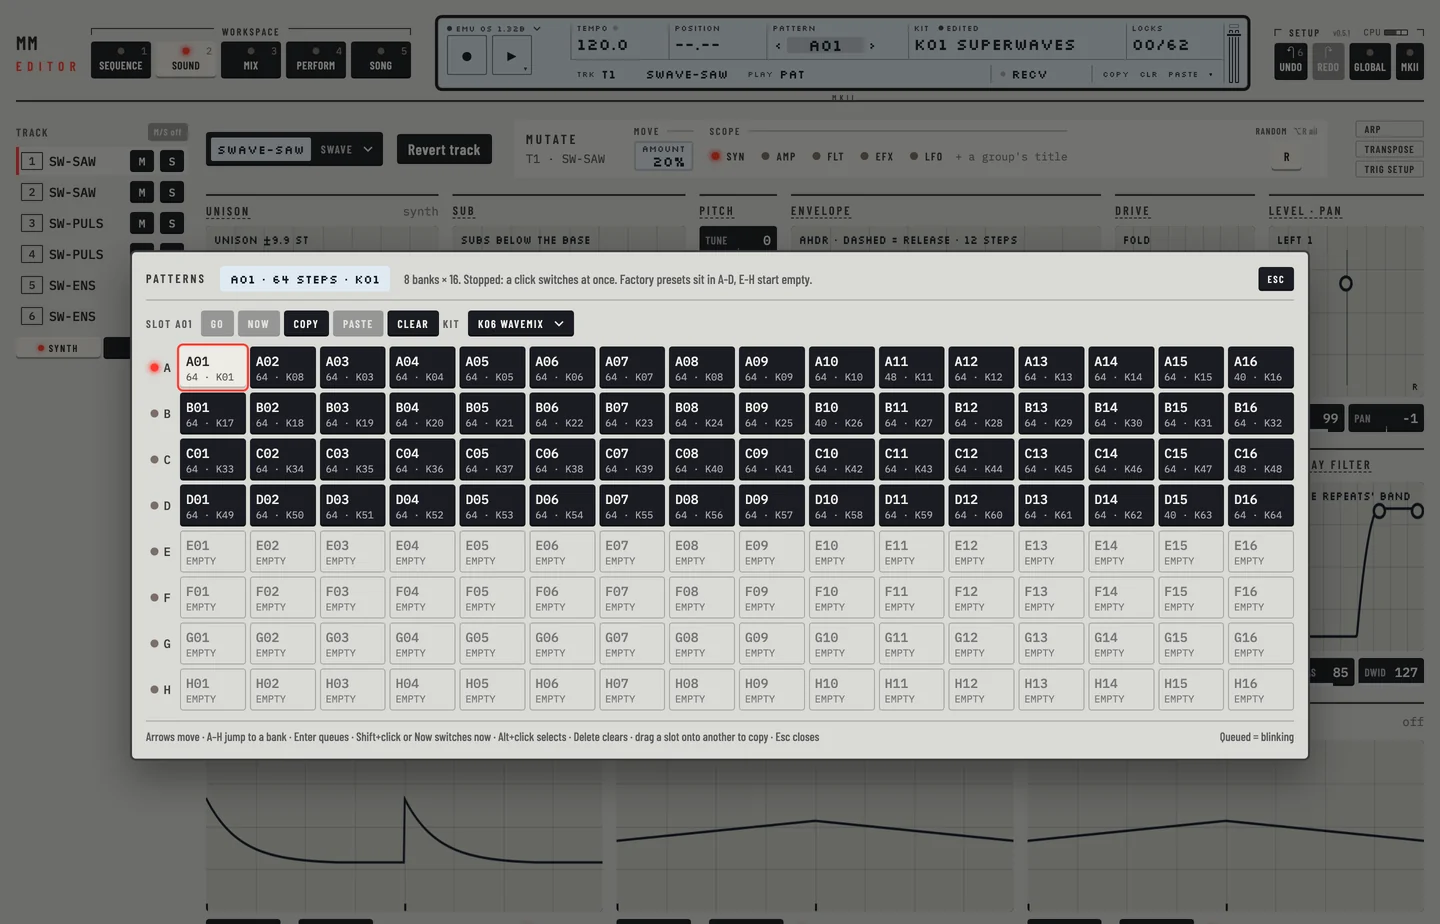
The machine's BANK GROUP and BANK keys choose the pattern bank. The pattern chooser shows all eight banks A to H at once. Press [A–H] inside it to jump to a bank.

The pattern chooser
The pattern chooser
  1. Click <PATTERN> on the LCD. The chooser lists the 128 patterns A01 to H16, with the eight bank keys A to H.
  2. Each tile gives the length of its pattern and the kit it recalls. An empty pattern reads EMPTY.
  3. Press [D], then [E], then click the key of bank G. The selection moves into that bank each time.
  4. Click a pattern that recalls another kit. The machine loads that kit.

[FUNCTION] + [BANK GROUP] opens the mute window: it is the Mutes card in Perform, and the prepared mutes described above.

The keys that open the secondary windows, ARP, TRANSPOSE, SWING and SLIDE, are as follows.

  • Arp and Transpose are tabs of the dock in the Pattern workspace. The Kit workspace has keys that go to them.
  • Swing is Swing in the step menu of the Pattern workspace, and the <SWG> field of the LCD's second line.
  • Slide is Slide in the step menu of the Pattern workspace.

RECORD, PLAY AND STOP

The record and play keys are at the top right of the LCD.

  • Press [SPACE] or click the play key. The machine plays. Press it again to stop. After clicking in the piano roll, wait for the pattern to reach the machine. If the editor says the panel is busy, press the key again.
  • Click the record key while the machine is stopped to switch grid recording on. Editing steps on the page does not need it.
  • Press [⌥] + [SPACE] to start live recording, the machine's [REC] + [PLAY]. Press it again to stop recording.

To record live:

  1. Click Pattern and pick track 1 in the rail.
  2. Press [⌥] + [SPACE]. The machine plays and records.
  3. Play [A], [S] and [D]. The machine records the notes.
  4. Click the record key to switch recording off, then stop the machine.

Grid recording is not needed to edit steps with the mouse. Hold [⇧] and click the record key while the machine is stopped to start step recording, the machine's [STOP] + [REC]. The key shows STEP. See "Step recording" in chapter 11.

  1. Click Pattern and pick a synth track whose first step is empty.
  2. Hold [⇧] and click the record key while the machine is stopped. The cursor sits on step 1.
  3. Press [A]. The note is written to step 1 and the cursor moves on.
  4. Press [→] for a rest. The cursor moves to step 3.
  5. Press [←] twice to go back to step 1, then press [DELETE] or [BACKSPACE]. Step 1 is cleared and the cursor moves on.
  6. Press [ESC] to finish.

On a MIDI track the same click starts step recording without a track key: [ESC] ends it and the editor goes back to the synth tracks.

Step recording
Step recording

On the machine a second press of [PLAY] pauses. In the editor:

  1. Hold [⇧] and click the play key, or press [⇧] + [SPACE]. The machine holds its step. The play key blinks and <POSITION> keeps the step.
  2. Click the play key, or press [⇧] + [SPACE] again. The machine goes on from the step it held.
  3. To end the pause instead, choose Stop in the transport menu. <POSITION> reads --.--.

The transport menu has Play or Stop, Pause or Continue, Live record and Panic, each with its key. Right-click the play key to open it. With the play key focused, Shift+F10 or the menu key opens it too.

On the machine a double press of [STOP] rewinds the pattern and silences the notes. In the editor this is Panic.

  1. Press the play key. The machine plays.
  2. Right-click the play key. The transport menu opens with Panic in it.
  3. Click Panic. Every note goes off and the machine stops.

Right-click the play key for the same menu, or press [⌘] + [.]. The editor sends All Notes Off on the channel of each track and stops the machine. The notes fade out with their release.

COPY, CLEAR and PASTE are the three keys under the LCD, <COPY>, <CLR> and <PASTE>, with [⌘] + [C], [DELETE] or [BACKSPACE] and [⌘] + [V]. What they act on depends on the workspace:

WorkspaceThey act on
Patternthe selected steps, or else the page of steps shown
Kitthe machine of the selected synth track, with all seven DATA pages
Performthe assign tabs of the selected track
Songthe selected song row

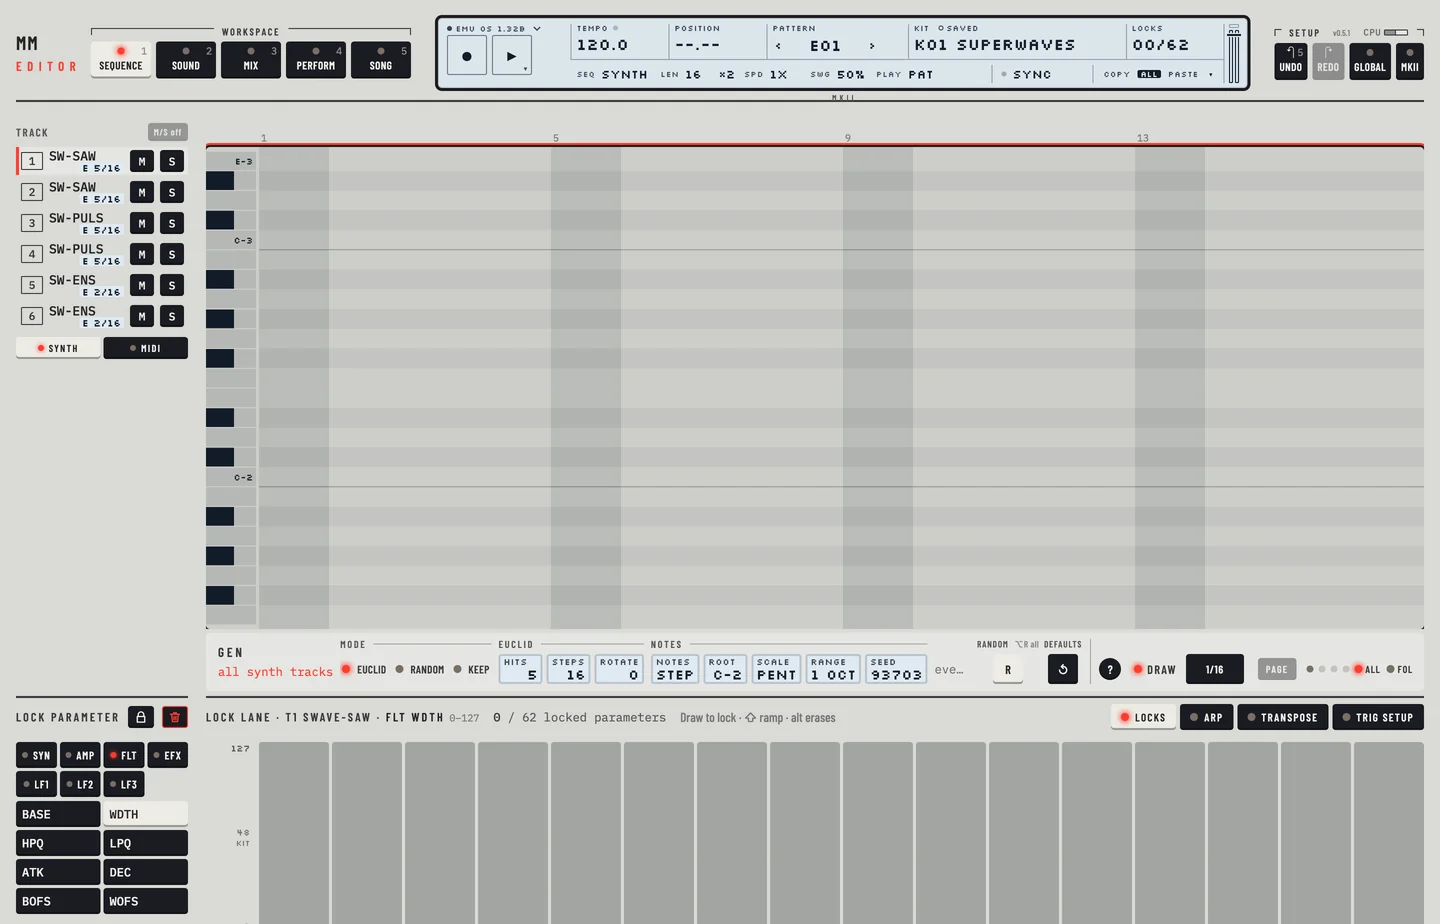
[⌥] + [DELETE] or [⌥] + [BACKSPACE] on Pattern clears the whole pattern. Clicking <CLR> with [⌥] held does the same.

To copy and paste steps:

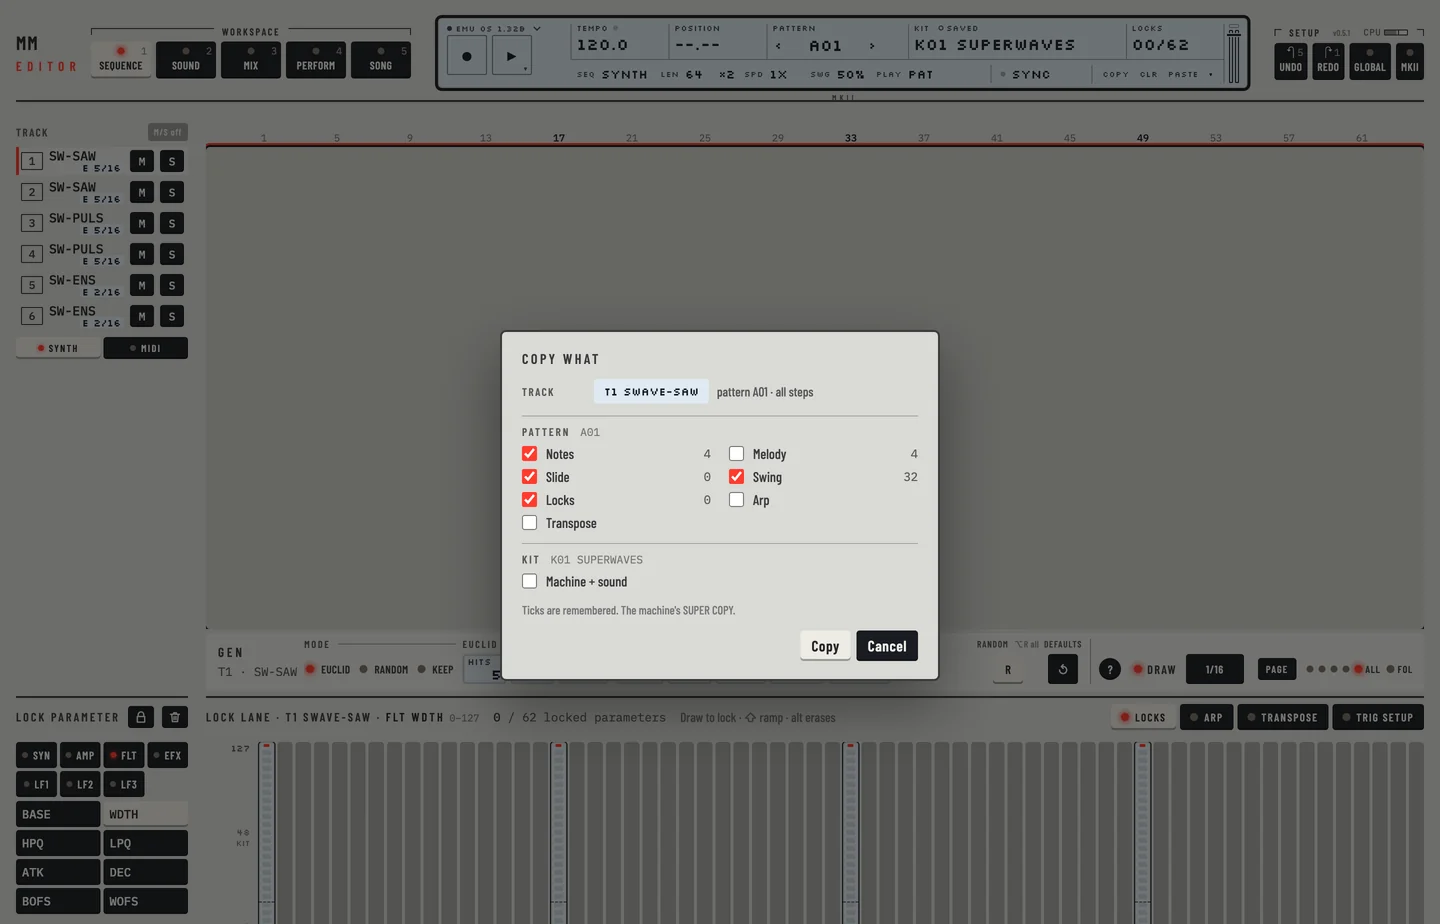
  1. Click Pattern. Click a note with [⌘] held to select it.
  2. Press [⌘] + [C], or click <COPY> on the LCD.
  3. Click an empty step with [⌘] held, then press [⌘] + [V], or click <PASTE>. The note lands at the selected step.
  4. With nothing selected, [DELETE] or [BACKSPACE] clears nothing. Click <CLR> to clear the page shown.
  5. Press [⌘] + [Z] twice to put the track back as it was.

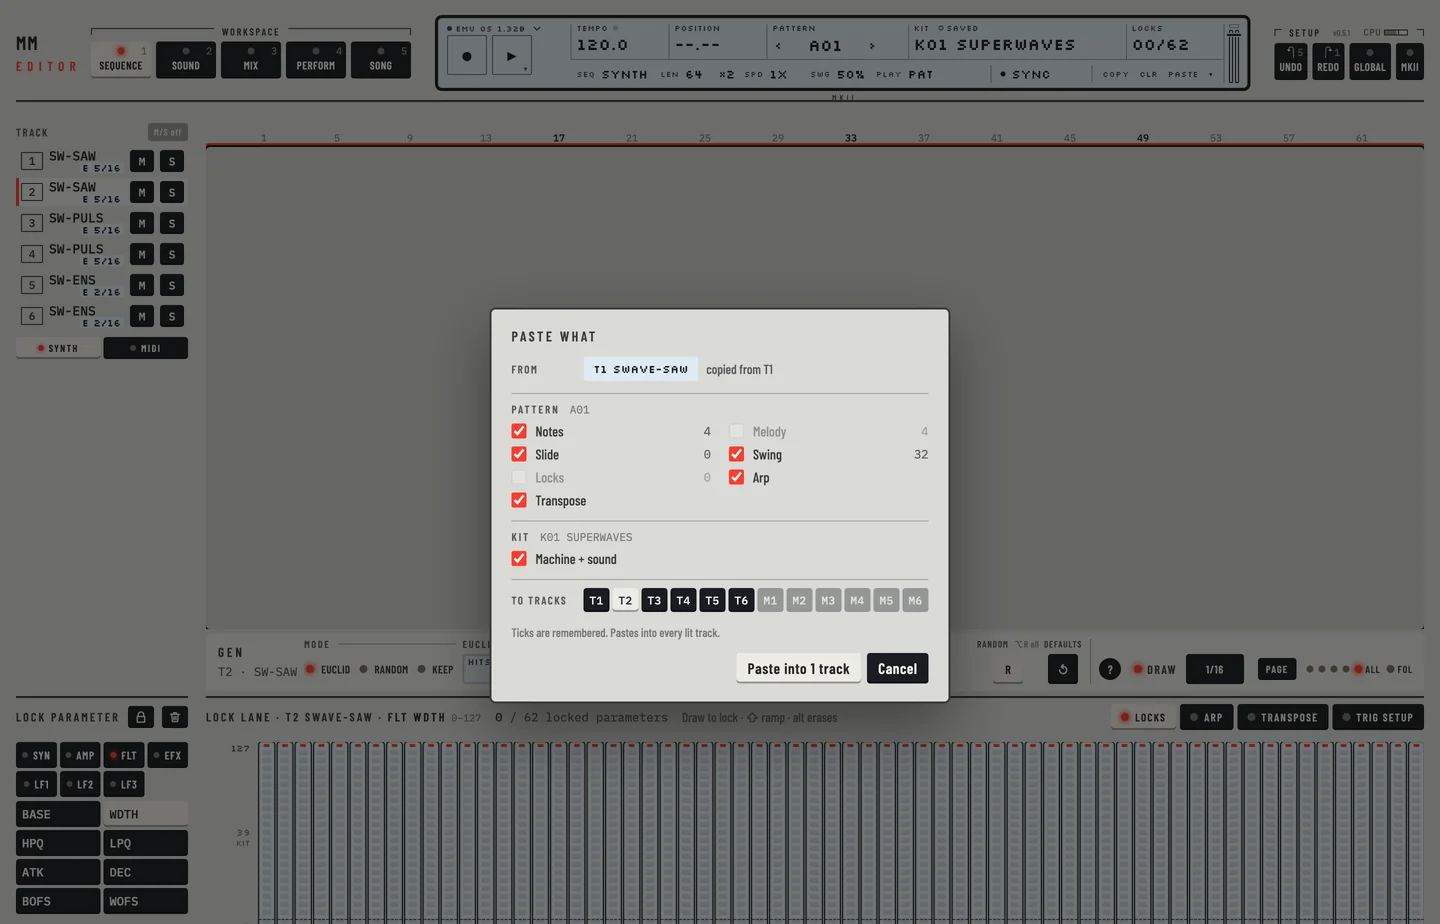
To paste the same steps into several tracks, select the steps, press [⌘] + [C] and press [ESC]. Shift-click the headers of the tracks to mark them and press [⌘] + [V]. Each marked track gets the copied steps.

SCALE KEY

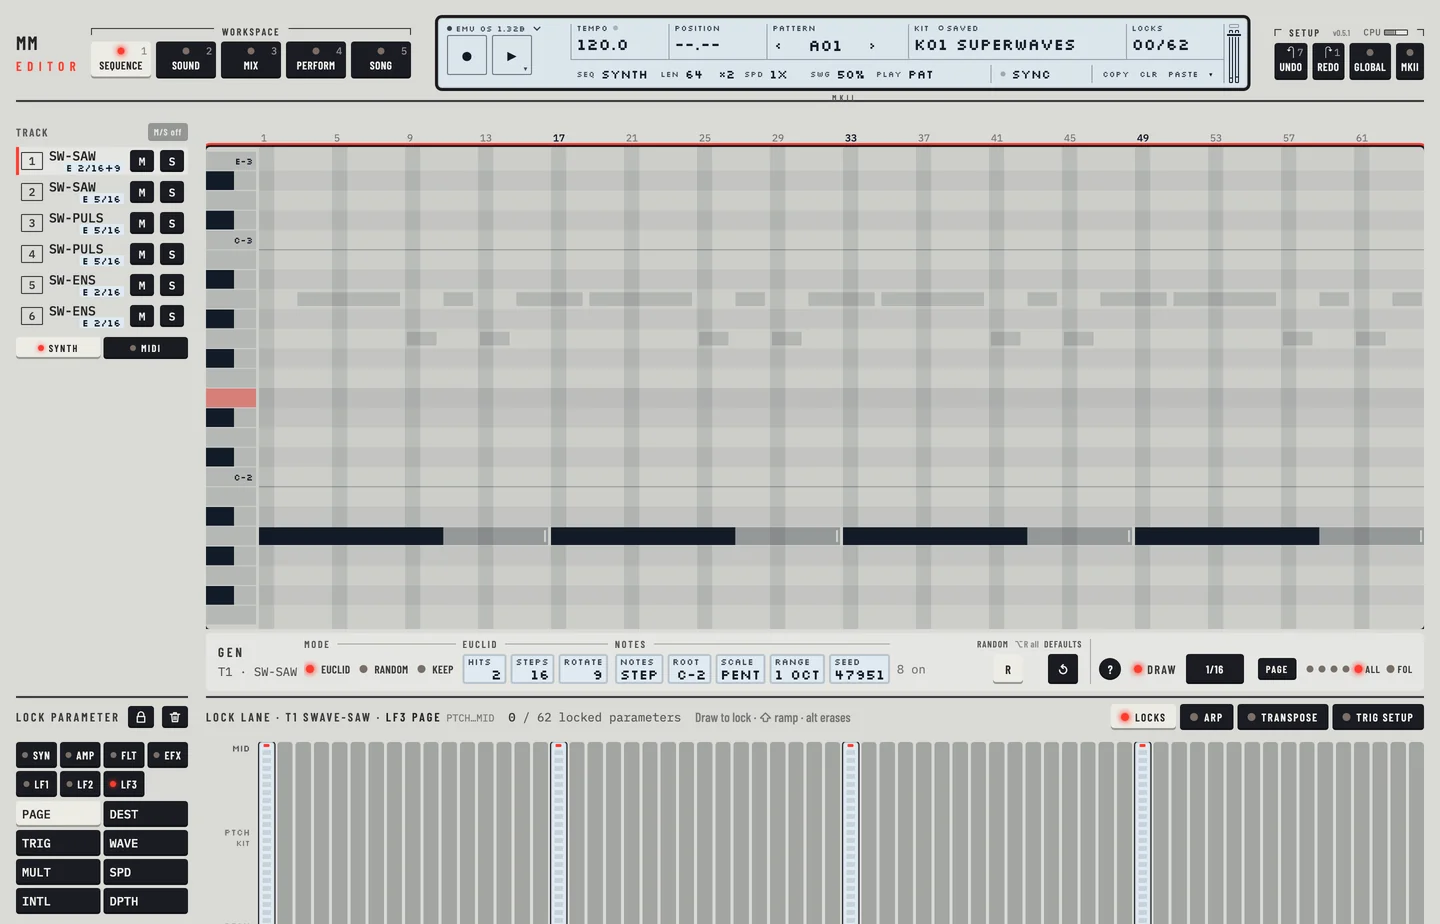
The machine's [SCALE] key shows one page of 16 steps. In the editor press Page in the Pattern workspace, or press the square bracket keys, to step through the pages. Four lights show the pages the pattern has and which one is shown.

  1. Click Pattern, then switch ALL off. The roll shows one page of 16 steps.
  2. Click Page. The next page shows, when the pattern is longer than 16 steps.
  3. Press [[] or []] to go back. Click ALL to show every step again.
The pages of a pattern

[FUNCTION] + [SCALE] opens the scale set-up. In the editor its fields are in the LCD's second line on Pattern: <LEN> sets the pattern length and <SPD> the speed. Click a field to step it. Chapter 11 describes both.

  1. Click <SPD> on the LCD four times. It reads 1X, 2X, 3/4X and 3/2X in turn.
  2. Click ×2 on the LCD. The pattern doubles and the new pages copy the first.

TRIG SELECT KEY

On the machine [TRIG SELECT] chooses which trig track the TRIG keys edit: AMP, FILTER, LFO or ALL. In the editor you choose the envelopes of a trig in the step menu of the Pattern workspace: Envelopes, then Amp, Filter or LFO. On a selection it sets every trig in it. A note that fires only some envelopes shows their letters on its bar. A trig that fires none is trigless.

[FUNCTION] + [TRIG SELECT] edits the MIDI tracks. In the editor use the Synth and MIDI keys in the track rail, or the <SEQ> field in the LCD, to change between the six synth tracks and the six MIDI tracks.

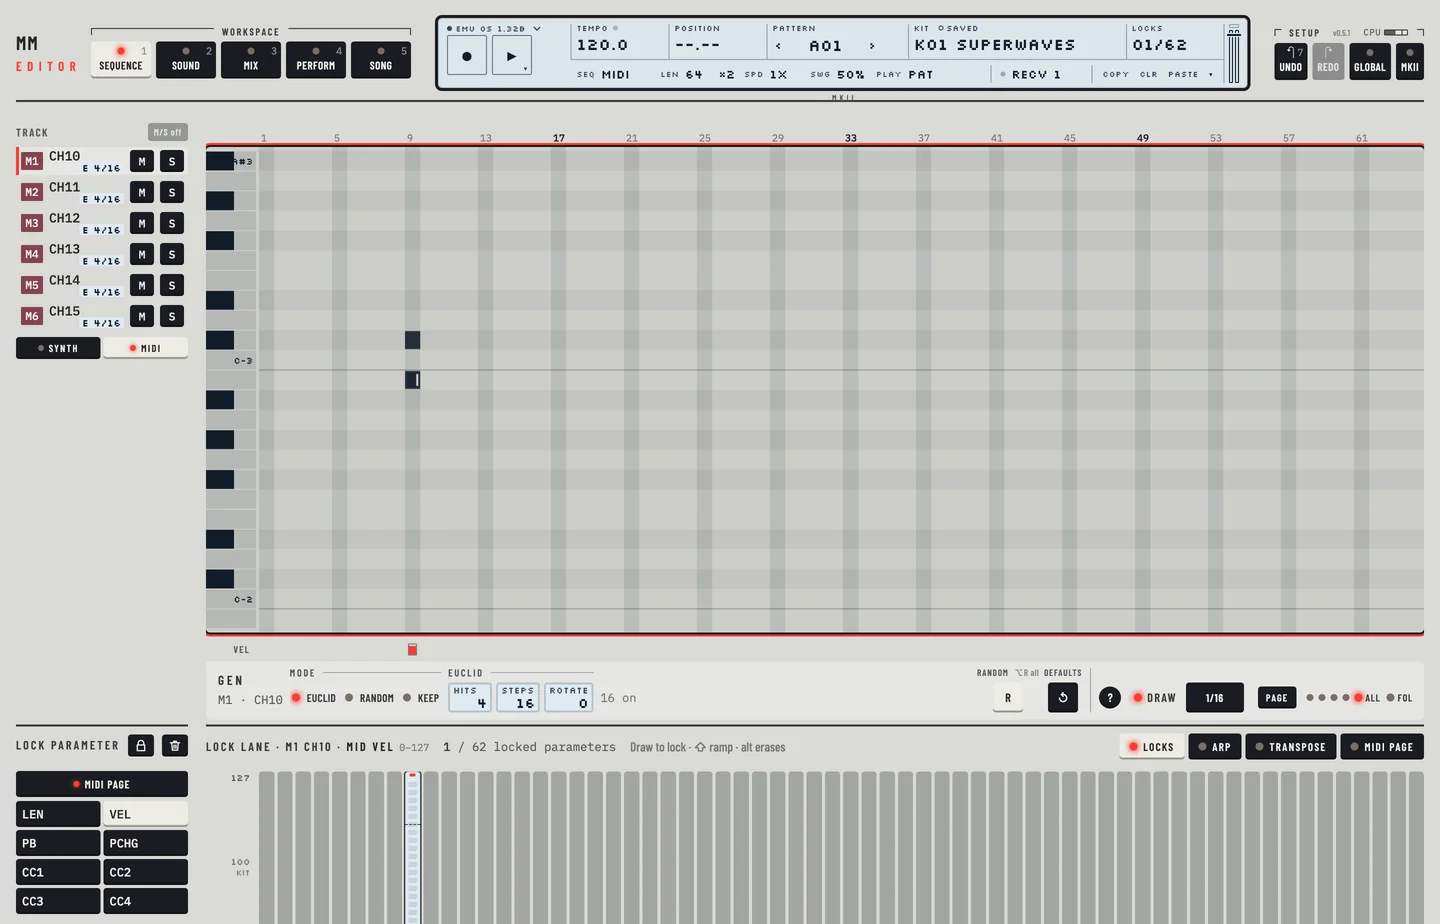
  1. Click Pattern, pick track 1 and click MIDI. The rail shows the MIDI tracks M1 to M6, each with its own roll.
  2. Click a note into each of the six MIDI tracks. Only that track changes.
The MIDI tracks
The MIDI tracks

THE KEYBOARD (SFX-6)

The SFX-6 has a keyboard and a joystick. The editor has the same functions on the Perform workspace.

  • The Keyboard card plays notes. It has four modes: Auto track, Multi trig, Multi map and Poly.
  • The Assign card has a joystick pad. Drag the stick. It springs back when you let go. On the machine's tabletop models the pad sends pitch bend, CC 1 and CC 2. HOLD keeps the stick where it is. RANDOM moves the stick by itself inside a region that you draw with REGION.
  • Multi trig and Multi map are keys of the card.
  • The Octave stepper moves the on-screen keyboard over all 128 notes, from MIDI 0 up to 127.
  • Follow moves the keyboard to the octave of a note you play. It moves only for a note outside the four octaves shown, and only when no other key is held. A click on the keys never moves it. Press Follow again to turn it off. The Octave stepper works as before.

To use the Perform keyboard and joystick:

  1. Click Perform, then click a key of the keyboard. The note goes to the machine.
  2. Hold a key with the mouse. It is lit. Let go and no key is lit.
  3. Drag the joystick of the Assign card and let go. The moves reach the machine and the stick springs back. Click HOLD and drag the stick again. When you let go, the stick stays where it is and the machine keeps the value. Click HOLD again. The stick returns to the middle. Click REGION, drag a rectangle on the pad and click REGION again. Click RANDOM. The stick moves by itself inside the rectangle. The Speed stepper sets how fast it moves, from 1 to 10. Click RANDOM again, press STOP or press Panic to end it. STOP and RANDOM return the stick to the middle, and Panic also ends HOLD. Play a note with a MIDI keyboard that lies outside the four octaves shown. With Follow lit, the keyboard moves to its octave.
  4. Click Multi trig, then SPLIT KEY. Click the first mode again, then Auto track.
  5. Click Multi map. The map table opens. Click Split selected range to add a range, and click × on the new range to take it away.

The computer keys play notes too: [A S D F G H J K L] and [W E T Y U O P]. A key of the on-screen keyboard is lit while you hold it: with the mouse, with the computer keys, or on a MIDI keyboard connected to the editor (the MIDI input of the standalone, or the MIDI track of the plug-in in your DAW). The piano roll shows the pitches the machine plays.

REAR PANEL

Power, the voltage selector and the fuse belong to the hardware. The editor has no counterpart.

MIDI sockets

The standalone editor has the AUDIO / MIDI panel for its MIDI. Press [,] or choose AUDIO/MIDI… in the engine menu. The MIDI card lists the inputs, with a light for each that is on, and an output. A button pairs a Bluetooth MIDI device. No MIDI input is on until you switch it on there. The list follows the system: a device plugged in or out appears or goes at once, and an input or output you had chosen comes back when its device returns. The Monitor row counts what came in and went out. A red line under the output warns when a virtual bus, such as an IAC bus, is both an input and the output: switch the input off or send to another bus. See "MIDI and sync" in the installation guide.

In a plug-in the host routes MIDI. The machine's own MIDI out, which carries notes, controllers, program changes, pitch bend, pressure and clock, reaches the plug-in's MIDI output. Its SysEx never does.

The editor has no MIDI THRU.

Audio inputs and outputs

The audio the host gives the plug-in goes to the machine's inputs. In the Mix workspace each FX machine has an In selector: NEIBOR, INP A, INP B, INP AB or a bus. This is where you choose which input the machine reads.

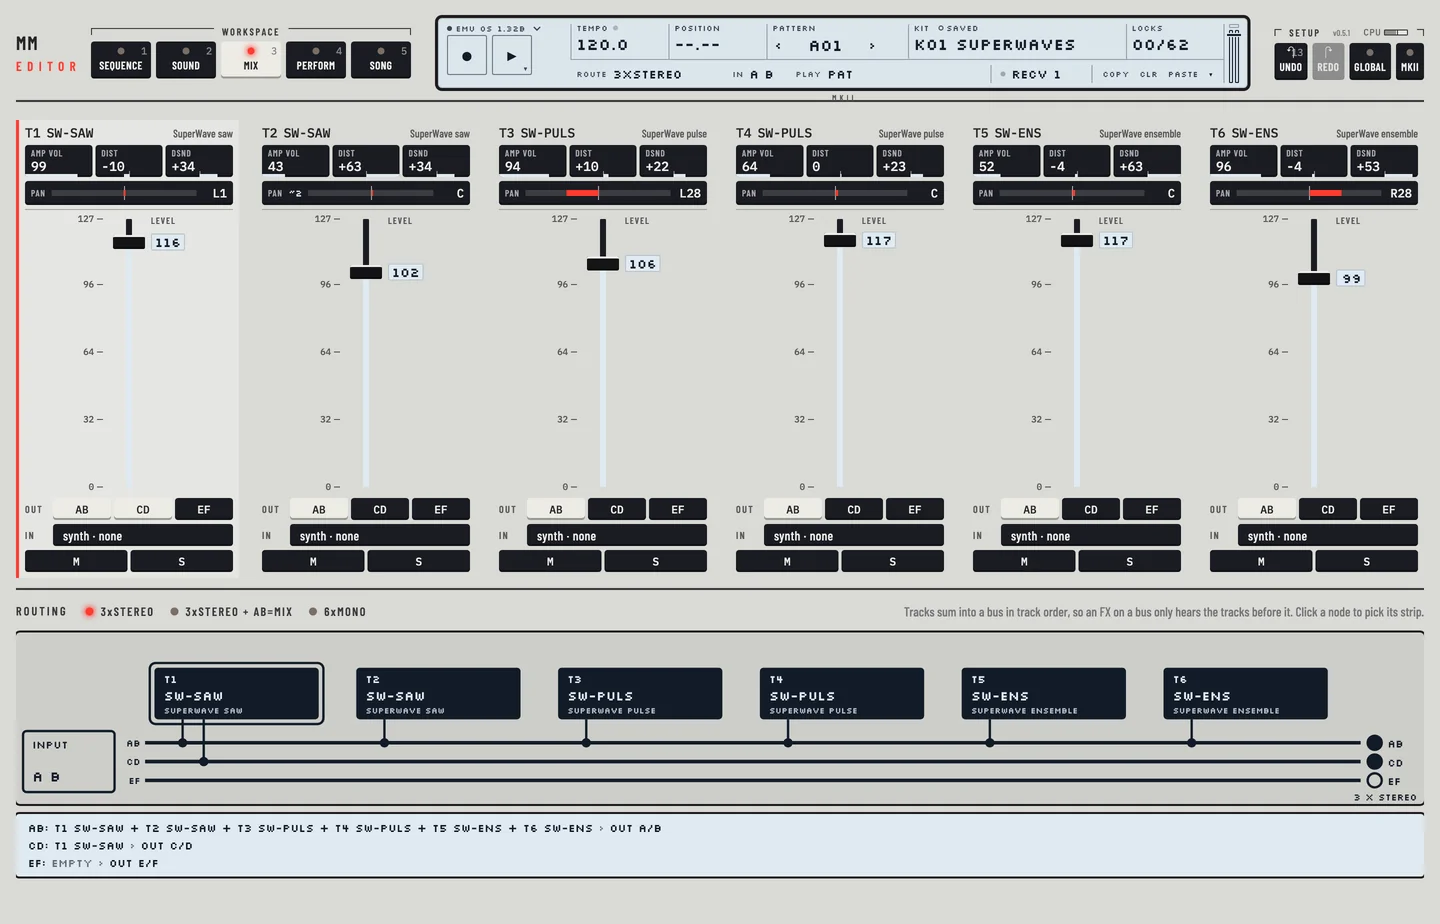
Each track has Out keys AB, CD and EF. The routing keys under the strips set the global routing: 3xSTEREO, 3xSTEREO + AB = MIX or 6xMONO. A multi-output VST3 host receives the extra pairs. Other hosts receive the main pair.

The headphone output has no counterpart. It is a copy of the AB pair.

CONNECTING

Mounting, cabling, cleaning and the battery are matters for the hardware. The editor needs only the firmware image, which it asks for on the first start.

3. The LCD user interfaceMonomachine Editor

3

The LCD user interface

MM manual p.1-10

The machine's screen shows the tempo, a level bar, eight parameter circles, four position boxes, the kit and the pattern. The editor's LCD is a strip in the top bar. It shows the same state: the fields that matter all the time stay in view, and the parameters of the screen live in the workspaces.

The LCD in the top bar

The LCD has two lines. The first line, from the left: the engine menu, the record and play keys, <TEMPO>, <POSITION>, <PATTERN>, <KIT> and <LOCKS>. The second line changes with the workspace. At its right end it has the sync field, then the keys <COPY>, <CLR> and <PASTE>.

LCD

Tempo

<TEMPO> shows the tempo in beats per minute, with one decimal. Drag it up or down to change it. When the host sets the tempo, the field is marked as the DAW's tempo and refuses edits. This is the editor's counterpart of the EXT the machine shows when it follows an external clock.

Level and parameters

The machine's level bar is the LEVEL fader of the Mix workspace. The eight parameter circles with their names are the value boxes of the Kit workspace. Each box has the parameter's name and its value.

  1. Click Mix and drag the LEVEL fader of track 1. The level follows.
  2. Press [⌘] + [Z]. The level is back.
  3. Click M on track 1 to mute it, and click M again to unmute it.

Position

<POSITION> shows the playback position as bar and step, for example 02.05. It reads --.-- when the machine is stopped. While the machine plays it counts the page and the step in it, and the same page is lit in the track rail. In the Pattern workspace, four lights beside the Page key show which pages the pattern has and the page shown, and a playhead runs across the steps.

Status

The record key and the play key light while the machine records and plays. The play key reads a triangle when stopped and a square when playing. While the machine is paused the play key blinks and <POSITION> keeps the step the pause holds.

Kit

<KIT> shows the number and the name of the current kit, for example K01 MONOMACHINE. Beside the label a small field reads saved or edited. It reads edited when the values of the kit differ from the kit saved in its slot on the machine. Click the field to open the kit library. The ‹ and › keys beside the name load the kit before or after, as a click in the library does. When the kit has unsaved edits the machine asks first.

Pattern

<PATTERN> shows the current pattern, A01 to H16. The ‹ and › keys beside it step to the pattern before or after. Click › to step to the next pattern and ‹ to step back. Click the name to open the pattern chooser. A pattern that waits for the end of the current one blinks.

Machine

The machine of the selected track is named in its row of the track rail and in the header of the Kit workspace. The header is also the machine picker: click it to change the machine. Pick each of the six tracks in turn and the rail and the header name the machine of the track you picked.

The LCD in the top bar while the machine plays

Locks

<LOCKS> counts the locked parameters in the pattern, out of 62. The Monomachine shares those 62 between all twelve tracks. The field warns when you near the limit.

Sync

The sync field at the right of the second line reads Sync when the editor and the machine agree. It reads RECV while the emulator takes a dump from the editor. With a real machine it reads SEND and a number when edits wait to go to it. Click it to send them.

LAYER EDIT AND WINDOWS

On the machine, windows open over the screen and the keys below them stay live. In the editor, dialogs open over the page with their own buttons. The kit library, the pattern chooser, the machine picker and the GLOBAL and AUDIO / MIDI panels are windows of the page. Press [ESC] to close a dialog or panel.

4. Quick startMonomachine Editor

4

Quick start

MM manual pp.1-11 to 1-14

This chapter takes you through the first things you do with the machine: choose a pattern, hear it, change it and record into it. Each part gives the steps in the editor and says where they differ from the Monomachine's panel. The editor must be running with the firmware image loaded, and the LCD must show the kit and the pattern.

SELECTING AND PLAYING

A pattern recalls the kit it was saved with. When you pick a pattern, the machine loads its kit.

  1. Click the <PATTERN> field in the LCD. The pattern chooser opens: 8 banks, A to H, of 16 patterns.
  2. Click a pattern. Stopped, the machine switches at once. Playing, it queues the pattern and starts it when the current pattern ends. The name in the LCD blinks while it waits.
  3. To switch at once while the machine plays, hold [⇧] and click, or click Now.
  4. Press [SPACE]. The machine plays and the <POSITION> field counts.
  5. Press [⇧] + [SPACE] to pause, and again to go on. Press [SPACE] to stop.

You can also step through patterns with the ‹ and › keys beside the name. While the machine plays, click ›. The next pattern is queued and starts when the current one ends. Stop the machine and click ‹ to go back.

The pattern chooser
The pattern chooser

Press [SPACE] again to stop.

PLAYING IN MULTI TRIG

In multi trig mode one source plays all six tracks. To use it:

  1. Go to the Perform workspace ([4]).
  2. In the Keyboard card, click Multi trig.
  3. Click or drag across the on-screen keyboard. Every track plays the note. The lamps below the keyboard flash for each track that sounds.

Multi trig takes its notes on MIDI channel 7. Chapter 5 describes the other keyboard modes.

EXPLORING A PATTERN

Play the pattern and listen to each track.

  1. Click a track in the rail to select it.
  2. Press [M] to mute it, or S in its rail row to solo it.
  3. Go to the Kit workspace ([2]) and drag the values of the track. The sound changes as you drag.
  4. Play the track from your keyboard with [A S D F G H J K L].

The piano roll plays the pitch of a note when you click it.

GRID RECORDING

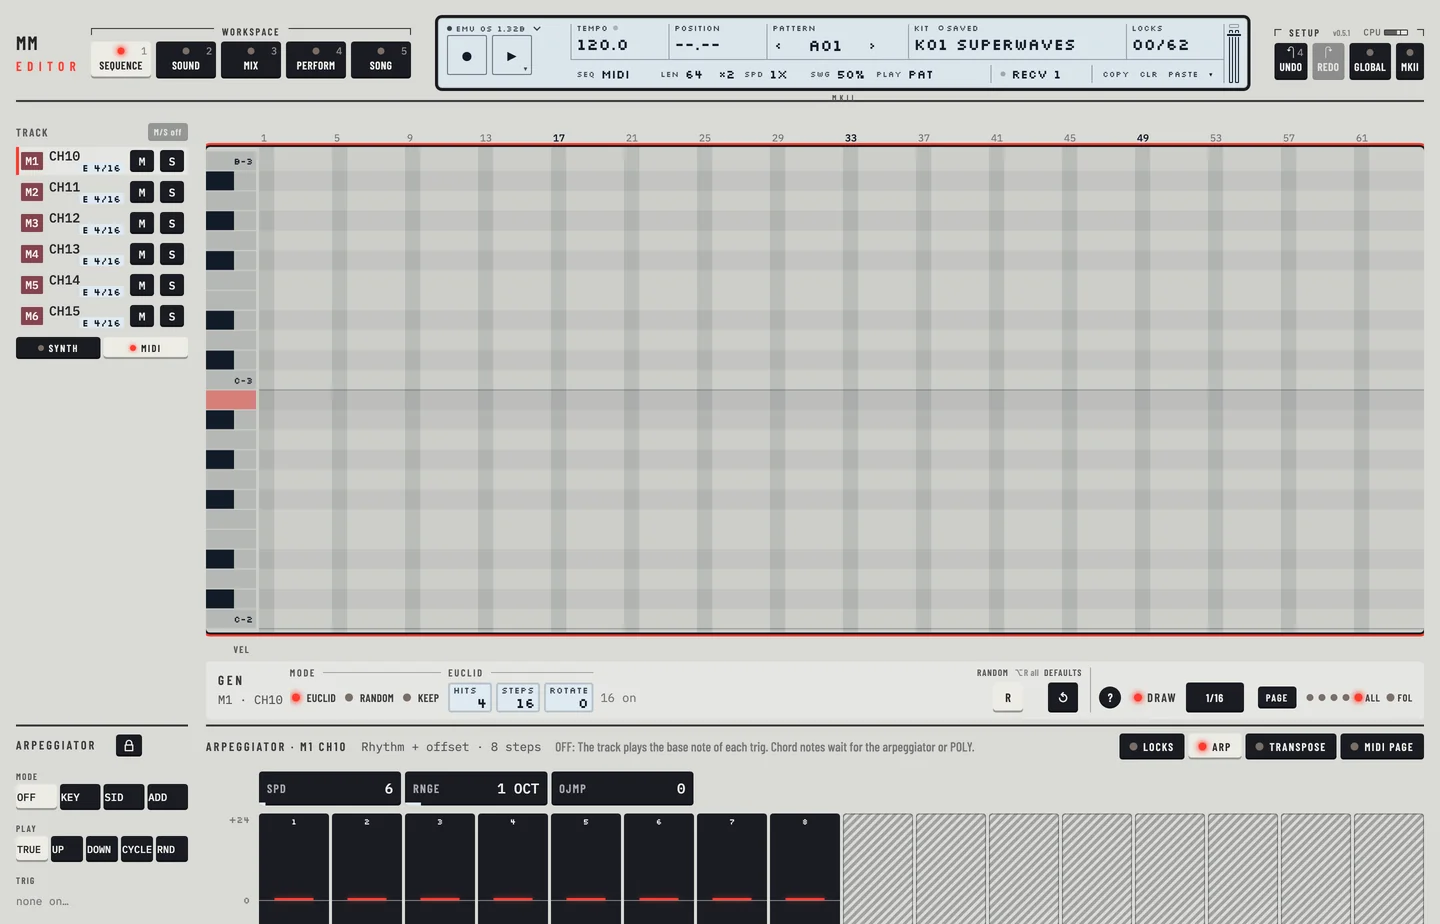
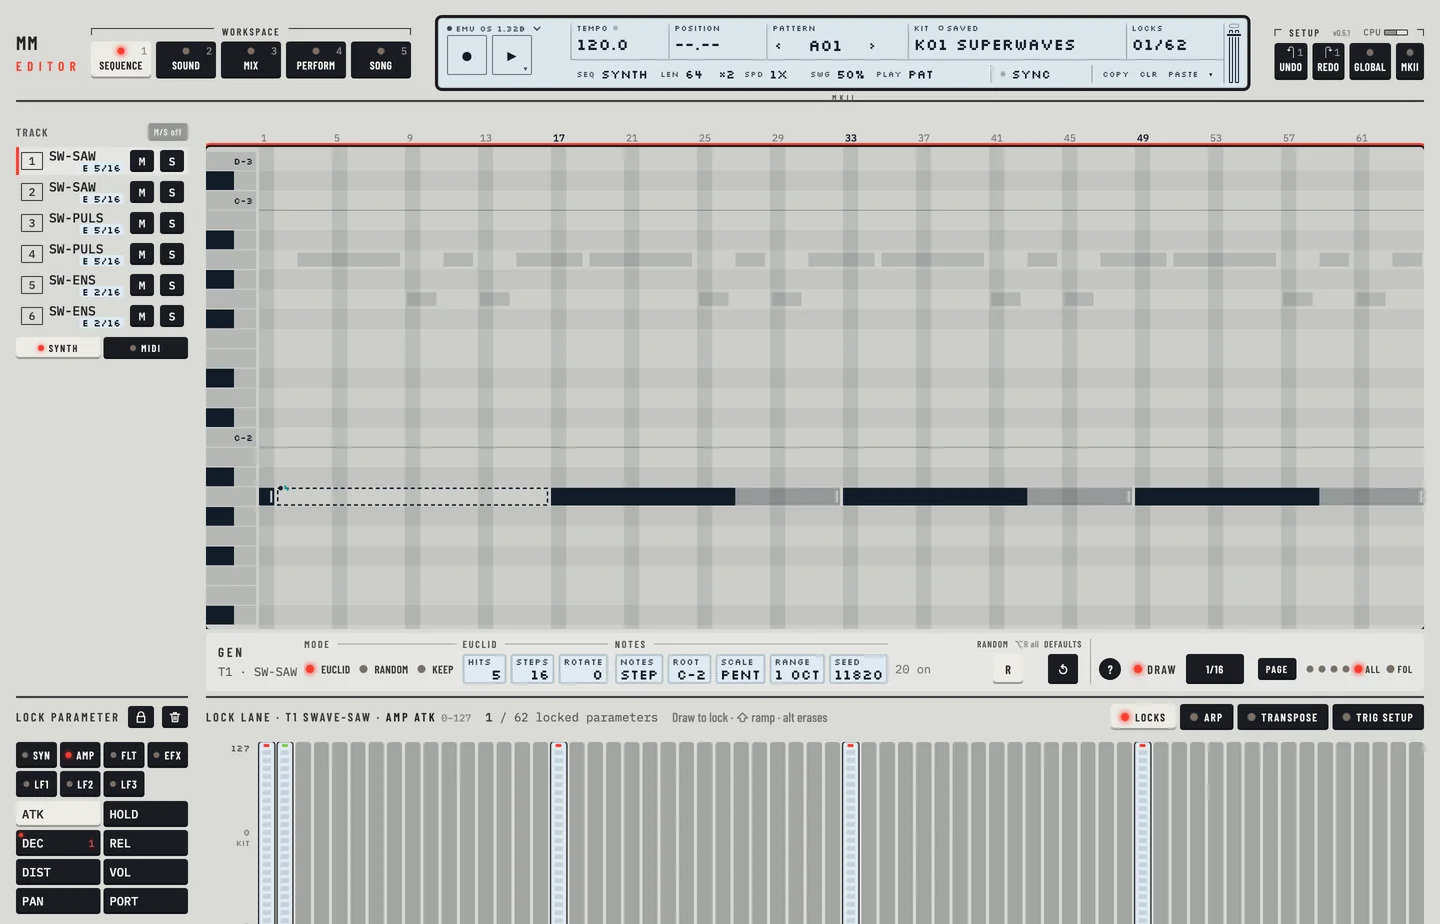
In grid recording you place notes on the steps of a pattern one by one. The machine does this with the TRIG keys. In the editor you draw in the piano roll of the Pattern workspace.

  1. Go to the Pattern workspace ([1]) and select a track.
  2. If you want the pattern's own kit, open the kit library and load it: click <KIT>, choose a kit, click Load. Chapter 6 describes the library.
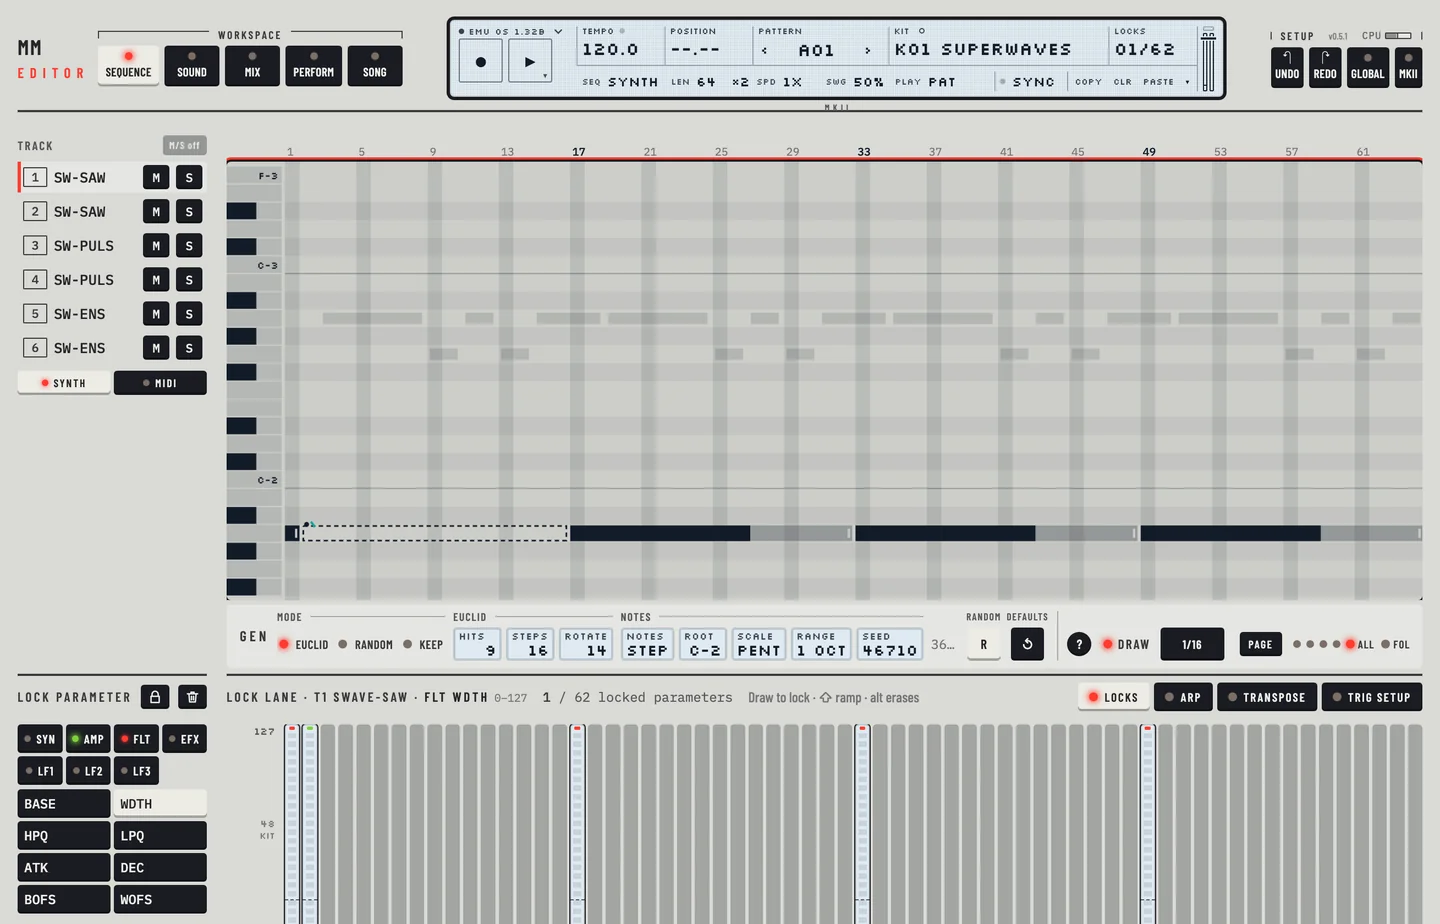
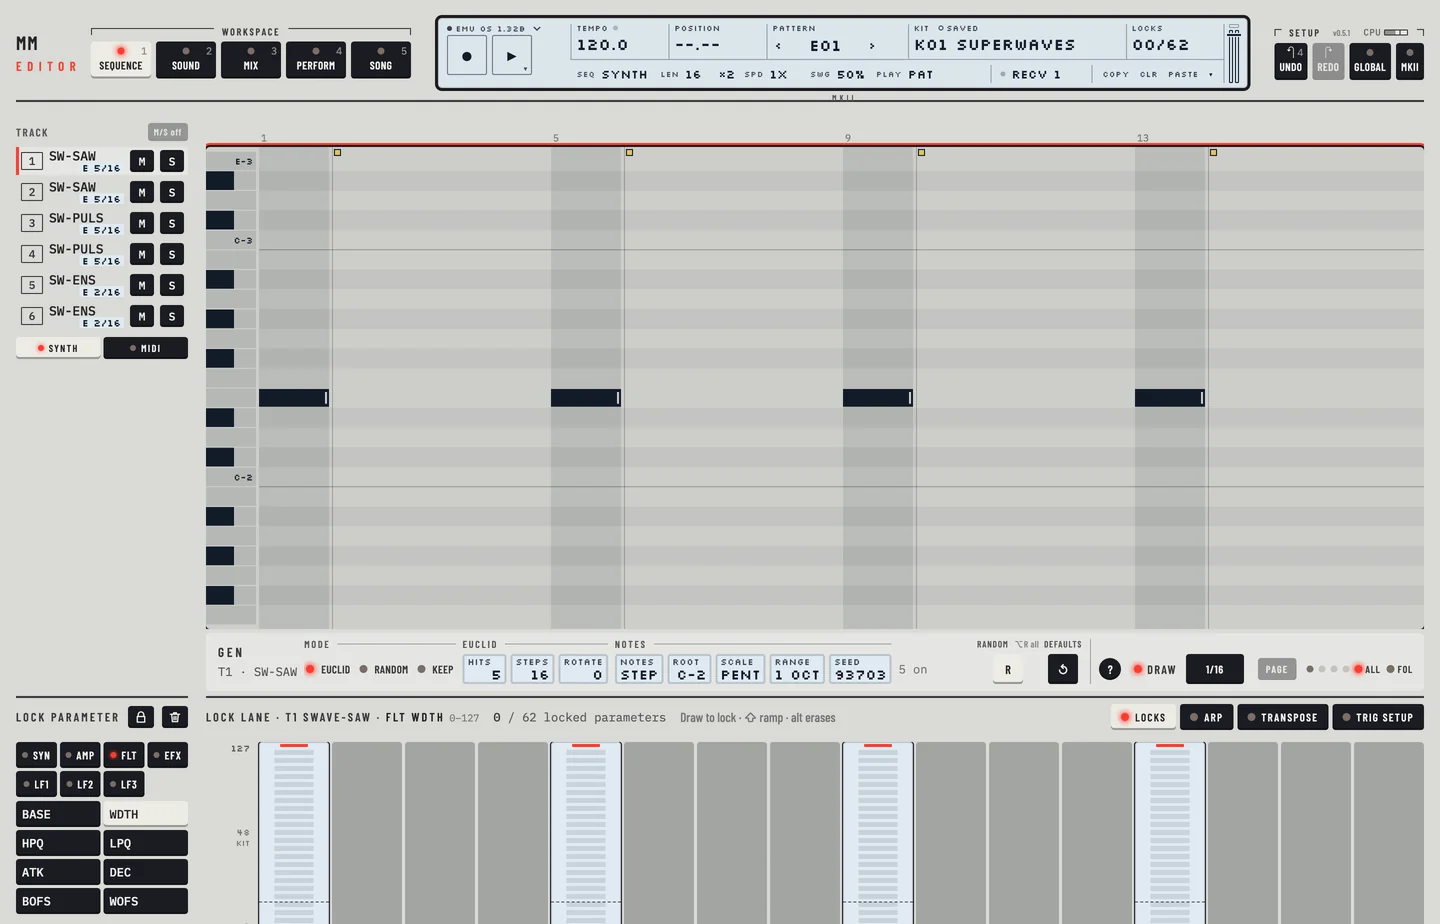
  3. Click an empty step in the roll. A note goes on it, as long as the Len key says.
  4. Drag the end of the note to make it longer or shorter, drag it up or down to change its pitch, or sideways to move it.

Click a note to select it. It stays selected, and [DELETE] or [BACKSPACE] removes it. Double-click a note to remove it at once. With one note selected, [↑] and [↓] change its pitch by a semitone. Deleting a note writes no NOTE OFF: the note before it runs on to the next trig or NOTE OFF, as on the machine.

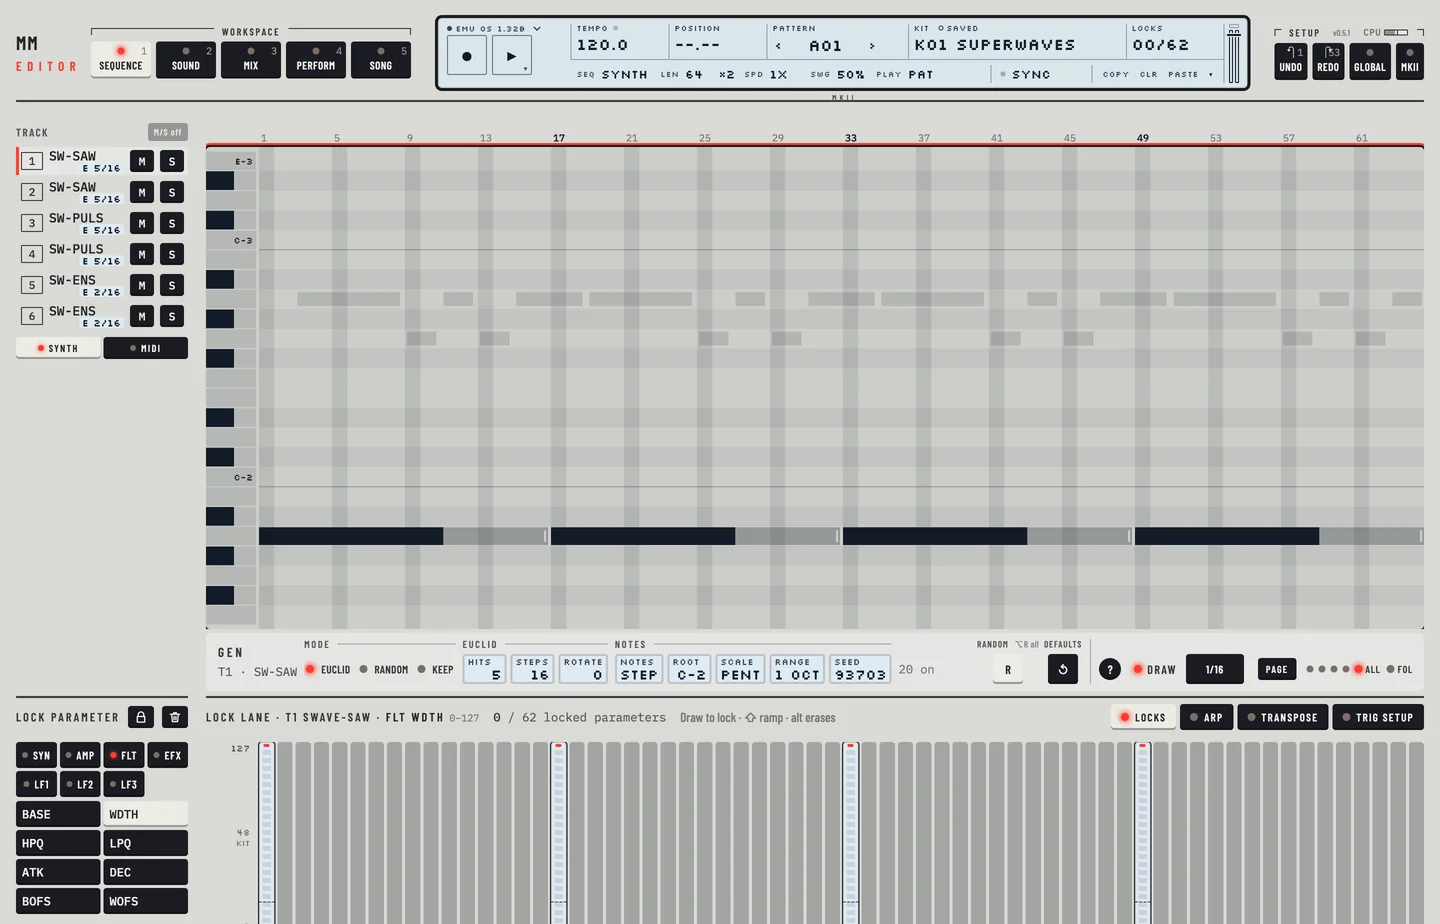
To paint the same note on several steps, drag sideways. The steps you cross get the note. A drag is one undo step. Hold [⌥] and drag over the notes to erase them, which is also one undo step.

To set how long a note is:

  1. Check that Draw is lit and the Len key reads 1/16.
  2. Click an empty step. A note of one sixteenth goes on it and a NOTE OFF on the step after, so it does not run into the next note.
  3. Click the Len key to make it 1/8, then click another empty step. The note is two steps long.
  4. Drag the end of the first note over two more steps. It lasts three steps, up to the next note, and new notes get 3/16.
  5. Press [⌘] + [Z] to take the changes back one by one.
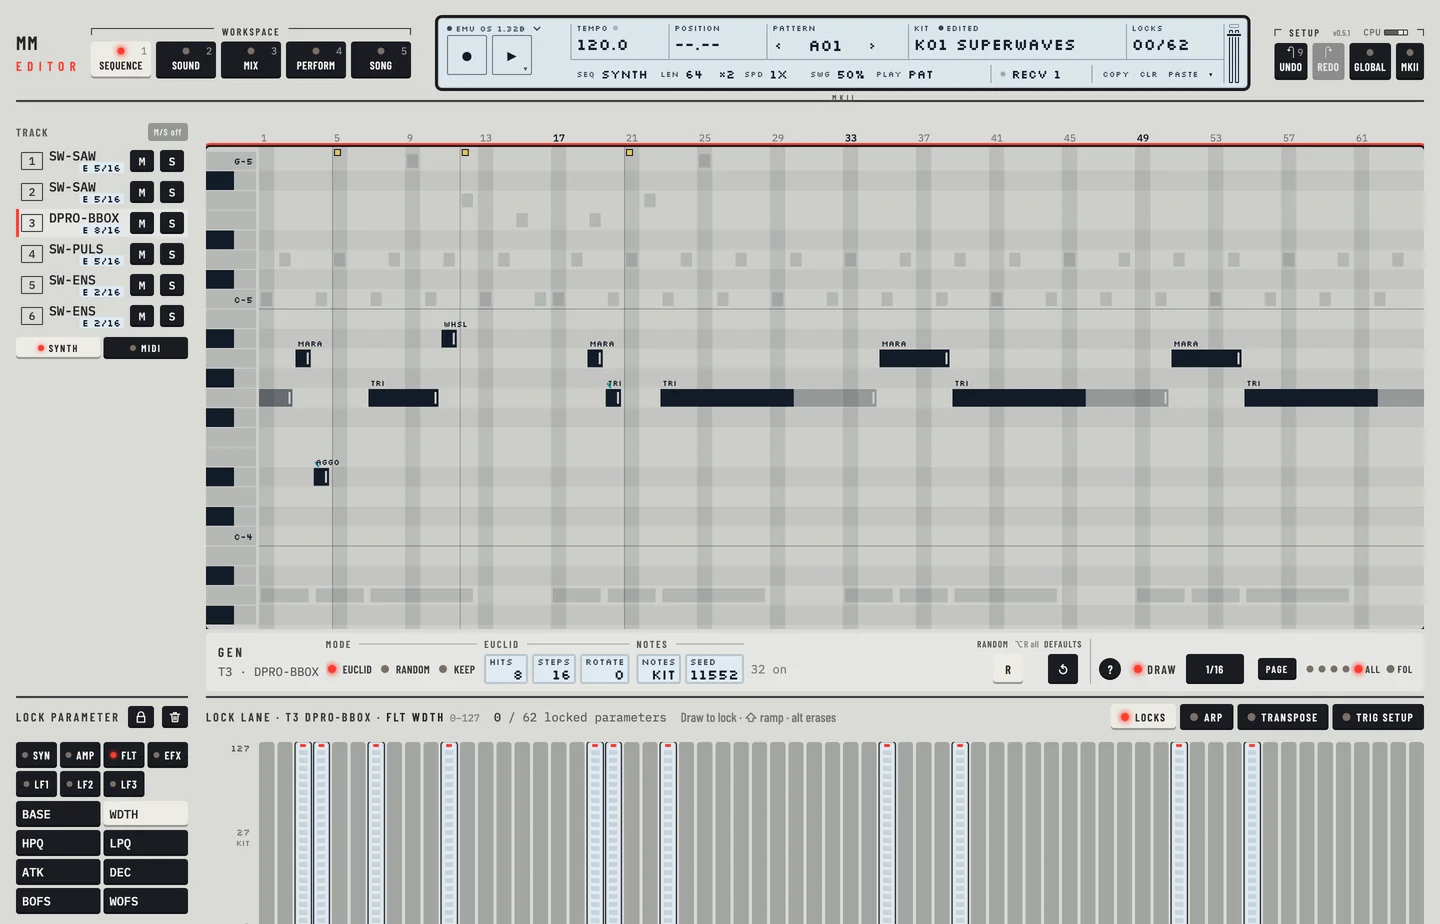
Notes drawn in the piano roll with their lengths

To place a note off, which stops the sound at a step, hold [⌥] and click an empty step. You can also drag the end of a note: the note's length is the distance to its NOTE OFF.

For a chord note on a step, hold [⇧] and click the roll there. Right-click a step for the step menu (Ctrl-click on a Mac). It offers a note on or off, NOTE OFF, a trigless trig, the envelopes a trig fires, slide, swing and a chord note.

LIVE RECORDING

In live recording you play the keys while the pattern runs, and the machine writes the notes to the steps that play. The firmware quantises them.

  1. Select the track to record.
  2. Press [⌥] + [SPACE]. The machine starts if it was stopped, and the record light comes on. Clicking the record key while the machine plays does the same.
  3. Play with [A S D F G H J K L] or the on-screen keyboard.
  4. Press [⌥] + [SPACE] again to stop recording. If the editor says the panel is busy, wait a moment and press it again.

To erase while recording, hold [DELETE] or [BACKSPACE], the machine's [EXIT]. The selected track's notes go on each step that plays while the key is down. The other tracks keep their notes. Let go of the key, switch recording off and stop the machine.

PARAMETER LOCKS

A parameter lock gives one parameter a value of its own for one step.

Lock a value

  1. In the Pattern workspace, click the Locks tab under the roll, then a page tab in the rail, for example FLT.
  2. Click the parameter, for example BASE. The lock lane under the roll now edits it.
  3. Drag over the bars of the lane. Each step with a trig gets a lock with the value where you dragged.
  4. To draw a straight line of values, hold [⇧] and drag from a step that has no lock. The locks make a ramp over the notes. Hold [⇧] on a lock and drag sideways to draw a slide to the next lock instead (see "Slide" in chapter 15).
  5. To set a locked value from the keys, turn the wheel over a lock step. Each notch is 4, and [⇧] makes it 1.

The lane draws a solid line at the kit value of the parameter, with its number. Drag the line up or down to change the kit value. A lock on a step with no trig is drawn hatched, as a ghost bar: the machine plays it, from that step until the next trig. Hold [⌥] and click it to remove it.

The <LOCKS> field of the LCD counts the locked parameters of the pattern, out of 62.

The lock lane under the roll

Lock live

While live recording plays, turn a value on the Kit workspace. The machine records the value as a lock on the step that plays when the value arrives. The editor marks that step in the trig row and in the lock lane, for about three seconds, and a note says which value it locked.

Remove locks

  • Hold [⌥] and drag over the lane to erase the locks of one parameter.
  • The clear key in the rail header clears the locks of the parameter you are looking at. Hold [⌥] and click it to clear every lock of the track.
  • Right-click a step and choose Clear locks (keep the notes). The step loses its locks and keeps its note. On a selected step it works on the whole selection.
  • Select a step and click the ⋯ on it, or right-click it, and choose Clear locks. Press [⌘] + [Z] to bring the locks back.
  • Select a step and press [DELETE] or [BACKSPACE]. The step loses its note, its slide and its locks together.
5. Monomachine overviewMonomachine Editor

5

Monomachine overview

MM manual pp.1-15, 1-16

The Monomachine has six synth tracks. Each track has its own machine, filter, amp, effects, delay and three LFOs. The sequencer plays the six tracks from one pattern, and six MIDI tracks beside them. The keyboard can play the tracks one at a time, all together, or as a trigger for patterns.
SIX INDIVIDUAL TRACKS

The six tracks are independent. A kit holds a machine for each and a full set of parameters. In the editor:

  • The track rail at the left lists the tracks T1 to T6 with their machines.
  • The Kit workspace edits the selected track.
  • The Mix workspace shows the six tracks side by side, each with its own level, pan and routing.

Chapter 6 describes the machines and kits.

SIX TRACK SEQUENCING

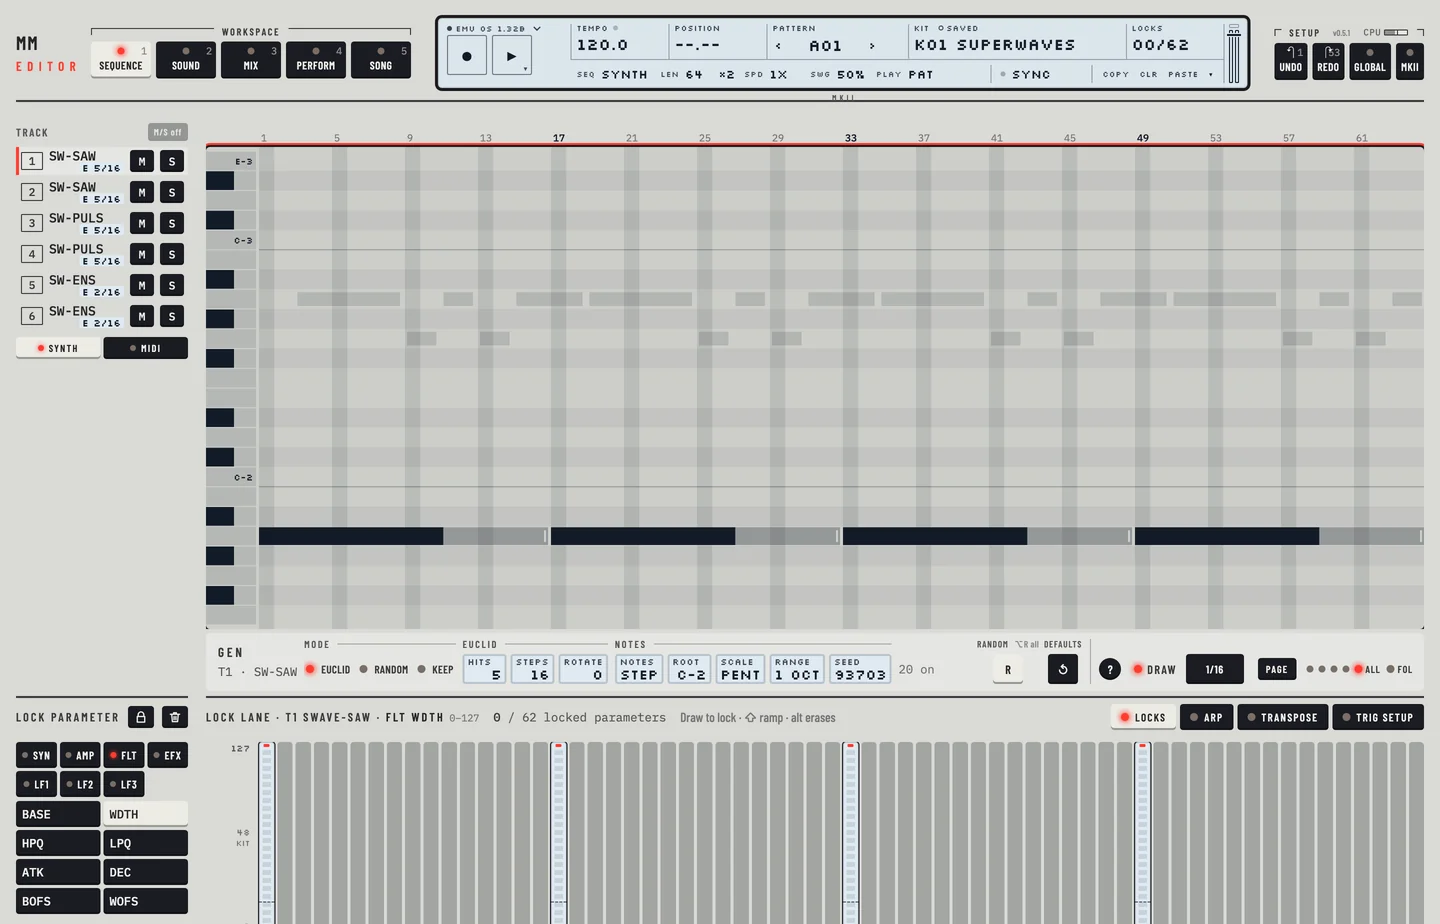
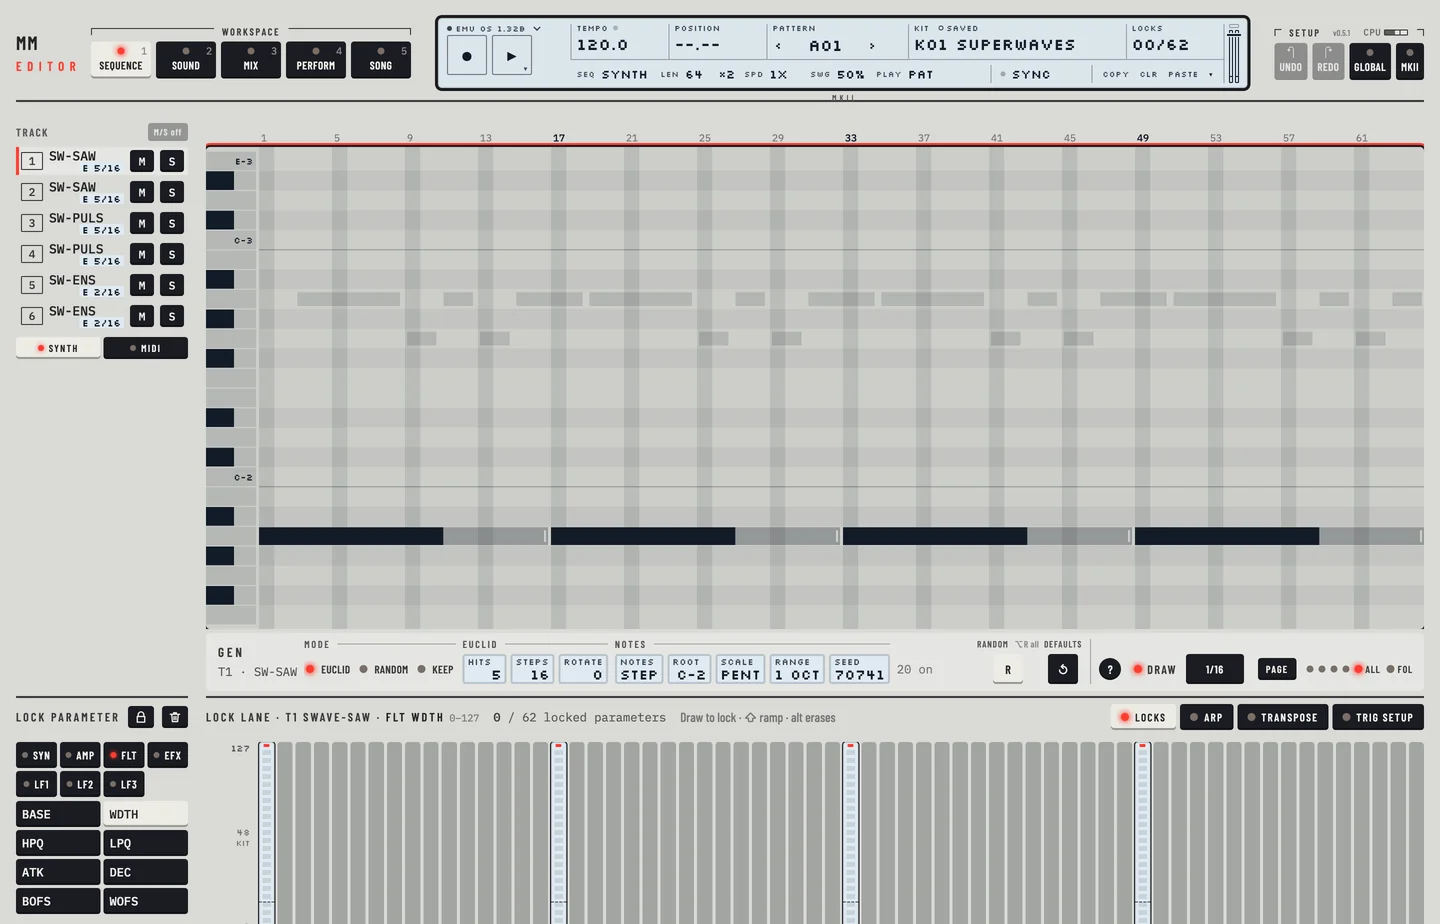
A pattern holds the notes, the envelope trigs and the parameter locks of the six tracks. The Pattern workspace edits them: a piano roll for notes, with small marks on the notes for envelope trigs, slide, swing and locks, and a lock lane for the parameters. Chapters 10 to 15 describe the sequencer.

The Pattern workspace

MIDI SEQUENCING

Six more tracks in each pattern send MIDI notes. Click MIDI in the track rail of the Pattern workspace to edit them. The rail then lists M1 to M6, each with its MIDI channel. The Kit workspace shows the MIDI page of the selected MIDI track: note length and velocity, pitch bend and program change, and four controllers. Chapter 16 describes the MIDI sequencer.

  1. Click Pattern, pick track 1 in the rail and check that Draw is lit.
  2. Click MIDI. The rail lists M1 to M6, each with its own roll.
  3. Click a note into each of the six MIDI tracks. Only that track changes: no other MIDI track and no synth track.
  4. Hold [⇧] and click another pitch on a note of M1. The step holds a chord, and all its notes share one length.
The MIDI tracks in the Pattern workspace

POLY MODE

In poly mode all six synth engines play one track, the track in focus, so it has six voices. The other five tracks are silent, and so are notes sent on their MIDI channels.

  1. Go to the Perform workspace ([4]).
  2. Select the track with the numbered keys in the title of the Assign card.
  3. In the Keyboard card, click Poly. The editor presses the [TRACK] key of that track on the machine, so the track you see is the track that plays.
  4. Play the keyboard. The machine also takes the notes of the track on its own MIDI channel and on the auto channel.
Poly mode on track 3

The line under the keyboard modes names the poly track and says that the others are silent. Its key in the Assign card and its lamp under the keyboard read ×6. The keys and lamps of the other tracks dim, and so do their rows in the rail on Pattern and Kit.

Select another synth track, in the Assign card or in the rail, and poly mode moves to it. The first chord on the new track can sound as one note. The chords after it sound in full. A MIDI track selected in the rail leaves poly mode where it is.

The editor follows the machine: press [TRACK] on the machine in poly mode, or switch poly mode on there, and that track is selected and shown as the poly track. If the machine is busy taking a dump, the editor cannot press [TRACK]: the page says so and keeps the track the machine plays.

On the Perform workspace the <MODE> field in the second line of the LCD reads POLY while the mode is on. Click Auto track to leave it.

MULTI TRIG MODE

In multi trig mode one source plays all six tracks, as if they were one large mono synth. Click Multi trig in the Keyboard card. The mode takes its notes on MIDI channel 7.

Multi trig has four settings. Choose one with the keys in the title bar of the Keyboard card:

SettingWhat the keyboard does
ALL TRKeach note plays all six tracks; each track keeps its own arpeggiator
SPLIT KEYkeys from the split point play the tracks from Upper from to T6; keys below play the tracks before it
SEQ STARTeach note restarts the pattern, transposed from C-4
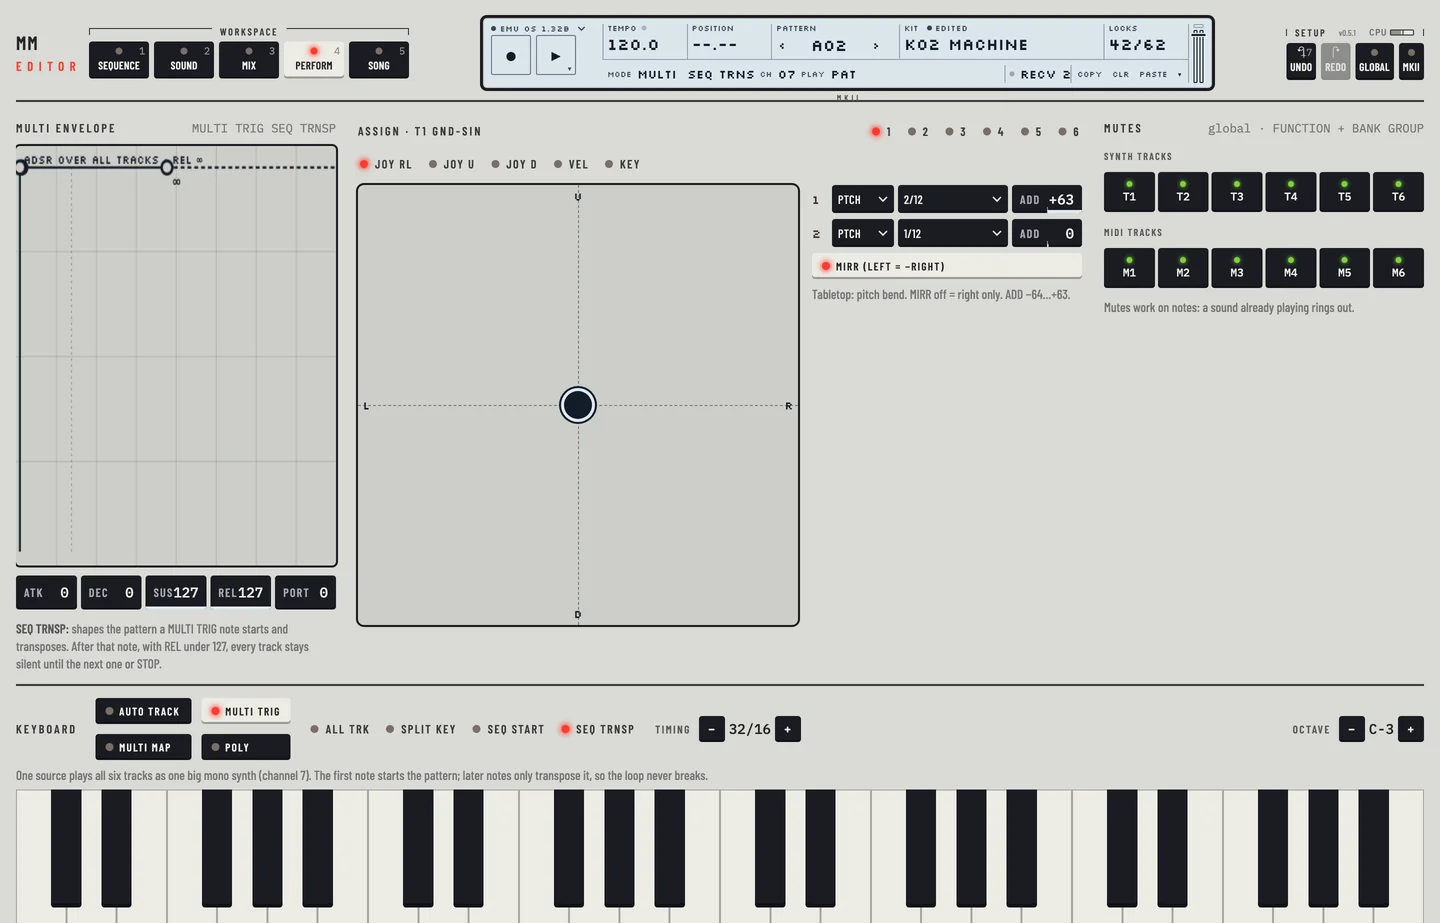
SEQ TRNSPthe first note starts the pattern; later notes only transpose it

In SPLIT KEY mode, drag the split marker on the keyboard to move the split point, and click − or + beside Upper from to set the first track of the upper zone. In the two sequencer settings, the Timing stepper sets when the change happens: DIRECT, or one of the values from 1/16 to 32/16.

Multi envelope

The Multi envelope card of the Perform workspace holds an ADSR that works on top of every track's own envelope. It has the values ATK, DEC, SUS, REL and PORT. Drag the dots in the plot or the value boxes. For no effect, set ATK to 0 and DEC, SUS and REL to 127. SPLIT KEY does not use it.

MULTI MAP MODE

In multi map mode key ranges of the keyboard start patterns. Click Multi map in the Keyboard card. The mode takes its notes on MIDI channel 8.

The Multi map card lists the ranges. Each row has:

  • the range of keys, its upper key set with − and +;
  • the pattern to start, or CUR for the current pattern;
  • OFS, the first step to play, and LEN, the number of steps. LEN needs an offset first;
  • TRN, the transpose;
  • the timing, which waits for a bar line.

Click Split selected range to add a range. Click the × on a row to delete it. The keyboard shows the ranges as bands with the pattern names. The ranges are stored in the global slot.

FIGURE 1

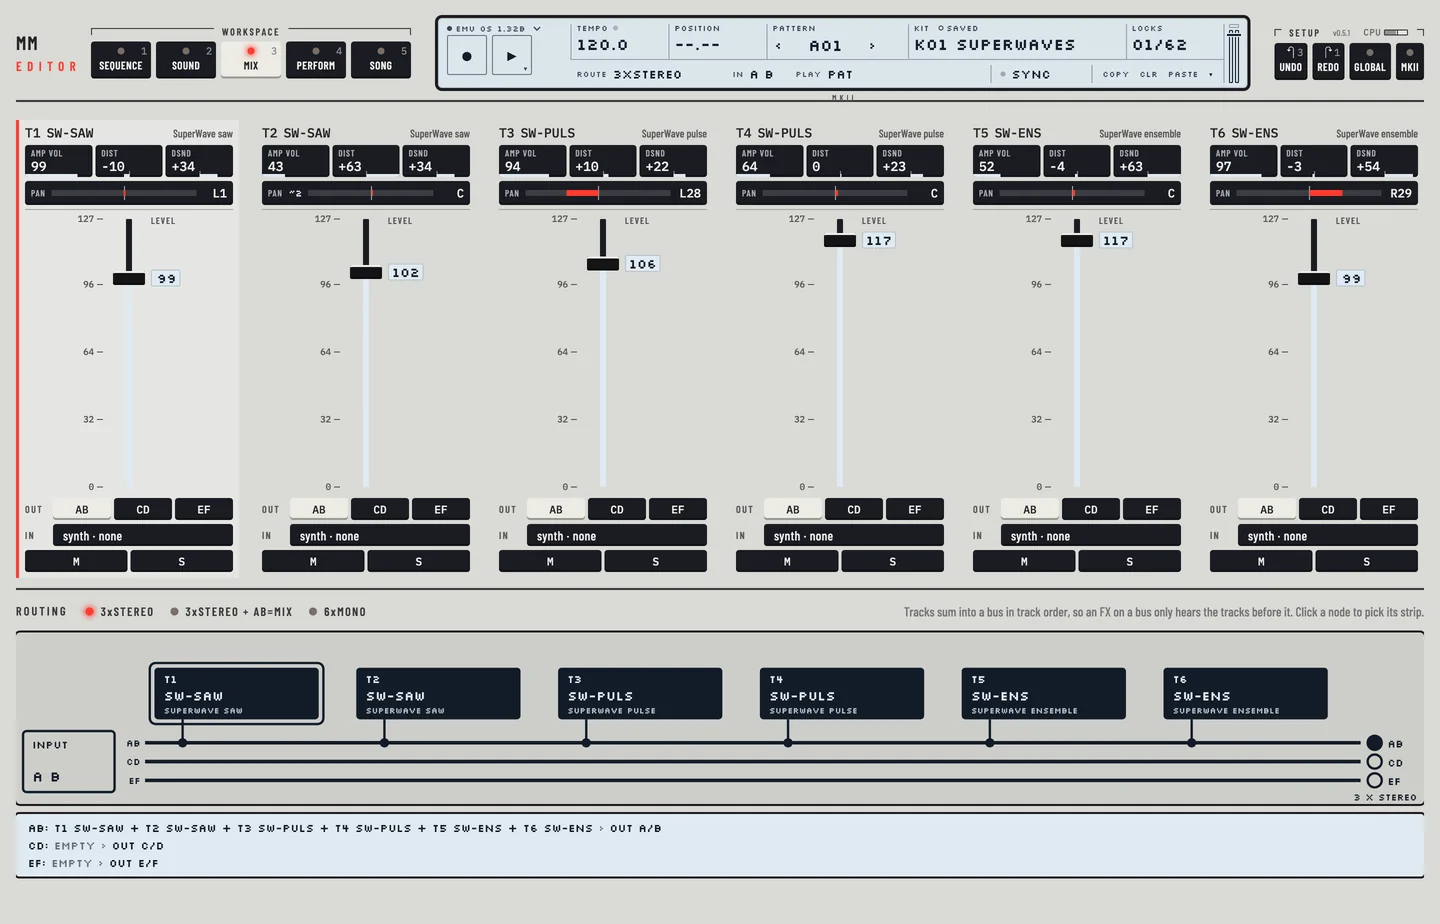
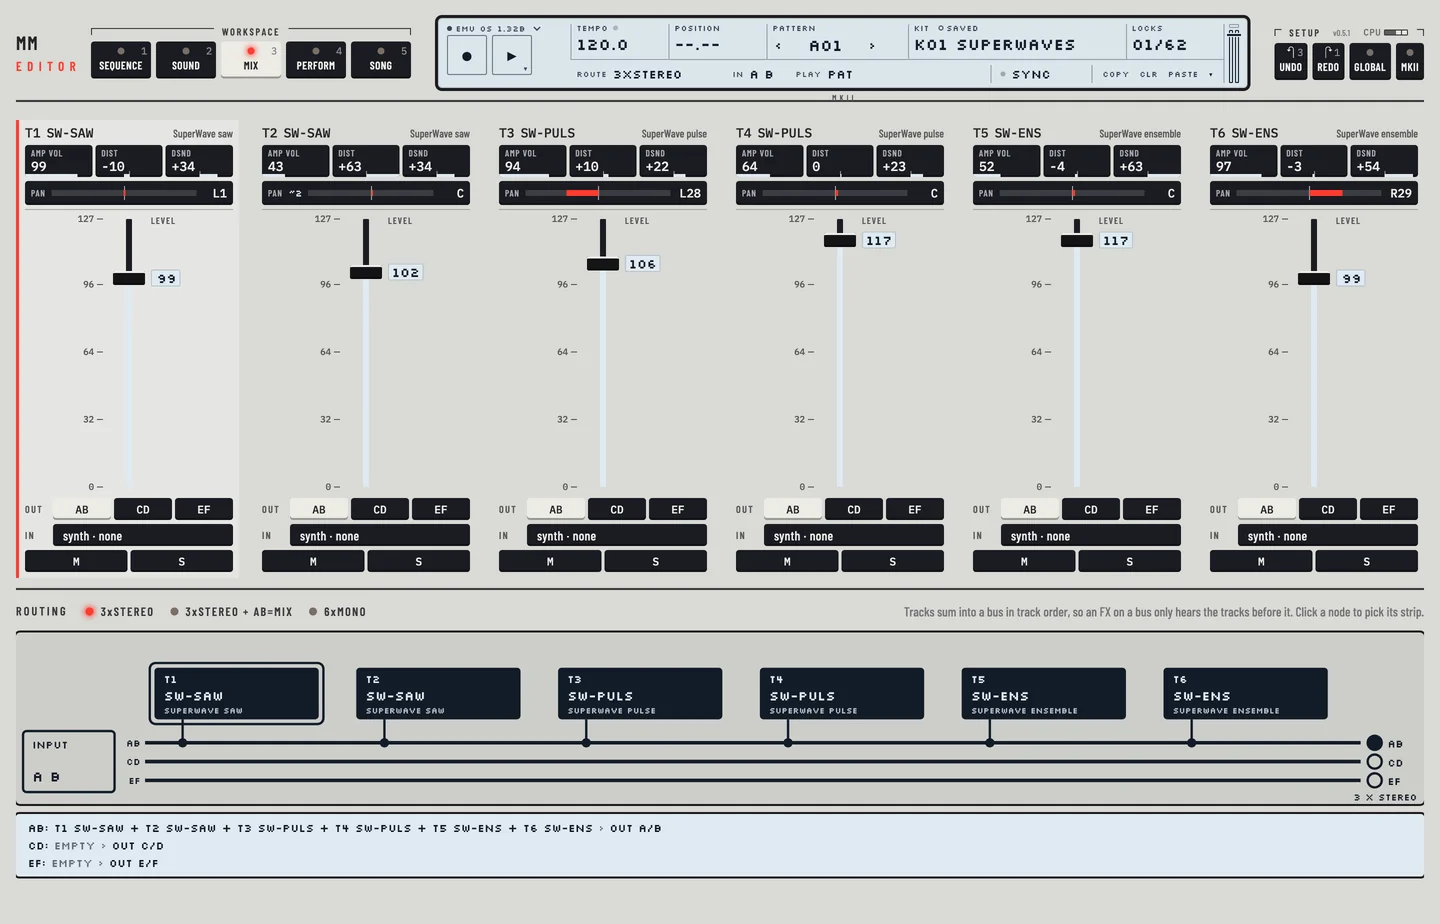
The manual's overview figure shows how the tracks, effects and outputs join. The Mix workspace draws this as a signal graph: a node for each track with its machine, three buses AB, CD and EF below, and the outputs at the right. Click a node to select its strip.

The routing graph
The routing graph
6. Synthesis arrangement: kits and machinesMonomachine Editor

6

Synthesis arrangement: kits and machines

MM manual pp.1-17 to 1-25

Each of the six synth tracks plays one machine. A machine is a kind of sound generator. Its output goes through the same chain on every track: the amp, the filter, the effects and the delay. A kit stores the machines of all six tracks and everything that belongs to them.

ARRANGEMENT

The machines come in families:

FamilyWhat it is
SWAVESuperWave: analogue style oscillators with unison and sub oscillators
SIDthe 6581 chip, with ring modulation and sync
DPRODigiPRO: digital waves, a beat box of drum sounds, and on the MKII a double draw and an ensemble
FM+frequency modulation, in three arrangements
VOa voice with vowels and consonants
GNDbasic sources: silence, a sine and noise
FXmachines that process audio from the inputs or other tracks

Every track also has the same track effects after its machine: an amp with an envelope and distortion, a filter with its own envelope, an equaliser, sample rate reduction and a tempo synchronised delay. Chapter 7 describes them.

KITS

A kit holds the machine of each track and all seven DATA pages of each track, with the LFOs. It also holds the MIDI pages of the six MIDI tracks, the routing and input of each track, the trig settings, the multi envelope and the name.

The editor edits the kit the machine plays. It does not write a value to a stored kit slot until you save.

The ‹ and › keys beside the kit name in the LCD load the kit before or after. When the kit has unsaved edits the machine asks first.

LOADING A KIT

The machine holds 128 kits. The kit library lists them all.

  1. Click the <KIT> field in the LCD. The kit library opens with the 128 slots as a grid.
  2. Click a slot, or move to it with the arrow keys and press [ENTER]. The kit loads. If the current kit has unsaved edits, the editor asks first.
  3. To select a slot without loading it, hold [⌥] and click.

The current kit is marked in the grid, with ok or ed to say whether it is saved or edited. Slots with a name show it; empty slots read EMPTY. [ESC] closes the library.

The kit library
The kit library

Load an empty kit

Load an empty slot to start from nothing. The kit has six tracks with the machine GND-SIN, the sine, and default settings.

SAVING AND NAMING

The small field beside the <KIT> label reads edited while the kit differs from its saved slot on the machine, and saved when it matches. The kit edits are kept in the project of your DAW as well.

To save a kit under another slot:

  1. Click <KIT> on the LCD. The kit library opens.
  2. Hold [⌥] and click a slot. It is selected.
  3. Click Save as and answer the question.
  • Save writes the current kit to its own slot. The slot's old content goes to the machine's UNDO KIT.
  • Save as writes it to the slot you selected, after asking if that slot is used, and the kit becomes that slot's kit. The slot you saved from keeps what it had.

To rename a kit, select its slot and press [F2], or double-click the slot, or click Rename. Type a name of up to 11 characters and press [ENTER]. The editor takes the name as text, so there is no character picker. Press [⌘] + [Z] to take a rename back.

The kit library: Save as under the slot you picked

UNDO KIT

The machine keeps one extra kit, the UNDO KIT, as the first entry of its kit list. It holds the kit lost to the last load or overwrite without saving. The dialogs of the editor name it when an action puts a kit there. The editor's own undo, [⌘] + [Z], works on top of it.

To lose a kit on purpose and bring it back, rename the kit that plays, which is an edit you do not save, then load another kit. The machine keeps the edited kit as its UNDO KIT. To load it:

  1. Open the kit library: click the KIT field on the LCD.
  2. Click UNDO KIT. The lost kit plays again, with its unsaved edits, and the slot it came from becomes the current kit.
  3. Click Save to keep it.

If the current kit has unsaved edits, the editor asks first: the machine does not keep them when it loads the UNDO KIT.

COPY KIT

  1. Open the kit library. Hold [⌥] and click the kit slot to select it.
  2. Click Copy, or press [⌘] + [C / V].
  3. Hold [⌥] and click the slot to copy into, then click Paste.
  4. Press [⌘] + [Z] with the library open. The slot is back as it was.

You can also drag a slot onto another slot to copy it there.

Pasting a kit writes it to the machine as a dump. The machine takes a dump only in its receive state, so the editor passes the dump through the machine's SYSEX RECV, and the sync field of the LCD reads RECV while it does. With a real Monomachine the field reads SEND and a number until you send the edit.

CLEAR KIT

  1. Hold [⌥] and click the kit slot in the library to select it.
  2. Click Clear, or press [DELETE], and answer the question. The slot is cleared.

The slot gets the empty kit: six sine machines and default settings. The machine has no clear message, so the editor writes the empty kit as a dump, through SYSEX RECV. [⌘] + [Z] undoes a paste, clear or rename.

ASSIGNING A MACHINE

  1. Select the track in the rail.
  2. Go to the Kit workspace ([2]).
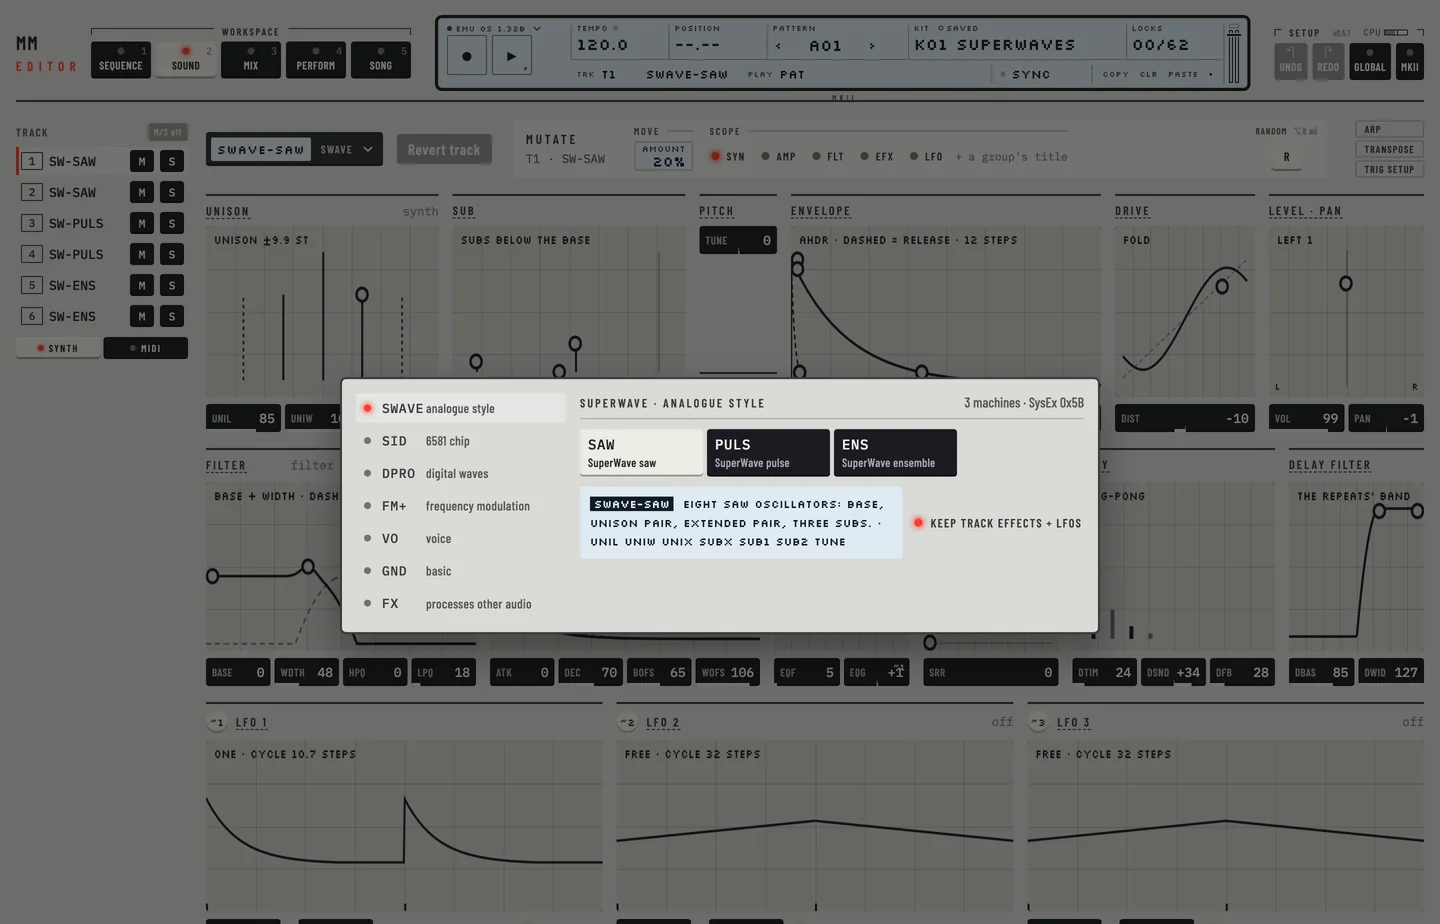
  3. Click the machine name at the head of the workspace. The machine picker opens.
  4. Click a family at the left, then a machine. Move the pointer over a machine to read what it is and what its eight synthesis parameters are called.

The track now plays the machine, with the machine's start values for the synthesis page.

The picker has a toggle, Keep track effects + LFOs. While it is lit, the amp, filter, effects and LFO pages of the track stay as they were. Switch it off to set those pages to their start values too.

The machine picker
The machine picker

COPY MACHINE

  1. Go to the Kit workspace and select the track.
  2. Click <COPY> under the LCD, or press [⌘] + [C]. The machine and all seven DATA pages are copied.
  3. Select another track and click <PASTE>, or press [⌘] + [V]. The track gets the machine and its settings.
  4. Press [⌘] + [Z] to take the paste back.

CLEAR MACHINE

On the Kit workspace, click <CLR>. The track plays GND-SIN again, with every page at its start values.

SETTING THE MIX BUS

A track sends its sound to one or two mix buses: AB, CD and EF. In the Mix workspace each track strip has three Out keys. Click a key to send the track to that bus or to stop sending it. A track can feed two buses. Chapter 18 describes routing.

PARAMETER EDITING

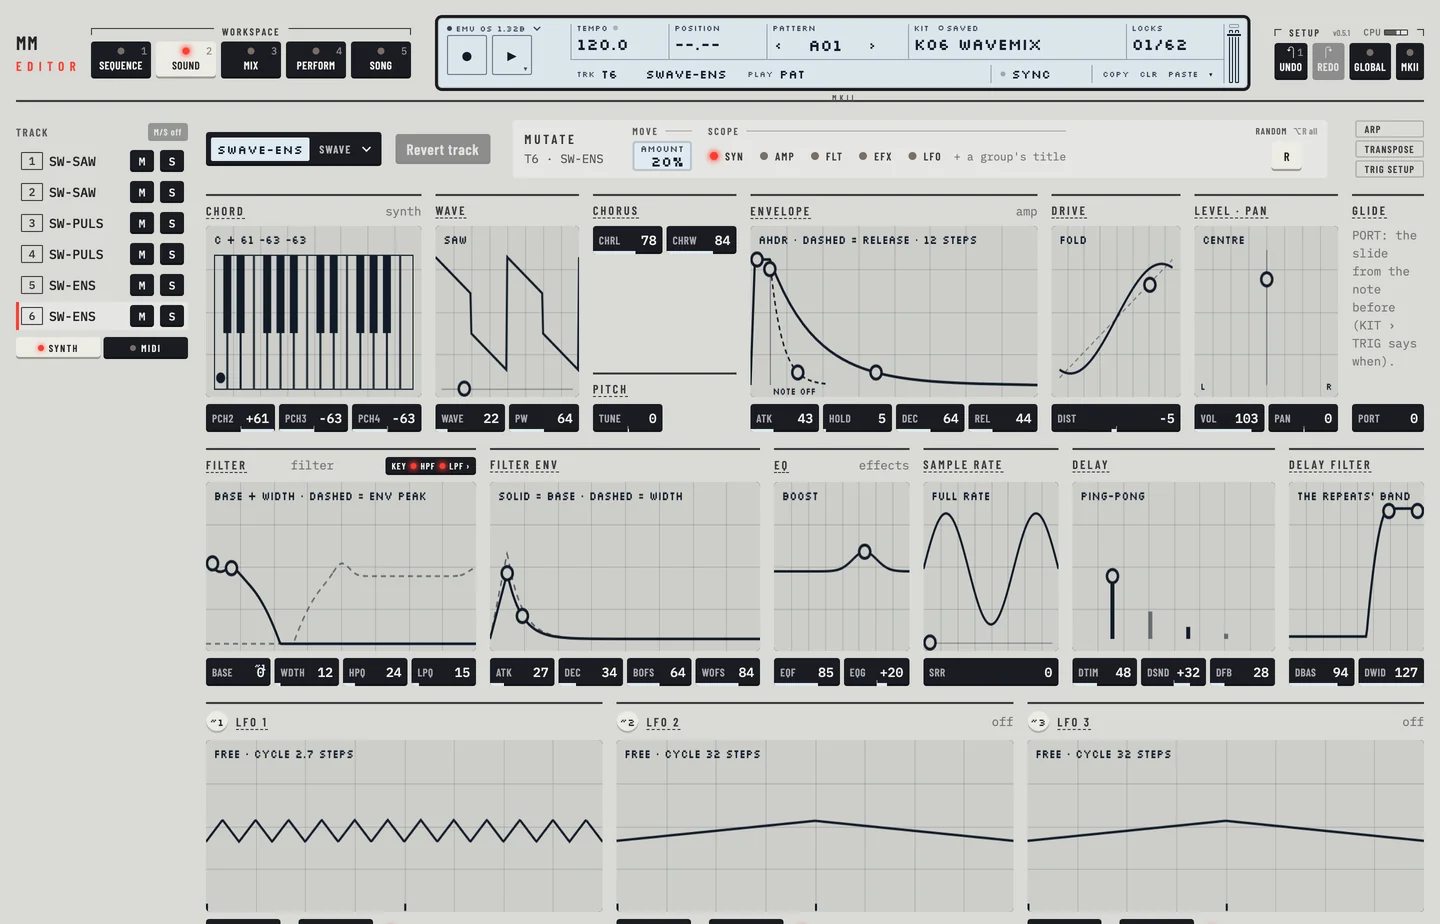
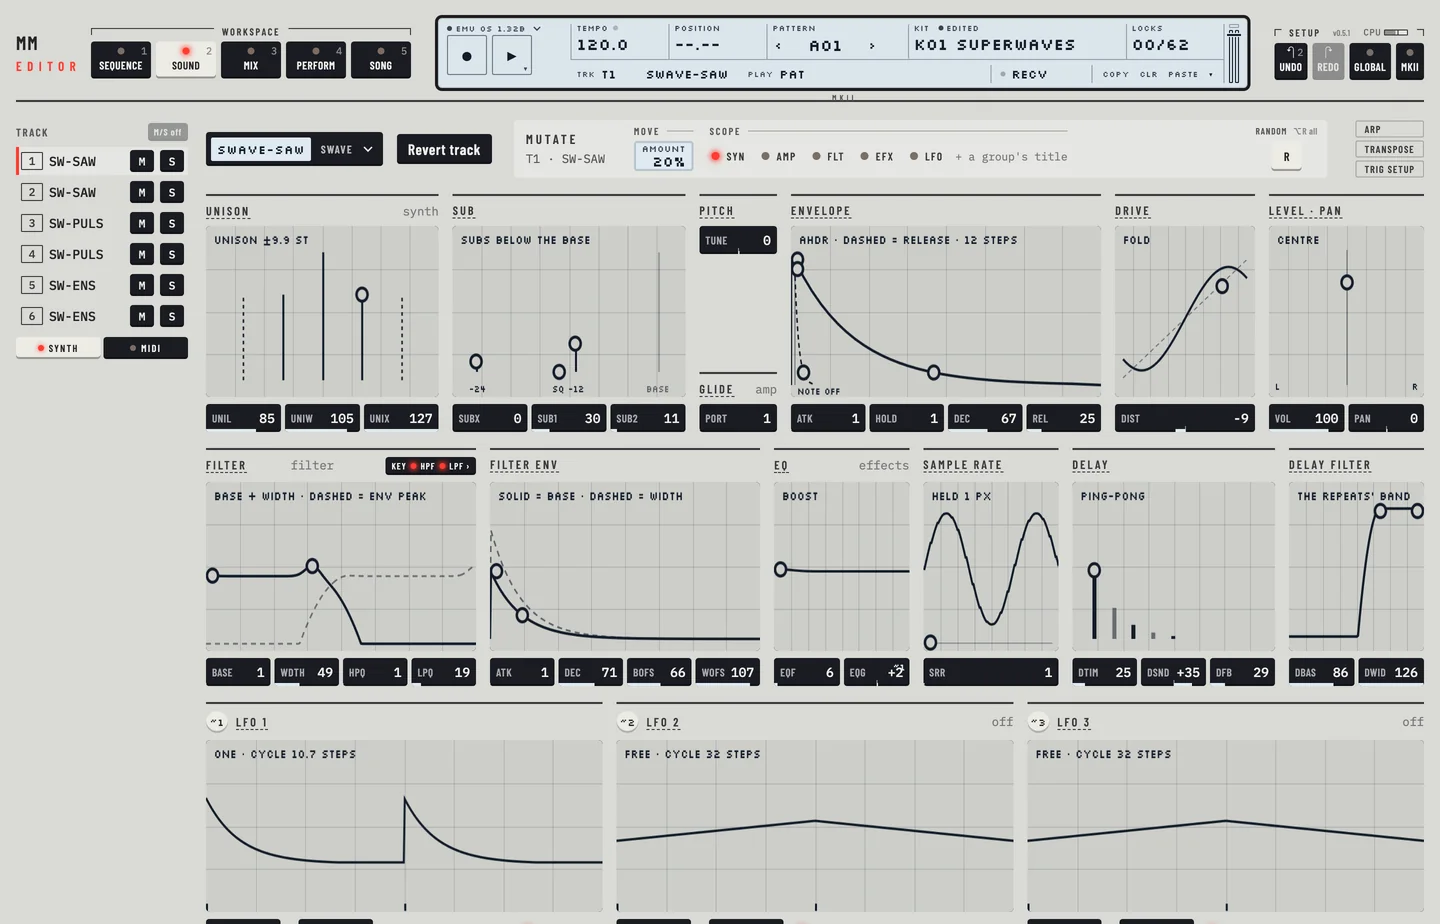
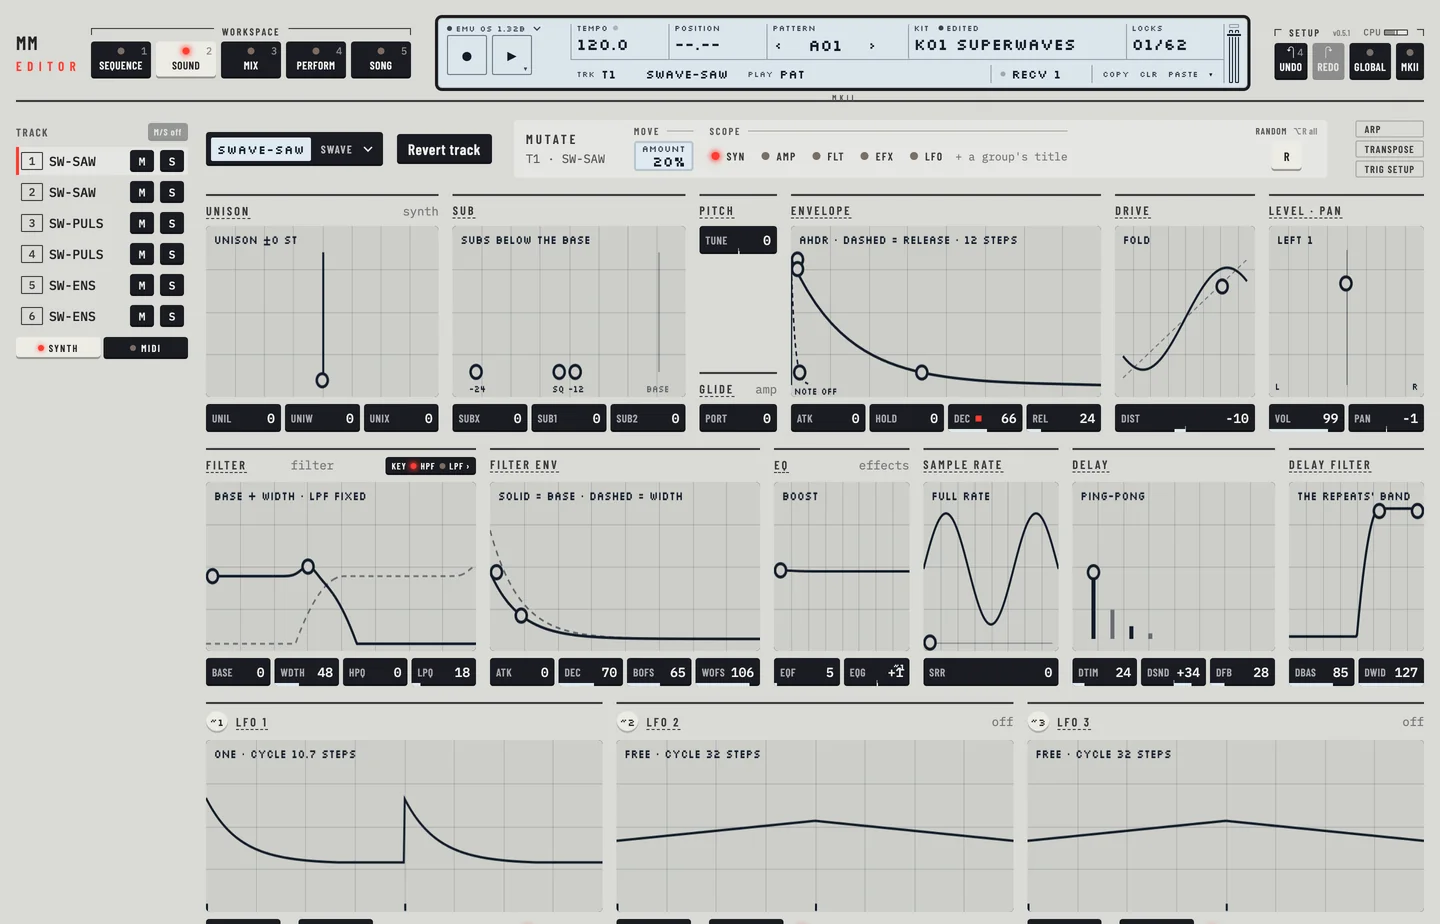
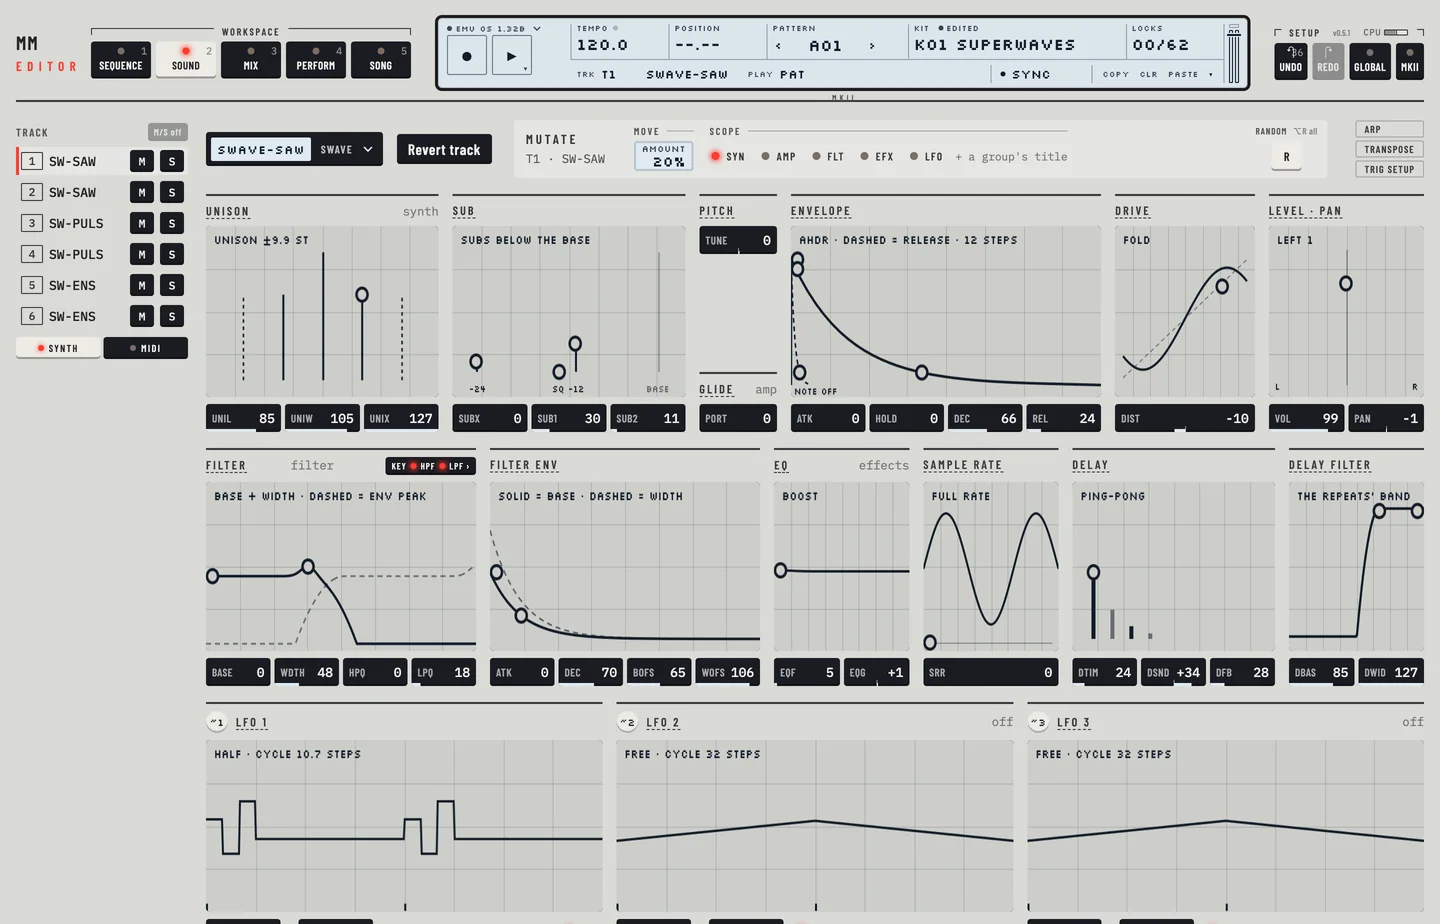
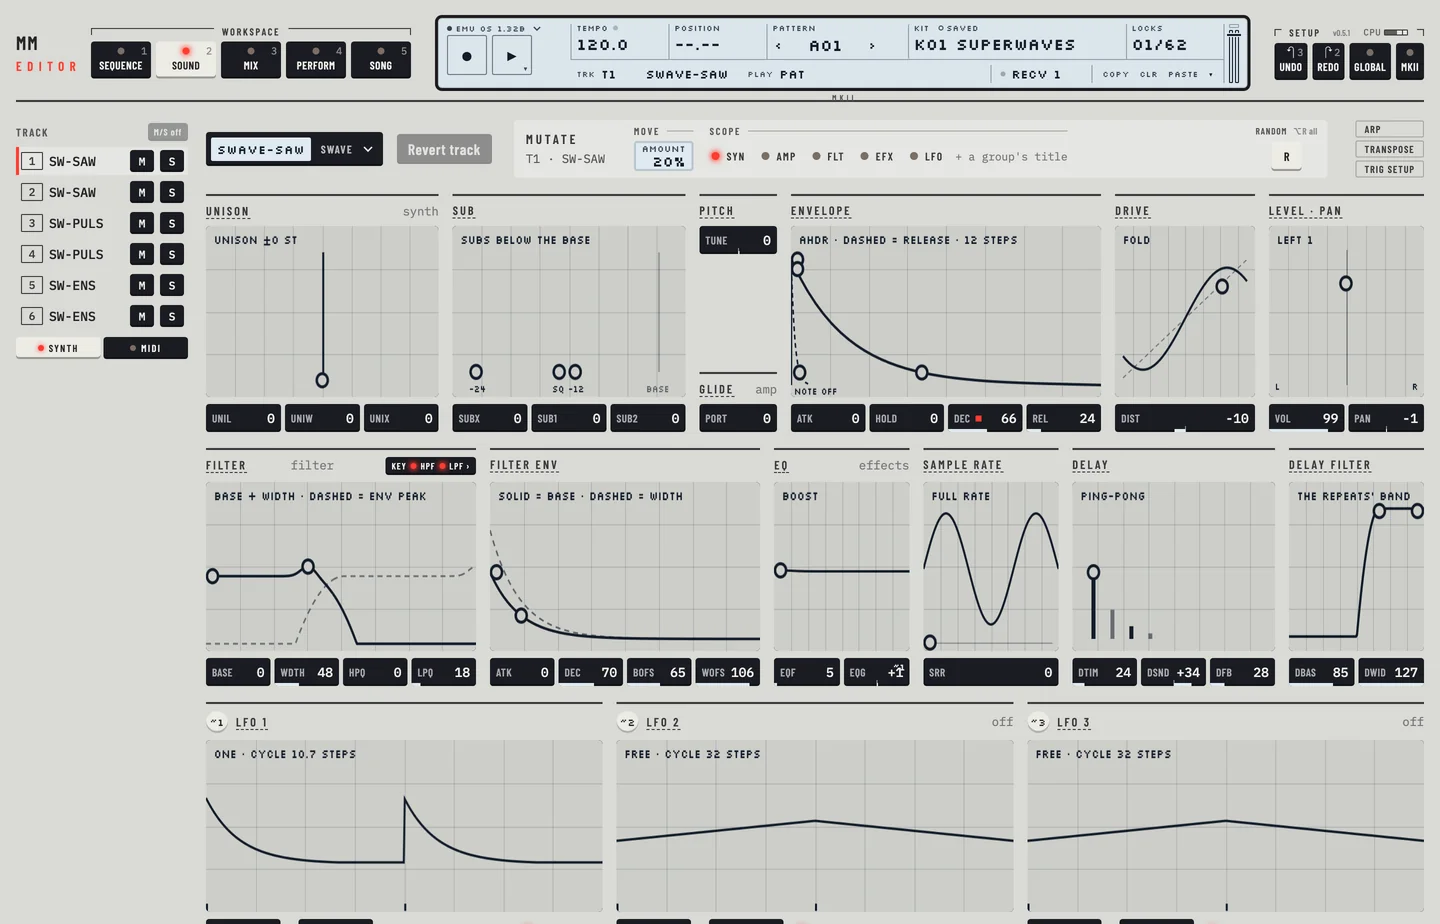
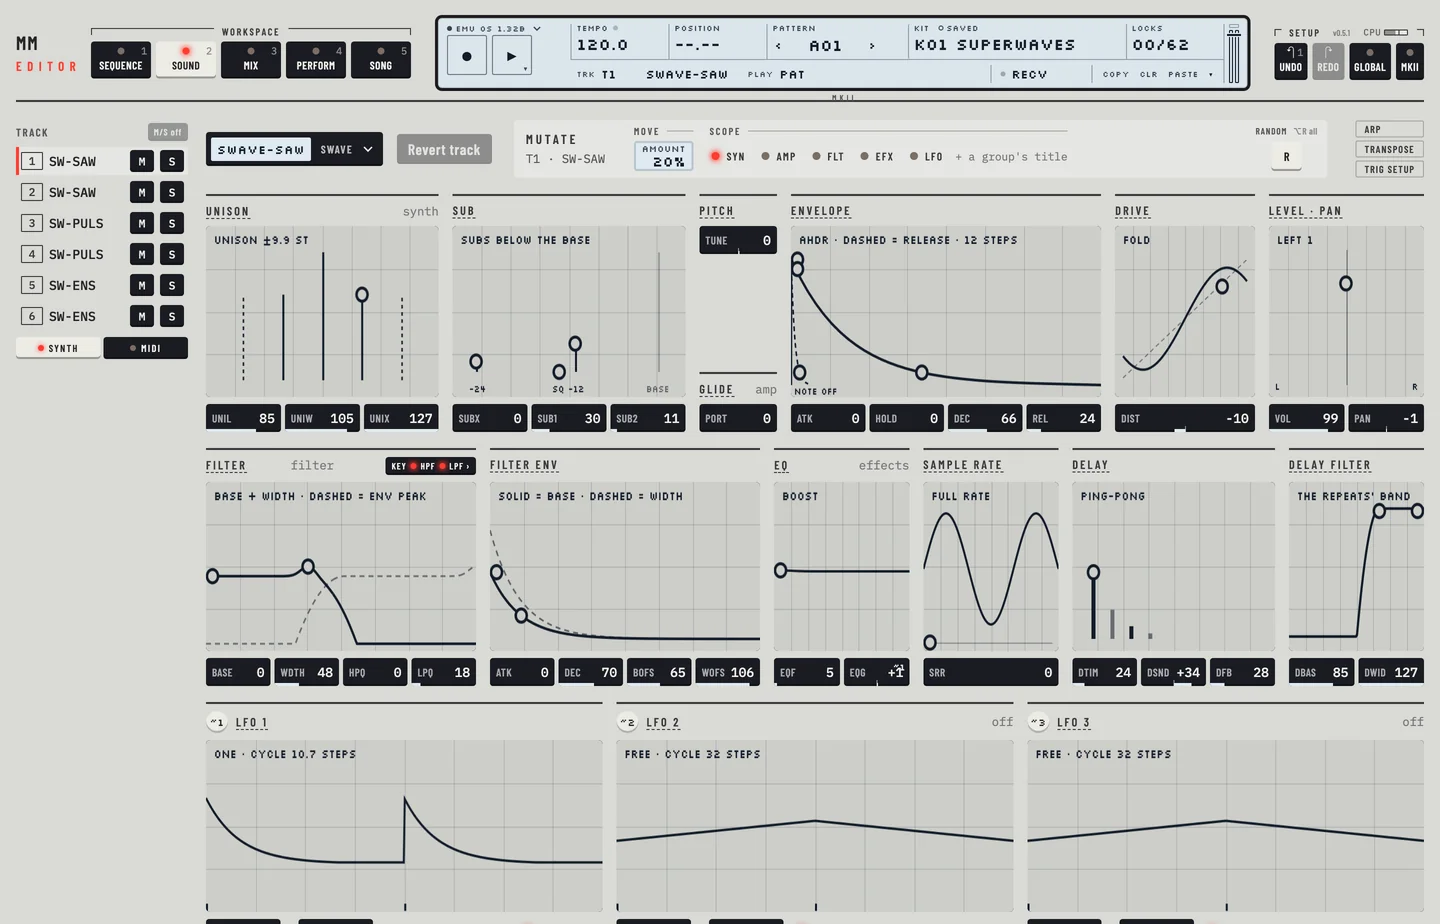
A track has seven pages of eight parameters, 56 in all. The Kit workspace shows them as groups of a few values, with a small picture where the values draw a shape:

  • the synthesis page, whose groups depend on the machine;
  • the amp, filter and effects pages, the same on every machine;
  • the three LFOs at the foot.

Most synth machines have TUNE, a fine tune in semitones, on the synthesis page. The beat box and the FX machines do not.

The Kit workspace
The Kit workspace

Every edit goes to the machine at once, as a controller message, but it is not in the stored kit until you save. The edited mark in the LCD says so.

7. Track effectsMonomachine Editor

7

Track effects

MM manual pp.1-26 to 1-34

The sound of a machine passes through the same chain on every track: amp, filter, equaliser, sample rate reduction and delay. The chain is the same for every machine, so these parameters mean the same on every track. All of them are on the Kit workspace, in the groups under the machine's own. Select the track, press [2] and drag the values.

The amp, filter and effects groups

A value box changes when you drag it, turn the wheel over it or press an arrow key on it. Double-click it for its default. Where a group has a picture, drag the dots in the picture to change the values they stand for.

LEVEL

LEVEL is the track's mix level, at the end of its path. It is the LEVEL fader of the track's strip in the Mix workspace. It can neither be locked on a step nor moved by an LFO. To balance tracks against each other use LEVEL. For movement inside the sound use VOL.

AMP ENVELOPE

The Envelope group of the amp page holds four values.

ValueWhat it sets
ATKthe attack: how long the level takes to rise after a trig
HOLDhow long the level stays up, before the decay starts
DECthe decay: how long the level takes to fall
RELthe release: how long it falls after a NOTE OFF

ATK, DEC and REL are times. Each 8 more about doubles the time. ATK 64 reaches 90 percent of the level in about 0.14 seconds, and DEC 64 falls 20 dB in about 0.55 seconds. DEC 127 holds the level until the NOTE OFF, and REL 127 never fades. HOLD counts in steps of the pattern: HOLD 8 is one step, so it follows the tempo.

The picture shows the shape as the machine plays it, with the release dashed. Drag its dots to set the values.

DISTORTION

DIST is in the Drive group of the amp page. Drag the dot in its picture up or down, or use the value box. Above 0 it overloads the sound. Below 0 it adds headroom: the sound is quieter and cleaner.

TRACK VOLUME

VOL is the volume of the voice. It is in the Level · pan group of the amp page, and it is the trim at the top of each strip in the Mix workspace, as AMP VOL. VOL comes before LEVEL in the path. Unlike LEVEL you can lock it on a step and an LFO can move it.

PAN

PAN places the track in the stereo field, from L64 to R63. It is in the Level · pan group and in each strip of the Mix workspace.

  1. Click the Mix tab, or press [3].
  2. Drag the PAN bar of a strip sideways. The box at its right reads, for example, L28 or R28, and a red bar shows how far the track lies from the centre.
  3. Double-click the bar for the centre.
  4. Press [⌘] + [Z] to put the pan back where it was.
The PAN bars of the strips in the Mix workspace

PORTAMENTO

PORT sets how long the pitch glides from the note before to the next note. It is in the Glide group of the amp page and in the Trig setup plate of the Pattern workspace. In the plate, Port chooses when it glides: ALWAYS glides to every note, and LEGATO glides only between notes that overlap.

FILTER

The filter of each track is a 24 dB filter built from a high-pass and a low-pass. The Filter group of the filter page holds four values:

ValueWhat it sets
BASEthe cutoff of the high-pass
WDTHthe gap from the high-pass up to the low-pass
HPQthe resonance of the high-pass
LPQthe resonance of the low-pass

In the picture, drag the dots sideways for BASE and WDTH and up for HPQ and LPQ. A dashed line shows where the filter envelope takes the filter.

FILTER ENVELOPE

The Filter env group holds ATK and DEC, the attack and decay times of the filter envelope, and BOFS and WOFS, how far the envelope moves BASE and WDTH: -64 to +63, 0 not at all.

The screen has two parts. The large part is for BOFS and WOFS: a line for each, solid for BOFS and dashed for WOFS, with -64 at the left edge, 0 on the vertical line and +63 at the right edge. Drag a dot left or right; it covers the whole range. The small square at the right shows the shape of the envelope only, with a dot for ATK and a dot for DEC.

FILTER TRACKING

Both filters follow the pitch of the notes. With tracking off a filter stays where BASE and WDTH put it, whatever note plays: under a low LPF the high notes go quiet, and a high HPF lets them through.

The title of the Filter group shows the state: KEY with a lamp for HPF and one for LPF, lit while that filter follows the notes. The label of the filter's screen says which filter is fixed. The switches are on the Perform workspace, in the Assign card.

  1. Click KEY in the title of the Filter group. The Perform workspace opens on the KEY tab of the Assign card, for the same track.
  2. Click HPF tracks keys or LPF tracks keys. A lit key means the filter follows the keys. Click it and the key goes dark: that filter stops following the notes, and the KEY title of the Filter group on Kit shows it off.
  3. Press [⌘] + [Z] to switch it on again.
Key tracking in the Filter group

EQ

The EQ group holds EQF, the frequency of the equaliser band, and EQG, its gain. A negative EQG cuts the band and a positive one boosts it.

SAMPLE RATE REDUCTION

SRR, in its own group, reduces the sample rate of the track for a lo-fi sound. Drag its dot, or the value box.

DELAY

Each track has its own delay, synchronised to the tempo. The Delay group holds three values and the Delay filter group two.

ValueWhat it sets
DSNDthe send into the delay. A negative value keeps the stereo image, a positive value is ping-pong, 0 is no delay
DTIMthe delay time, in 256th notes
DFBthe feedback. The editor warns above 64
DBASthe base of the filter in the feedback path
DWIDthe width of that filter

DSND is also in the trim row at the top of each strip in the Mix workspace, with VOL and DIST.

8. Low frequency oscillatorsMonomachine Editor

8

Low frequency oscillators

MM manual pp.1-35 to 1-37

Each synth track has three LFOs. An LFO moves one parameter of the track, or of the pitch, in a repeating shape. The three LFOs of a track are independent, and an LFO can move a parameter of another LFO.

The LFOs are the bottom row of the Kit workspace. Each has its own group, titled LFO 1, LFO 2 and LFO 3. A group holds, from the top:

  • a picture of the LFO across the pattern (two bars at least), with ticks where the LFO is triggered and the locks of the track on the LFO's parameters shown, see "LFO and parameter locks" below;
  • the target: PAGE and DEST selects, with the TRIG keys beside them;
  • eleven keys for the shape;
  • four value boxes: MULT, SPD, INTL and DPTH.

The group is marked off while its depth is 0.

The LFO groups
The LFO groups

LFO

An LFO needs a target. Its target is a page and a destination on that page.

Choose a target

  1. Select the track and go to the Kit workspace ([2]).
  2. In the LFO's group, open the PAGE select. It lists PTCH, SYN, AMP, FLT, EFX, LF1, LF2, LF3 and MIDI.
  3. Open the DEST select and choose the parameter. It lists the parameters of the page. For PTCH it lists eight ranges: 1/12, 2/12, 7/12, 1OCT, 2OCT, 4OCT, 8OCT and 16OCT. For LF1 to LF3 the parameters are those of the other LFOs. For MIDI they are the parameters of the MIDI page.
  4. Set DPTH, the depth, above 0.

Changing the page sets the destination back to the first entry.

Route by dragging

The key marked ~ and the LFO's number, at the head of the group, is a handle. Drag it onto any value box on the page. The value boxes that can be a target are marked while you drag. Drop the handle on one. The editor sets PAGE and DEST to that value, and gives the depth a start value of 32 if it was 0. A note names the LFO and the value it now moves.

TRIG

The TRIG keys set how the LFO starts.

KeyWhat the LFO does
FREEruns on without being restarted
TRIGstarts again on each trig
HOLDholds the value it has when a trig comes
ONEplays one cycle after a trig
HALFplays half a cycle after a trig

Which steps trigger the LFO is set in the sequencer: see "LFO trigs" below.

WAVE

Eleven keys, each with a small picture, choose the shape. They are, in order: TRI, ITRI, SAW, ISAW, SQR, ISQR, EXP, IEXP, RMP, IRMP and RND. Click a key to choose a shape. The picture of the LFO redraws.

MULT

MULT multiplies the speed. Its values are 1X, 2X, 4X, 8X, 16X, 32X and 64X.

SPD

SPD sets the speed of the LFO. MULT multiplies it. Drag the value box.

INTL

INTL is the interlace of the LFO. Drag the value box.

DPTH

DPTH is the depth: how far the LFO moves its target. At 0 the LFO does nothing and its group reads off. Drag the value box.

LAYERING

Two LFOs can move the same target, and their movements add. A value box that an LFO moves shows a small badge, ~ and the number of the LFO, for example ~1 or ~12 when two LFOs move it. Hover over the badge to read which LFOs these are.

LFO AND PARAMETER LOCKS

The picture of an LFO follows the locks of the selected track. A lock on TRIG, WAVE, MULT, SPD, INTL or DPTH of this LFO (set in the lock lane of the Pattern workspace, page LF1, LF2 or LF3) changes the LFO for the length of its step only: the LFO runs on at that step's speed, in that step's shape and depth, and goes back to its own values at the next step. The picture draws that. A step with such a lock is shaded, its tick is taller, and the label under the title names the locked parameters. A lock on a step that has no trig does nothing, and the picture ignores it. The picture is drawn again when you open the Kit workspace or change a value there.

LFO TRIGS

The sequencer triggers the LFOs on its own. A trig with its LFO trig on triggers the LFOs of the track at that step. It matters for the TRIG, HOLD, ONE and HALF keys. In the Pattern workspace right-click the step and choose Envelopes, then LFO, to switch it. A note without its LFO trig shows the letters of the envelopes it does fire.

SHARED LFOS

A MIDI track shares its three LFOs with the synth track of the same number. M1 shares with T1, and so on. An LFO that has PAGE set to MIDI moves the MIDI page.

On a MIDI track, the Kit workspace shows the MIDI page, and in the place of the LFO groups a note says which synth track they belong to. Click Open T1 LFOs (with the number of the track) to go to them.

9. Additional kit settingsMonomachine Editor

9

Additional kit settings

MM manual pp.1-38 to 1-44

Besides the sound of each track, a kit holds settings for how the tracks are played: what the joystick, the velocity and the key position control, which track a trig also plays, how the portamento and legato behave, and how a single keyboard drives several tracks. The assign settings and the multi trig, multi map and multi envelope settings are on the Perform workspace. Press [4], or click the Perform tab. The trig track settings are on Pattern.

ASSIGN

Assign lets a performance control move a parameter of the track. Each control has two rows. A row names a page, a parameter on that page, and an amount to add.

The Assign card follows the track selected in the rail. Its header shows the track and its machine, for example Assign · T2 SWAVE-1. The keys 1 to 6 in the header choose another track.

  1. Press [4].
  2. Click a tab to choose the control: JOY RL, JOY U, JOY D, VEL or KEY.
  3. In a row, choose the page: SYN, AMP, FLT, EFX, LF1, LF2, LF3 or PTCH.
  4. Choose the destination. The list holds the parameters of that page for the machine on the track.
  5. Set ADD, from −64 to +63, by dragging the box up or down. Double-click it to return to 0.
  6. Press [⌘] + [Z] to take back the change.
The Assign card with the joystick

Copy, clear and paste an assign

The LCD keys Copy, Clr and Paste act on all the assign tabs of the track while Perform is open.

  1. Click Copy, or press [⌘] + [C].
  2. Choose another track in the Assign header.
  3. Click Paste, or press [⌘] + [V]. The track takes all the tabs of the copy.

Clr empties the tabs of the track. [⌘] + [Z] takes back a paste or a clear.

JOYSTICK

The tabs JOY RL, JOY U and JOY D hold the joystick's three directions: right and left together, up and down. Beside the rows the card shows a stick. Drag it with the pointer to try the assignment. It springs back to the middle when you let go, unless HOLD or RANDOM under the stick is lit. HOLD keeps the stick where it is until you click it again. RANDOM moves the stick by itself inside the rectangle set with REGION, at the Speed you choose. STOP and Panic end it. The stick sends the same MIDI as your hand, so the machine receives it at the same rate. On the tabletop models JOY RL is pitch bend, JOY U the mod wheel (CC 1) and JOY D the breath controller (CC 2).

MIRR is on the JOY RL tab. When it is lit, a move to the left acts as the same move to the right with the sign reversed. When it is dark, only the right half of the movement acts.

VELOCITY

The VEL tab assigns the velocity of the notes you play to a parameter. The sequencer always plays its notes at velocity 100, so a velocity assign only responds to the keys.

KEY TRACKING

The KEY tab assigns the key you played last to a parameter. The value is low for the lowest key and near its maximum for the highest.

Two keys on this tab, HPF tracks keys and LPF tracks keys, switch the key tracking of the high-pass and low-pass filters. KEY in the title of the Filter group on Kit shows the two switches and opens this tab. Chapter 7 describes filter tracking.

TRIG TRACK SETTINGS

These settings belong to one track. They sit in the Trig setup tab, in the header of the lock lane on Pattern. A MIDI track has the MIDI page tab in its place (see chapter 16).

  1. Press [1].
  2. Select a synth track in the rail.
  3. Click Trig setup above the lock lane. The keys of the tab appear in the rail.
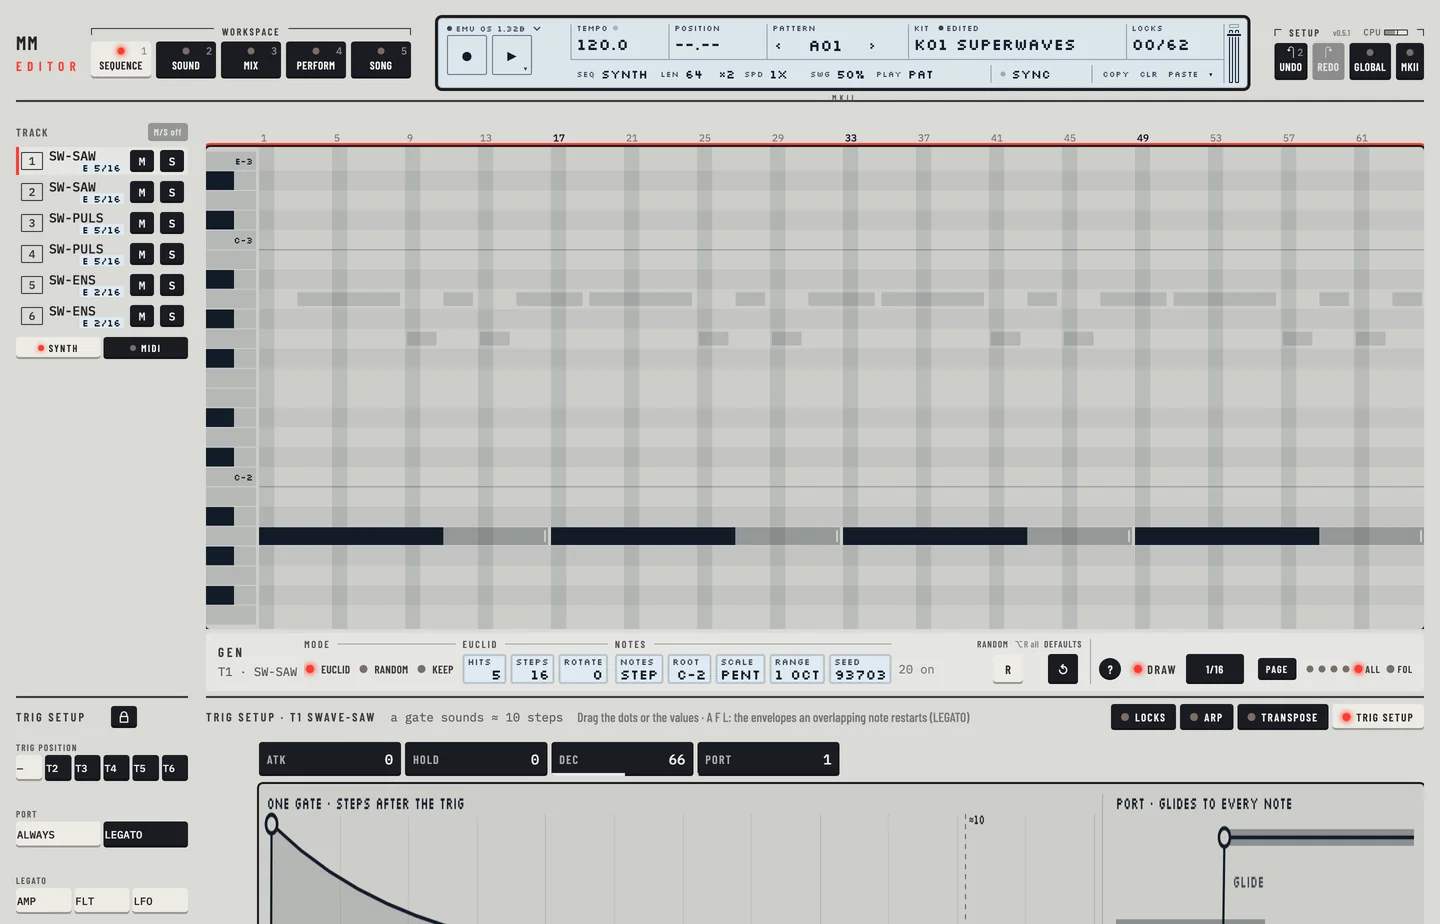
The Trig setup tab
The Trig setup tab

Trig position chooses a second track that also plays this track's notes. The keys are T1 to T6, without the track itself, and a dash for none. The Mix workspace draws the link as a dotted cord labelled TRIG and the target track. On Pattern and Kit, the number of a track that plays only because another track forwards its trig lights in blue; a track with its own trig lights in the usual colour.

Port sets how the portamento works.

  • ALWAYS: the track glides to every note.
  • LEGATO: the track glides only between notes that overlap.

To change it, click the other Port key. [⌘] + [Z] takes the change back.

Legato has three keys, AMP, FLT and LFO. A lit key means that envelope fires again when a note starts while the one before still sounds. With all three lit every note retriggers, which suits a bass. With all three dark the notes join smoothly, which suits a lead.

The value boxes ATK, HOLD, DEC and PORT above the picture are the track's amp envelope and glide amount. The picture draws one gate and the glide between two notes. Drag its dots to change the values.

MULTI TRIG

In multi trig mode one source plays all six tracks, as a single large mono synth.

  1. Press [4].
  2. In the Keyboard bar, click Multi trig.
  3. Click one of the four modes: ALL TRK, SPLIT KEY, SEQ START or SEQ TRNSP.
  4. Play the keyboard on the page, or send notes on the multi trig channel. The second line of the LCD shows the channel in the CH field. You set the channel in GLOBAL (chapter 19).
The Perform workspace in multi trig mode

ALL TRK

Every note plays on all six tracks. Each track keeps its own arpeggiator.

SPLIT KEY

The keyboard splits in two. Keys from the split point up play the tracks from Tn to T6. Keys below play T1 to the track before Tn.

  1. Click SPLIT KEY.
  2. Click − or + beside Upper from to choose Tn.
  3. Drag the split marker on the keyboard to choose the split key. The marker reads, for example, SPLIT C-4 · T3-6 above.

In split mode the multi envelope does not act.

SEQ START

Each note you play restarts the pattern. The pattern is transposed by the distance of the note from C-4.

SEQ TRNSP

The first note you play starts the pattern. Later notes only transpose it, so the loop never breaks.

Timing

SEQ START and SEQ TRNSP show a Timing stepper. Click − or + to choose DIRECT, 1/16, 2/16, 4/16, 8/16, 16/16 or 32/16. With DIRECT the note acts at once. With another value it acts at the next division of that length, and the page says so when you play.

MULTI ENV

The Multi envelope card holds an ADSR that acts on top of every track's own envelope. Notes on the multi trig channel set it going. What it shapes depends on the multi trig mode of the kit. The title of the card names the mode, and the line under the boxes says what the envelope does in it.

  • ALL TRK: it shapes the notes of the multi trig channel, which play all six tracks.
  • SPLIT KEY: it has no effect.
  • SEQ START and SEQ TRNSP: it shapes the pattern that a multi trig note starts.

Before the first multi trig note the envelope leaves the tracks alone. After one, its level holds every track. With REL under 127 every track is silent once that note is let go, its own notes too, until the next multi trig note or STOP. In SEQ START and SEQ TRNSP the pattern goes silent with them. Panic ([⌘] + [.], or Panic in the transport menu) sends STOP and opens it again.

To hear the envelope from the editor, click Multi trig in the Keyboard card: the keys then play on the multi trig channel. While the keys play another mode, the card says so.

The multi envelope in ALL TRK

The five boxes are ATK, DEC, SUS, REL and PORT. PORT is the portamento for all tracks. The plot above them shows the envelope: it rises for ATK, falls to the SUS level for DEC, holds, then falls to nothing for REL. Each dot sits on the curve. Drag them to change ATK, DEC with SUS, and REL. A REL of 127 never fades: the level runs on to the edge of the plot, marked ∞. Drag the REL dot to the end of its stage for 127.

10. The pattern sequencer: pattern operationMonomachine Editor

10

The pattern sequencer: pattern operation

MM manual pp.1-45 to 1-47

The sequencer plays patterns. The Monomachine holds 128 patterns, A01 to H16, in eight banks of 16. A pattern has twelve tracks: six synth tracks and six MIDI tracks. It is up to 64 steps long. The editor shows the patterns on the Pattern workspace. Press [1], or click the Pattern tab.

BASIC PATTERN OPERATION

PATTERN SELECTION

The pattern field of the LCD shows the pattern that plays. Click ‹ or › beside it to go to the pattern before or after. For any other pattern, open the pattern chooser.

  1. Click the pattern field, or focus it and press [ENTER]. The chooser opens.
  2. Click a bank letter, A to H, or press the letter. The row of 16 slots shows that bank.
  3. Click a slot. Each slot shows the pattern name, its length and its kit, for example 32 · K01. A slot with no data reads EMPTY.
The pattern chooser
The pattern chooser

While the machine is stopped, a click switches to the pattern at once. While it plays, the machine switches at the end of the pattern that plays. The slot is marked as queued, and the pattern field of the LCD blinks with the name of the pattern that waits. The button in the row above the slots reads Go when the machine is stopped and Queue when it plays.

To switch at once while the machine plays, hold [⇧] and click the slot, or click Now.

Press [ESC] to close the chooser.

PATTERN CHAINING

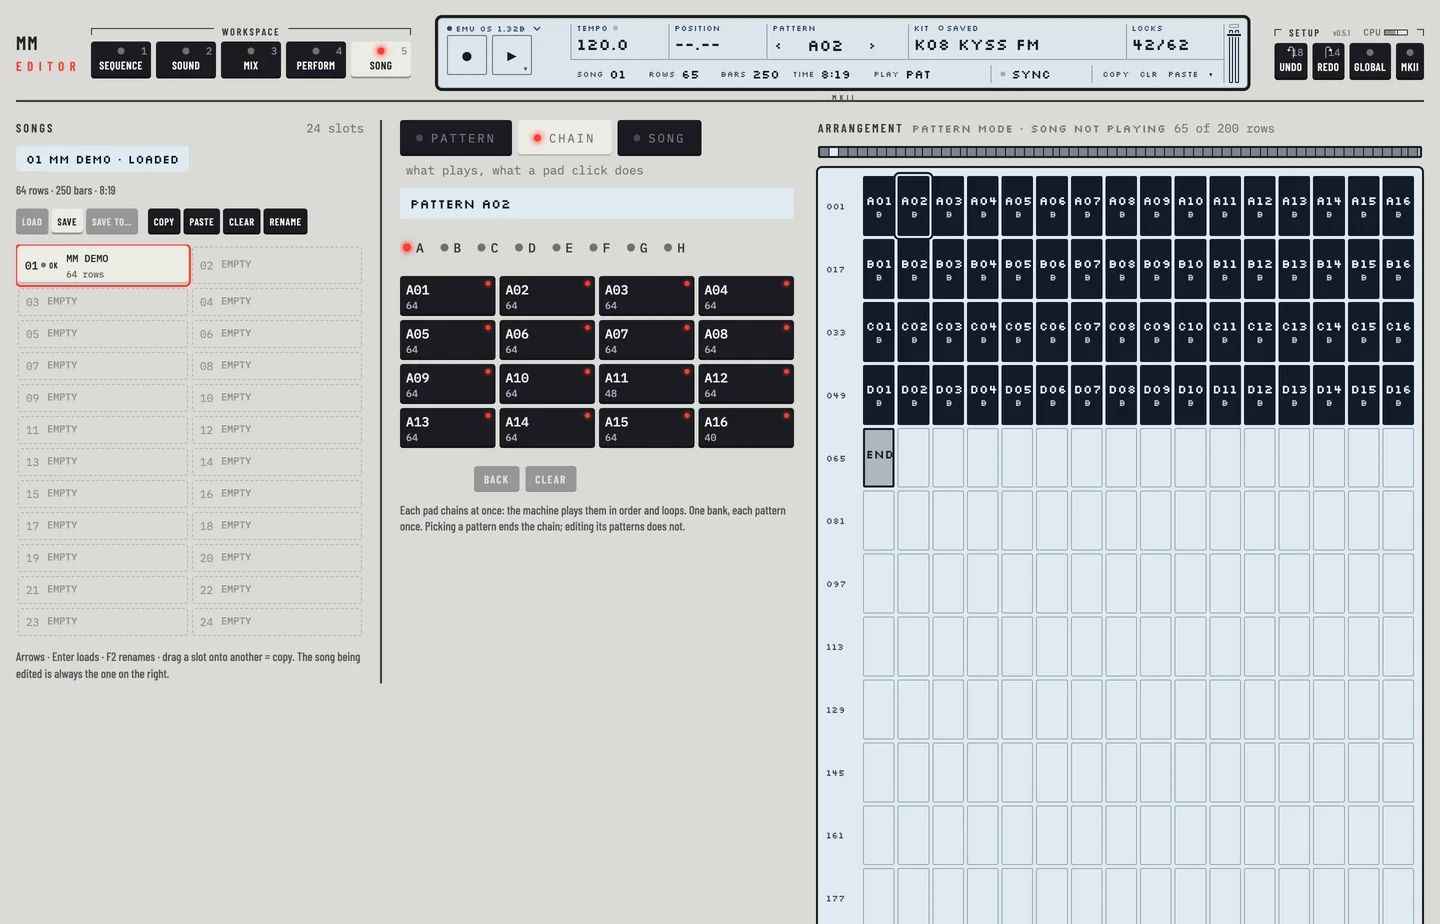
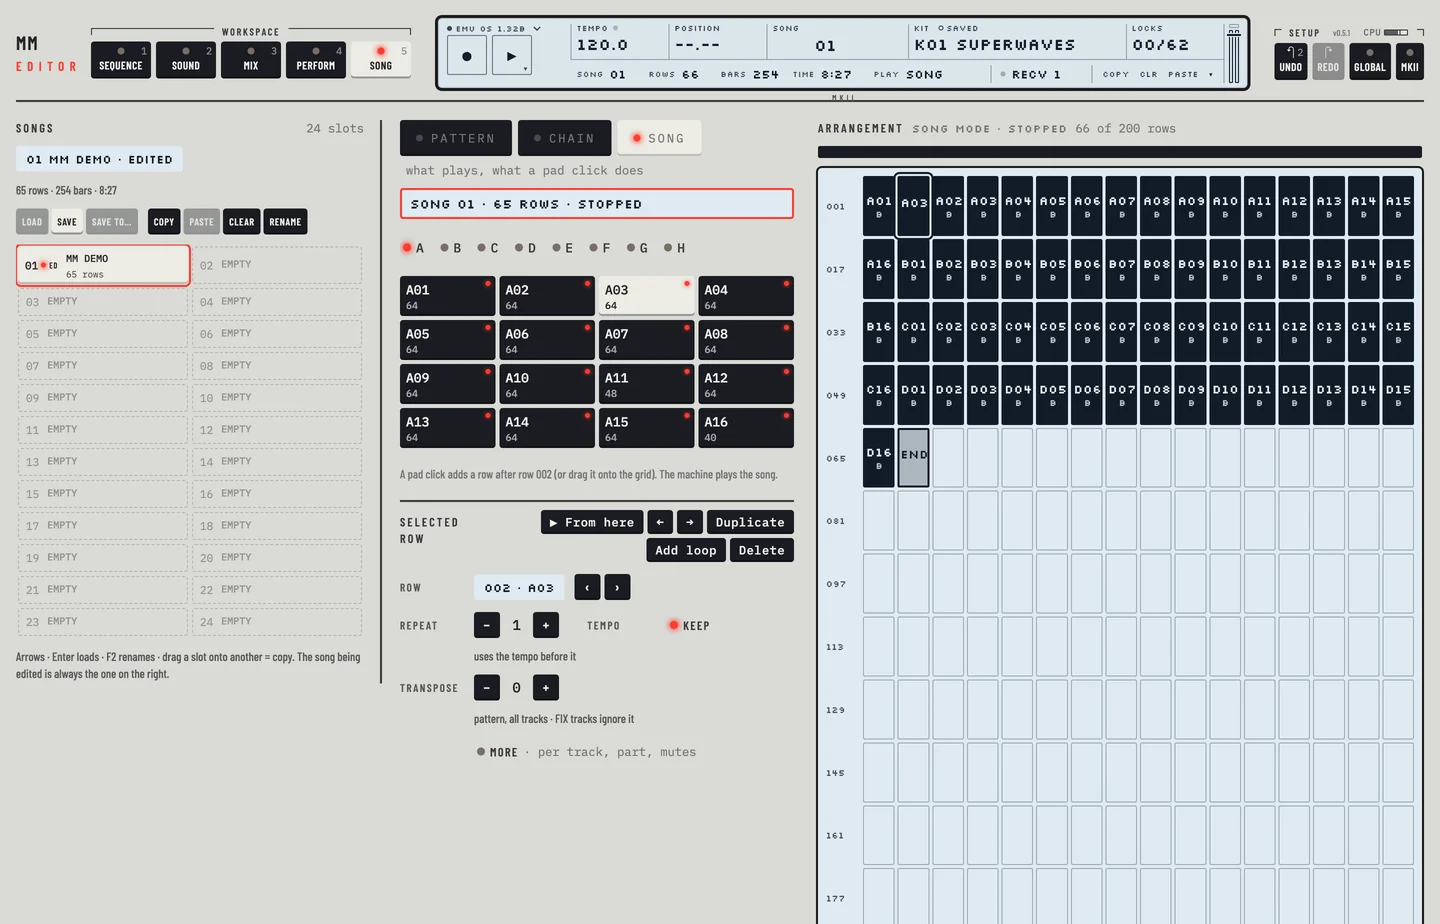
A chain plays patterns of one bank one after the other, each once, and then starts again. You build a chain on the Song workspace, on the same pattern palette that builds a song.

  1. Press [5].
  2. Click CHAIN over the pattern palette.
  3. Click a bank, A to H.
  4. Click the pads in the order to play. Each pad shows its number in the chain, up to 16.

The machine plays the chain as soon as there are two pads. If it plays, the chain starts at the end of the pattern that plays. If it is stopped, [SPACE] starts it at the first pad. The line over the bank letters reads CHAIN and the patterns in order, for example CHAIN A03»A05.

Pads A02 and A03 chained on the Song workspace
  • Click a numbered pad to take it out of the chain.
  • Back takes out the last pad.
  • Clear ends the chain.

Choosing a pattern from the pattern field or the chooser also ends the chain. Editing the patterns of a chain does not.

The pads follow the machine. If the chain ends on the machine, for example because you chose a pattern on the LCD, the pads start over and the key over the palette goes back to PATTERN. If the machine plays a chain that the pads do not show, the pads show it. The editor sends a chain a moment after your last click on a pad. If you click PATTERN or SONG inside that moment, the chain is not sent.

SCALE SETUP

The scale of a pattern is its length and its speed. Both are on the second line of the LCD while Pattern is open.

#### Length

LEN sets the length of the pattern, from 2 to 64 steps. All tracks share it.

  • Click LEN for the next full page: 16, 32, 48, 64 and then 16 again.
  • Hold [⇧] and click for the page before.
  • Scroll the wheel over it to change the length one step at a time.

LEN changes the length and copies nothing. Steps past the old length hold what the pattern stored there. To fill a longer pattern, use ×2.

The key beside it, ×2, doubles the pattern. The new half is a copy of the first half, with every track's steps, slides, swing steps and locks. A pattern of more than 32 steps cannot double, and the page says so. [⌘] + [Z] takes the doubling back in one step.

A page is 16 steps. The Page key on the bar above the lock lane steps through the pages. The keys [ and ] go to the page before and after. The four lights beside Page show how many pages the pattern has and which one you see. All shows every step at once. Fol makes the page follow the play position.

#### Speed

SPD sets the tempo multiplier of the pattern: 1X, 2X, 3/4X or 3/2X. Click it for the next value, or hold [⇧] and click for the one before.

#### Song rows

A song row can play a part of a pattern with an offset and a length of its own. See "Play part of a pattern" in chapter 17.

11. Composing a patternMonomachine Editor

11

Composing a pattern

MM manual pp.1-47 to 1-55

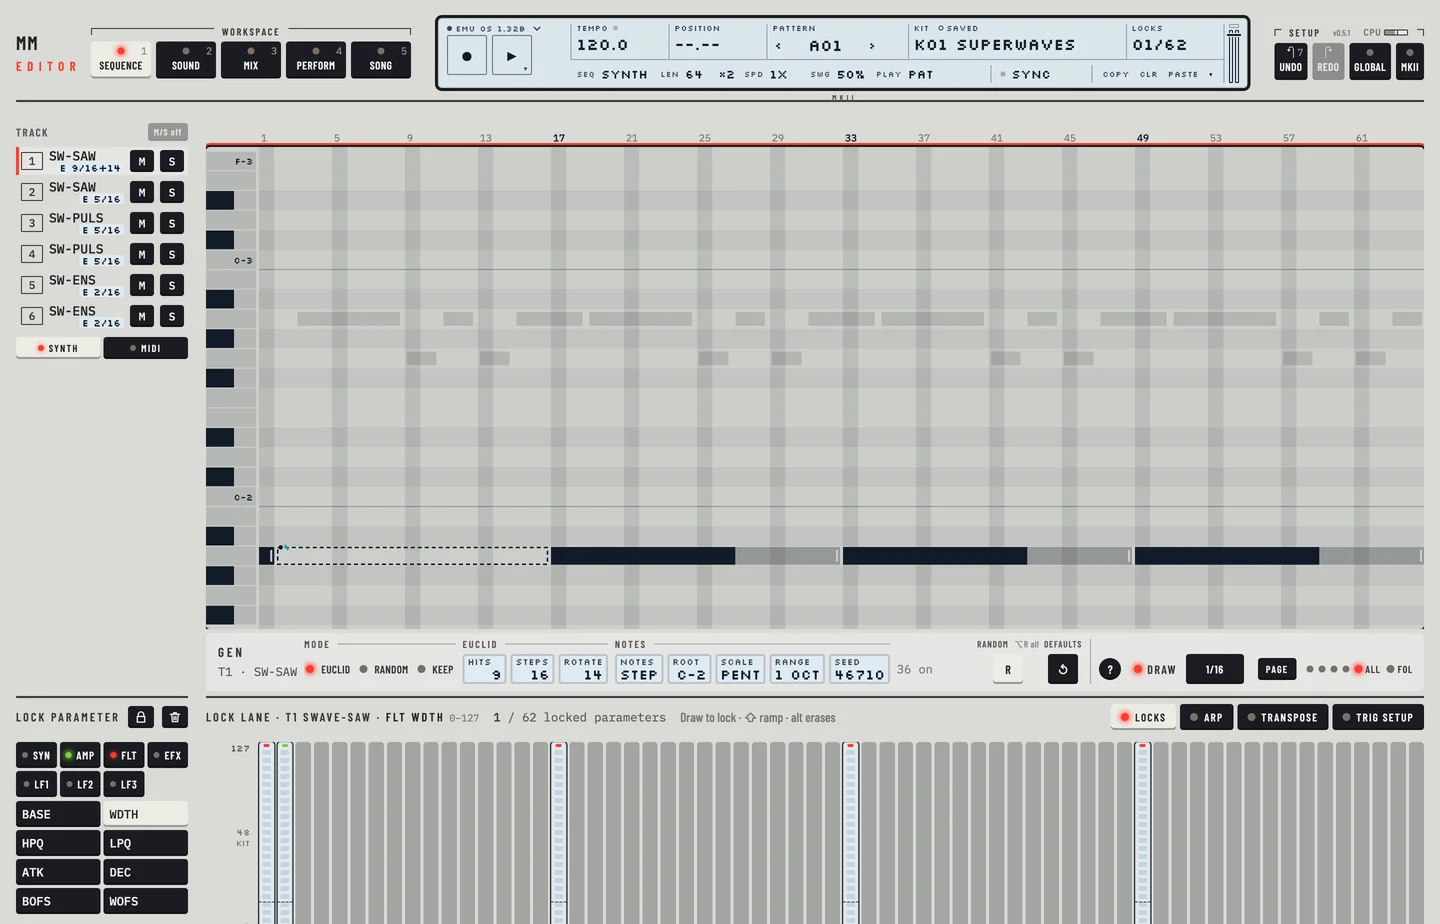
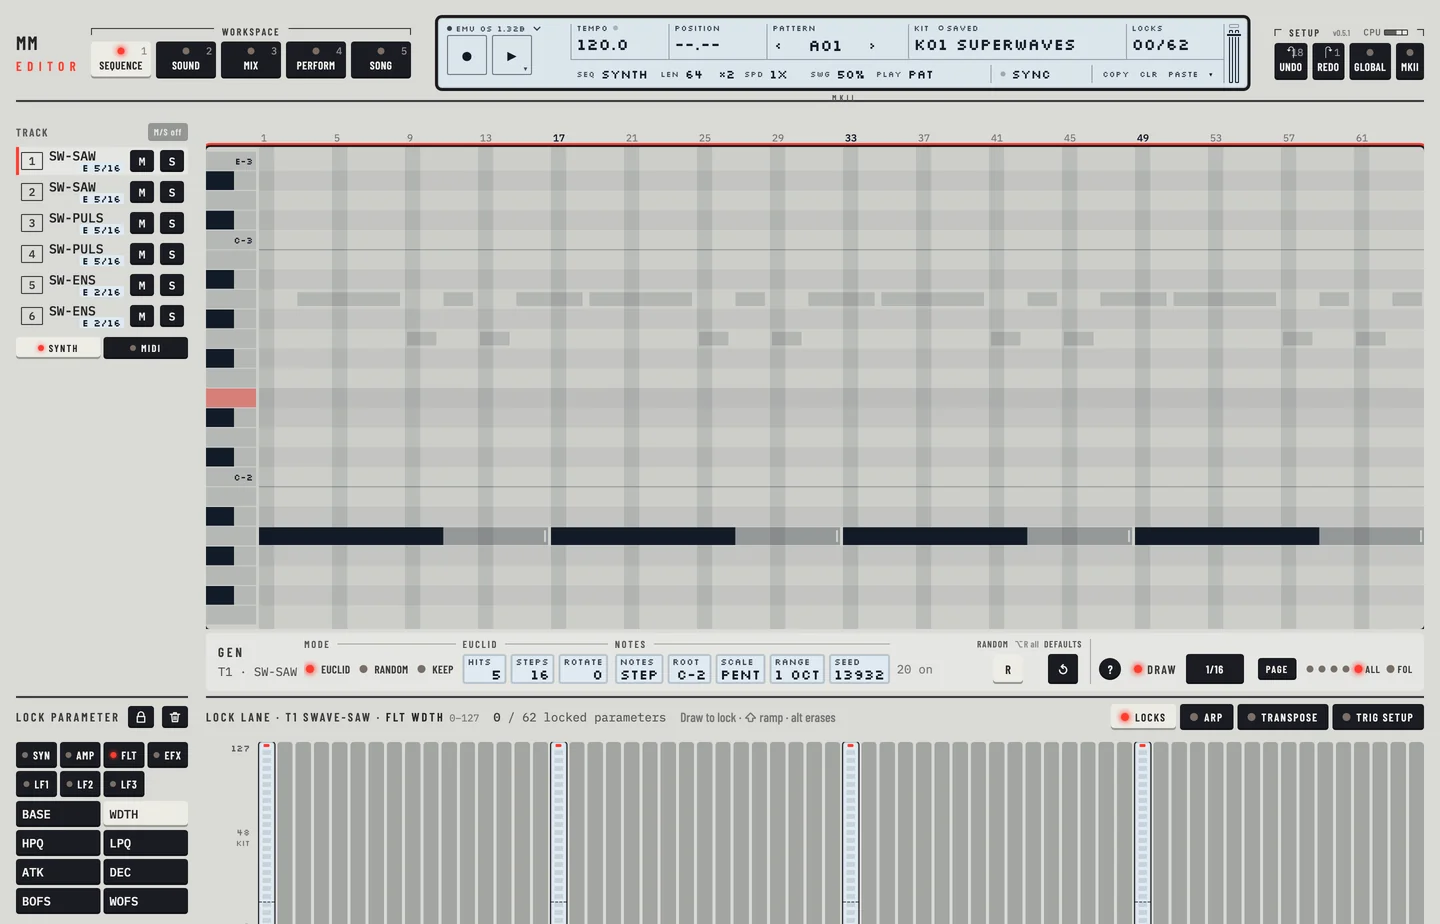
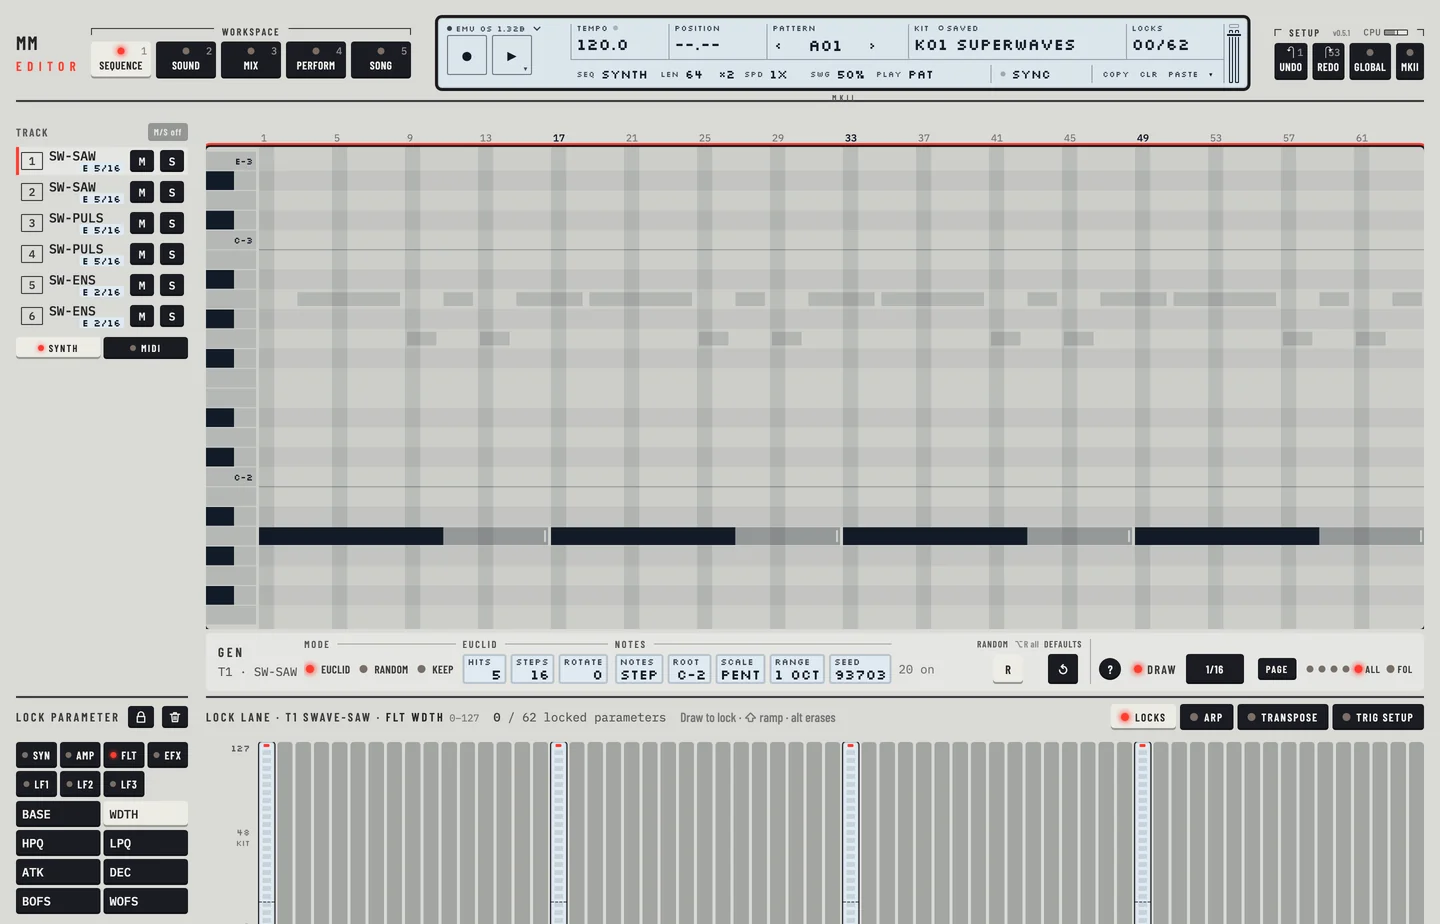
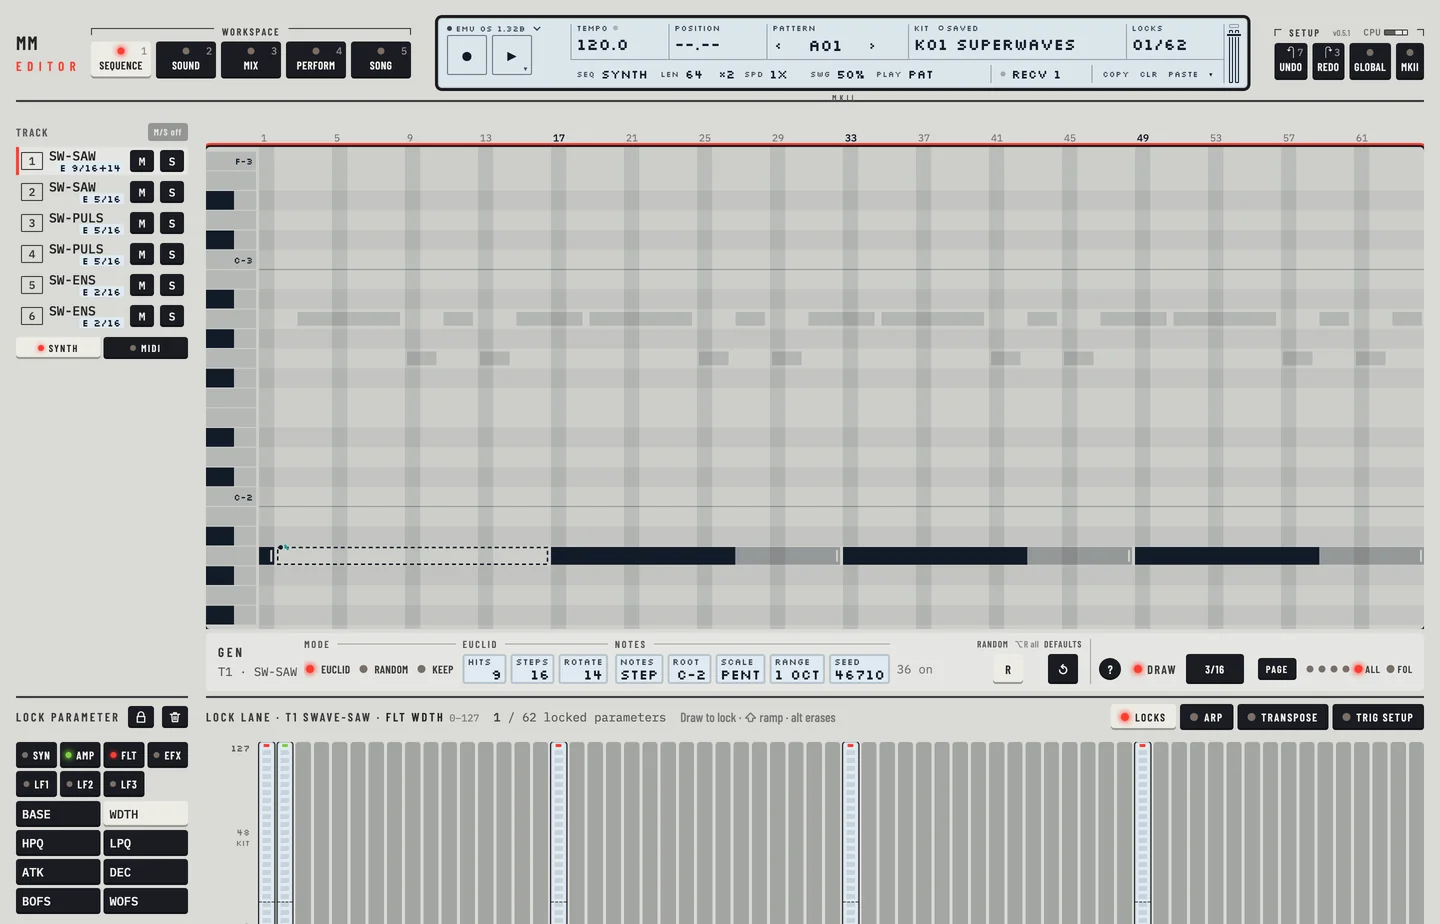
You write a pattern on the Pattern workspace. Press [1], or click the Pattern tab. The rail on the left holds the tracks. The piano roll in the middle shows the notes of the selected track, one column to a step. Under the roll are the rows for the envelope trigs, slide and swing, and under them the lock lane.

The Pattern workspace

RECORDING PREPARATIONS

On the machine you select a kit, a track and the trig tracks before you record. In the editor you only select the track.

  1. Click a track in the rail, or press [↑] or [↓] to move to the track before or after.
  2. Click Synth under the rail for the six synth tracks, or MIDI for the six MIDI tracks.

The roll shows the selected track. The field SEQ on the second line of the LCD also switches between SYNTH and MIDI.

GRID RECORDING

On the machine you step through the grid with the trig keys. In the editor you draw the notes in the piano roll.

Write notes

  1. Make sure Draw is lit above the roll. Press [B] to turn it on or off.
  2. Click the Len key to choose the length a new note gets: 1/16, 1/8, 1/4, 1/2 or 1 bar. Click for the next length. Hold [⇧] and click for the one before.
  3. Click an empty step at the pitch you want. A note of that length goes in.
  4. To change the pitch, drag the note up or down.
  5. To fill steps, drag sideways. Every empty step the pointer crosses gets the note.

A drag or a paint is one undo step. [⌘] + [Z] takes it back whole.

The piano roll
The piano roll

The roll shows a range of pitches. Scroll the wheel over it to move the range. Hold [⇧] to move it an octave at a time. On a synth track the keys at the left of the roll play the pitch.

Note length and NOTE OFF

Drag the end of a note to set its length. New notes take the length too. On a synth track a note sounds until the next NOTE OFF or the next trig of the track, so the editor writes a NOTE OFF where the note ends. On a MIDI track the editor writes the note's LEN, 6 to a step. A note can be drawn up to the next trig of its track. It can run past the end of the pattern onto its start, and the roll draws that part lighter.

To set a NOTE OFF by hand, hold [⌥] and click an empty step. A NOTE OFF is a yellow mark.

To delete a note, double-click it, or hold [⌥] and click it. The earlier note runs on to the next trig or NOTE OFF, as on the machine. The editor writes no NOTE OFF and takes none away: a NOTE OFF goes only when you clear its own step. Drag on with [⌥] held to delete every step the pointer crosses. One [⌘] + [Z] brings all of them back.

Selecting a note

Click a note to select it. It stays selected, with no [⌘] needed. [DELETE] or [BACKSPACE] removes it. With one note selected, [↑] and [↓] change its pitch by a semitone, and [⇧][↑] and [⇧][↓] by an octave. Hold a key and the note keeps moving; the whole hold is one undo step. With no note selected, [↑] and [↓] still move to the previous or next track. A double-click on an empty place draws one note: the second click does nothing.

Chords

Hold [⇧] and click the step at another pitch. The step holds a chord note. A chord on a MIDI track has one length for all its notes. A synth track plays a chord through its arpeggiator (chapter 15) or in poly mode.

Rotate

Press [⌥] + [←] or [⌥] + [→] to move all the notes, slides and locks of the selected track one step earlier or later. They wrap round at the length of the pattern.

Rotates made while [⌥] stays down are one undo step. Let go of [⌥] and the next rotate is a step of its own, so [⌘] + [Z] takes back one rotate at a time.

Copy, clear and paste on the LCD

The LCD keys Copy, Clr and Paste act on the selected track. With no steps selected they act on the page shown (see "Track page copy"). With steps selected they act on the selection (see "Note copy").

LIVE RECORDING

Live recording records the notes you play while the pattern runs.

  1. Select a synth track.
  2. Press [⌥] + [SPACE]. The machine starts to play and to record. While the machine already plays, you can also click ● on the LCD.
  3. Play the computer keys: the white keys A to L and the black keys W E T Y U O P. Z and X move the octave, C and V the velocity.
  4. Press [⌥] + [SPACE] again, or click ●, to stop recording.

The machine records each note on the step nearest to it. The notes appear in the roll.

The editor records one key at a time. Draw a chord with [⇧]-click in the roll.

To erase while you record, select the track and hold [DELETE] or [BACKSPACE]. This is the machine's [EXIT]. The notes of the track go on each step that plays while the key is down. The track's header is marked red. Let the key go to stop erasing.

STEP RECORDING

In step recording you play one note for each step, and the machine moves on by itself. The tempo does not matter.

  1. Stop the machine and select a synth track. The machine writes only this track.
  2. Hold [⇧] and click the record key, or choose Step record in the play key's menu. The record key shows STEP, and a red cursor on the roll marks the step, with the track and the step number. A selection of steps is dropped.
  3. Play a note with the computer keys or the keys left of the roll. The machine writes it to the step under the cursor, and the cursor moves to the next step.
  4. Press [←] or [→] to move. → leaves a rest and moves on. ← goes a step back.
  5. Press [DELETE] or [BACKSPACE] to clear the step under the cursor. The cursor moves on.
  6. Press [ESC], or click the record key, to stop.

Select another synth track while step recording is on, and the machine records that track from the same step.

You can also draw notes in the piano roll at any time.

NOTE COPY

You copy notes with a selection of steps. A selection holds steps of one track or of several tracks.

  1. Hold [⌘] and click a step in the roll or in the trig rows to select it. Hold [⌘] and drag to select a run of steps. A drag over the step ruler above the roll selects steps of the selected track without a key. Hold [⇧] and click the ruler to extend the selection.
  2. Press [⌘] + [C], or click Copy on the LCD.
  3. Select the step to copy to.
  4. Press [⌘] + [V], or click Paste. The copy goes in with its first step on the selected step.

Notes, NOTE OFFs, envelope trigs, slides and locks go along. Other keys on a selection:

KeyDoes
[⌘] + [X]copy, then clear
[⌘] + [D]put a copy right after the selection; again for another
[⌘] + [A]select every step of the six tracks shown
[←] or [→]move the selection one step
[⇧] + [←] or [⇧] + [→]extend the selection one step
[ESC]clear the selection

Drag the selection with [⌘] held to drop a copy where you let go. A dashed frame shows where it lands. With Draw dark, drag the selected notes in the roll without [⌘] to move them.

Select a step or steps and click the small ⋯ on the selection for the step menu (a right-click on a step opens it too): note on or off, NOTE OFF, a trigless trig, the envelopes (Amp, Filter, LFO), slide, swing, a chord note, copy, cut, paste here, duplicate, clear, and fill every 2nd or 4th step from the one you clicked. Clear takes the notes, the slide and the locks of the steps. To keep the notes, choose Clear locks (keep the notes). Synth steps paste onto synth tracks, MIDI steps onto MIDI tracks.

CLEAR NOTE PARAMETER LOCKS

To clear the locks of one parameter on some steps, hold [⌥] and drag across the bars in the lock lane. Click the bin in the lane header to clear all the locks of that parameter. Hold [⌥] and click the bin to clear every lock of the track. A selected step cleared with [DELETE] or [BACKSPACE] loses its note and its locks together.

The machine's CLEAR NOTE LOCKS clears the locks of one note and keeps the note:

  1. Select the step, or several steps, in the roll or the trig rows.
  2. Right-click one of them and choose Clear locks (keep the notes).

You can also click the small ⋯ on a selected step and choose it there. The notes stay. Press [⌘] + [Z] to get the locks back.

TRACK PAGE COPY

A page is the 16 steps shown while Page is on. While All is lit, the page is the whole pattern. With no steps selected, the LCD keys copy and paste the page shown of the selected track.

  1. Show the page to copy.
  2. Click Copy on the LCD. The page is named, and its steps, slides and locks are copied.
  3. Show the page to paste into. It can be on another track of the same kind.
  4. Click Paste.

Pages paste between synth tracks or between MIDI tracks, not between the two. A lock for a parameter the target machine does not have is skipped, and the page says how many.

To paste into several tracks at once, hold [⇧] and click the tracks in the rail. The marked tracks light. Press [⌘] + [V]. The page goes into every marked track as one undo step. Press [ESC] to unmark.

CLEAR TRACK PAGE

Click Clr on the LCD with no steps selected. The notes, slides and locks of the page shown on the selected track go. [⌘] + [Z] takes it back.

TRACK COPY

To copy a track with its sound, arpeggiator, transpose and swing:

  1. Select the track in the rail.
  2. Click ▾ beside <COPY> <CLR> <PASTE> on the LCD, then Copy…. The Copy what window opens.
  3. Tick Notes, Slide, Swing, Arp, Transpose and Machine + sound, and click Copy.
  4. Select the track to paste into.
  5. Click ▾, then Paste…. The window reads Paste what.
  6. Click Paste into 1 track. The track now holds the notes, slides, swing, arpeggiator, transpose and machine of the first. Press [⌘] + [Z] and the track is as before, in one step.
Paste what
Paste what

To copy only the notes with the step ruler:

  1. Drag across the whole step ruler to select all the steps of the selected track.
  2. Press [⌘] + [C].
  3. Click the target track in the rail, then click the first step of the ruler.
  4. Press [⌘] + [V].

A track copy takes all 64 steps of the track, whatever the length of the pattern.

Press [⌘] + [A] to select the six tracks shown, and paste them as a block. To copy the machine of a track, use Copy and Paste on the Kit workspace.

To copy a whole track with its machine, its arpeggiator, its transpose and its swing in one copy, use Copy… in the LCD's ▾ menu: see "Super copy".

CLEAR TRACK

To clear parts of a track:

  1. Select the track in the rail and press [⌘] + [⇧] + [BACKSPACE]. The Clear what window opens.
  2. Tick the parts, for example Notes alone, and click Clear. The notes go and the slides stay.

Or select all the steps of the track with the ruler and press [DELETE] or [BACKSPACE]. To clear every lock of the track, hold [⌥] and click the bin in the lane header.

To clear the whole track, or only some of its parts, use Clear… in the LCD's ▾ menu: see "Super clear". Clr clears the page shown.

PATTERN COPY

A pattern copy takes the whole pattern: the notes, locks, MIDI notes, the arpeggiator, transpose, swing and slide, and the link to the kit.

  1. Open the pattern chooser: click the pattern field of the LCD.
  2. Click the slot to copy, then Copy.
  3. Click the target slot, then Paste. The slot shows the length and kit of the copy at once.
  4. Press [⌘] + [Z] to take the paste back.

You can also drag a slot onto another slot to copy it there.

CLEAR PATTERN

In the pattern chooser, click the slot and then Clear, and answer the question. The slot reads EMPTY at once. Or, on Pattern, press [⌥] + [DELETE] or [⌥] + [BACKSPACE]. [⌘] + [Z] takes it back.

Both clear the notes and locks of every track. The pattern keeps its link to the kit, as on the machine.

SUPER COPY

Super copy copies the parts of a track you choose, over every step of the pattern.

  1. Select the track in the rail.
  2. Click ▾ at the right of <COPY> <CLR> <PASTE> on the LCD, then Copy…, or press [⌘] + [⇧] + [C]. The Copy what window opens.
  3. Tick the parts. Pattern has Notes, Melody, Slide, Swing, Locks, Arp and Transpose. Kit has Machine + sound (a synth track's).
  4. Click Copy.
  5. Select the track to paste into. Click ▾, then Paste…, or press [⌘] + [⇧] + [V].
  6. The parts copied are ticked. Under To tracks the selected track is lit, or the tracks marked for paste. Click a track key to light or unlight it.
  7. Click Paste into 1 track (the key says how many). The paste is one undo step.

Notes takes the trigs, the envelope trigs, the NOTE OFFs and the pitches. Melody takes only the pitches: they go onto the trigs the target track already holds, and a step with no trig stays empty.

Copy what
Copy what

SUPER CLEAR

  1. Select the track in the rail.
  2. Click ▾ at the right of <COPY> <CLR> <PASTE>, then Clear…, or press [⌘] + [⇧] + [BACKSPACE].
  3. Tick the parts to clear and click Clear.

Clearing Notes clears their locks too. Melody leaves the trigs without a pitch. Swing goes back to every second 16th step, as in a new pattern. Arp turns the arpeggiator off and keeps its settings. Machine + sound makes the track GND-SIN.

The window remembers what you ticked the last time. Press [⌘] + [Z] to take the clear back.

12. TempoMonomachine Editor

12

Tempo

MM manual pp.1-55 to 1-57

TEMPO

The tempo is global. A pattern does not store it, so changing the pattern never changes the tempo. A song row can carry a tempo of its own (see chapter 17, "Set a tempo for a row"). A row that has a tempo shows it as a number on its cell in the arrangement.

The Tempo field of the LCD shows the tempo in BPM with one decimal. It is on every workspace.

THE TEMPO SCREEN

You set the tempo in the Tempo field itself, from 30 to 300 BPM, or in the TEMPO window that a click on the field opens.

  • Drag the field up or down. Each pixel is half a BPM. Hold [⇧] to change it a tenth of a BPM at a time.
  • Click the field and press [↑] or [↓] to change it by 1 BPM. Hold [⇧] for a tenth.

The decimal part is kept, so 120.5 is a tempo.

Click the field without dragging to open the TEMPO window, the machine's tempo screen:

  • − and + change the tempo by 1 BPM, or a tenth with [⇧].
  • TAP taps the tempo.
  • NUDGE shifts the tempo for a moment, as [LEFT] and [RIGHT] on the machine. Press and hold −10 % or +10 %. The tempo is 10 % slower or faster while you hold it, and goes back when you let go. The keys [-] or [=] do the same while held.
  • Change on release holds a dragged tempo back until you let go of the field, as [FUNCTION] held does on the machine. The field shows the new tempo while you drag and the machine takes it at the release.
  • Sync INT and EXT choose the machine's own tempo or MIDI clock, as <TEMPO IN> in GLOBAL. Sync in GLOBAL opens the GLOBAL panel.

Press [Esc] or click outside the window to close it.

TAP TEMPO

  1. Press [⇧] + [B] in time with the music. It works on every workspace.
  2. After the second tap the tempo is set and the page shows it, for example Tap tempo: 128.0 BPM.

The tempo is the average of the last five taps. A pause of two seconds starts the count again.

On workspaces other than Pattern, [B] taps too. On Pattern [B] is the Draw key of the piano roll.

EXTERNAL SYNCHRONISATION

The machine runs on its own clock or follows a MIDI clock. The setting is in the GLOBAL panel.

  1. Click Global in the top bar.
  2. In the Sync card, click EXT beside Tempo in to follow a MIDI clock, or INT for the machine's own tempo.
  3. Click ON beside Ctrl in if the machine should also follow MIDI start and stop.

The Sync keys INT and EXT of the TEMPO window set Tempo in too.

In a DAW a new plug-in sets Tempo in to EXT and Ctrl in to ON itself, and the machine follows the host. Set Tempo in to INT to run the machine on its own clock in the DAW: the tempo edits again, and the DAW's tempo and transport no longer reach the machine. EXT follows the DAW again. The project keeps the choice. See chapter 19, "Control out 2" and "Control in", for the other settings of the card.

13. Parameter locksMonomachine Editor

13

Parameter locks

MM manual pp.1-57, 1-58

A parameter lock gives one parameter a value of its own on one step. The parameter takes the value when that step plays and goes back to the kit value after it. The editor paints new locks on steps with a trig. Existing locks on steps without a trig are kept and shown as ghost bars; the machine plays them too.

The pattern holds locks for 62 parameters. The count is shared by all twelve tracks. A parameter counts once however many steps lock it. The Locks field of the LCD shows the count, for example 12/62. When all 62 are used, the editor refuses a new locked parameter and says so. Clear the locks of one parameter to make room.

PARAMETER LOCKS

The lock lane is under the piano roll on Pattern. Press [1] and select a track.

The lock lane
The lock lane

The rail on the left of the lane lists what you can lock. For a synth track the page keys are SYN, AMP, FLT, EFX, LF1, LF2 and LF3. For a MIDI track there is one key, MIDI PAGE. A green light on a page key means the page holds locks. Under the page keys are the parameters of the page. A number on a parameter key counts its locked steps.

The lane shows one parameter at a time, the one lit in the rail. Each step with a trig has a bar. A solid line across the lane marks the value of the kit, and its number sits on the line at the right end of the lane. Rest the pointer on a step, or select it, to read its lock as a number at the top of its bar. Drag the labelled KIT ↕ handle in the left gutter to change the kit value, or focus it and use the arrow keys. The whole drag is one undo step and draws no lock. The line across the steps is a reference: a plain click or vertical drag on a step edits its lock, even when its value equals the kit value. Hatched steps have no trig. A lock that sits on a step with no trig is drawn there as a hatched ghost bar with a dashed outline and its number. The machine plays such a lock: its value takes hold on that step, without a new note, and stays until the next trig plays the kit value again. Hold [⌥] and click it, or right-click it and choose Clear … lock, to remove it.

A small mark at the top of a bar tells what the trig fires. Red: the trig fires all three envelopes (AMP, FILTER and LFO). Green: it fires only some of them, or none (a trigless trig). The tip of the bar says the same.

PARAMETER LOCKS IN GRID RECORDING MODE

On the machine you hold a trig and turn a knob. In the editor you draw the value in the lane.

  1. Click the page key and the parameter key in the rail.
  2. Drag across the bars in the lane. Each step with a trig that the pointer crosses takes the value at the height of the pointer. Every lock shows as a bar.
  3. To move one lock, scroll the wheel over its step. A notch moves the value by 4. Hold [⇧] for 1. A step with no lock starts from the kit value.
  4. To draw a straight line of values, hold [⇧] and drag from a step without a lock to the last step. Starting on an existing lock draws a slide instead. Every step with a trig under the line gets a lock. It is one undo step.
Locks drawn across the lane

Every lock of the parameter shows as a bar, so you can read the values of a step at any time. When you change the selected track or the parameter, the lane shows the new one.

Remove locks

  • Hold [⌥] and drag across the bars to remove the locks of that parameter on the steps you cross. The bars go.
  • Right-click a lock bar and choose Clear … lock to remove that parameter on that step. This works on ghost bars too.
  • Click the bin in the lane header to remove all the locks of the parameter.
  • Hold [⌥] and click the bin to remove every lock of the track.
  • Select a step or steps, click the small ⋯ on the selection (or right-click a step) and choose Clear locks (keep the notes) to remove all the locks of the step, or of the selected steps. The note stays. Press [⌘] + [Z] to put them back.
  • Select a step and press [DELETE] or [BACKSPACE] to clear the step whole, with its note.

Lock the current value

On the machine you hold a trig and click a knob: the step keeps the value the knob has now. In the editor:

  1. Click the page key and the parameter key in the rail.
  2. Select the steps: hold [⌘] and click a note, or drag on the step ruler.
  3. Click the lock key in the rail's header, beside the bin. Each selected step with a note gets a lock at the value the kit has now.

It is one undo step: press [⌘] + [Z] to take it back. A step without a note cannot hold a lock and is left out. To lock several steps at once, hold [⌘] and click one note, hold [⌘] [⇧] and click a later one, then click the lock key. Every note between them is locked in one undo step.

Locking the current value

Copy a note with its locks

The locks of a step go with the step when you copy it. Right-click a note with a lock, choose Copy, right-click an empty step and choose Paste here. The new step has the pitch and the lock. See "Note copy" in chapter 11.

Slide

A small ramp over a note marks a step that glides. Set it with Slide in the step menu. On a step with a slide, a locked value glides to the next lock instead of jumping. Shift-drag from a lock in the lane draws it; Shift-drag from an empty step draws a ramp of locks. See "Slide" in chapter 15.

PARAMETER LOCKS IN LIVE RECORDING MODE

While LIVE RECORDING plays (see chapter 11), turn a value on any page. The machine locks it on the step that plays when the value arrives. A step without a trig gets a trigless lock.

  1. Press [⌥] + [SPACE] to record live.
  2. Turn a value, for example the filter BASE on Kit.
  3. The editor marks the step in the trig row and the bar in the lock lane, and says which value it locked and on which step, for example Locks T1 FLT BASE on step 5.

To tidy up, stop recording and draw the values again in the lock lane.

14. Advanced sequencer controlMonomachine Editor

14

Advanced sequencer control

MM manual pp.1-58 to 1-60

TRIG TRACKS

Every note on a synth track is a trig. A trig can fire the amplitude envelope (AMP), the filter envelope (FILTER), the LFO envelope (LFO), or any of them together. The machine keeps one trig track for each. In the editor you set them in the step menu. A MIDI track has no trig tracks (see chapter 16).

A trig's marks in the roll

A note you draw in the roll fires all three envelopes. To change that:

  1. Right-click the step in the roll (Ctrl-click on a Mac), or select steps and click the ⋯ on the selection.
  2. Choose Envelopes. Amp, Filter and LFO have a tick for each envelope the trig fires.
  3. Click one to switch it. On a selection it switches every trig in it: on when one of them has it off, else off.

A note that fires only some envelopes shows their letters at the start of its bar: A, F and L. Where the bar is too narrow, three small ticks stand for them in the same order. A note that fires all three has no mark.

  • A single trig fires one envelope only: AMP, FILTER or LFO.
  • A NOTE OFF has a small yellow lamp at the top of its step, as the machine's TRIG key light. Where it ends no note, OFF is written beside it.

The editor shows the trig colours as marks in the roll. It does not show the machine's trig key lights.

TRIGLESS TRIGS

A trigless trig fires no envelope. It is there to carry a pitch or locks.

  1. Right-click an empty step, or a note, and choose Trigless trig (no envelopes).
  2. An empty step gets a trigless trig at the track's last pitch. A note keeps its pitch and loses its envelope trigs.
  3. Draw the locks in the lock lane.

Choose Trigless trig again to take it away, with its locks. The roll draws a trigless trig as a small hollow square in its step. Click or select it as any step. The step menu works on a selection as well.

PITCHLESS TRIGS

A pitchless trig fires envelopes without a pitch of its own: it plays the note before it. On the machine you hold EXIT and press the trig.

  1. Right-click an empty step, or a note, and choose Pitchless trig (the note before).
  2. An empty step gets a trig with all three envelope trigs. A note loses its note and keeps its envelope trigs and its locks.
  3. Choose Pitchless trig again to give the step a note of its own, the track's last pitch.

The roll draws a pitchless trig as a dashed bar at the pitch it plays. Its envelopes are in the step menu, under Envelopes. The step menu works on a selection as well.

15. Additional sequencer featuresMonomachine Editor

15

Additional sequencer features

MM manual pp.1-61 to 1-69

The arpeggiator and transpose are tabs in the header of the lock lane on Pattern: Arp and Transpose. Click a tab to show its keys in the rail and its values and picture under the roll. Swing and slide are in the step menu.

THE ARPEGGIATOR

Each of the twelve tracks has its own arpeggiator, six synth tracks and six MIDI tracks. A pattern holds all twelve. The arpeggiator turns the chord notes of a trig into a run of notes.

  1. Select a track and click Arp.
  2. Write a chord: hold [⇧] and click the steps at the other pitches in the roll.
  3. Set the mode and the other values below.

The light notes in the roll show what the arpeggiator plays. Press [⌘] + [Z] to take the change back.

The arpeggiator tab
The arpeggiator tab

ARPEGGIATOR BASIC SETTINGS

  • SPD is the speed. 6 is a sixteenth note, so the light notes follow one to a step.
  • RNGE is the number of octaves the run covers. Scroll over it to raise it. It stops at 9 OCT.
  • OJMP is the octave jump. Type a value in it.

Each track keeps its own settings: a mode key you click changes the arpeggiator of the selected track and no other.

Mode keys:

  • OFF: the track plays the base note of each trig.
  • KEY: one held note repeats, or the arpeggiator cycles through the held chord. Release every note to stop it. A trig holds its note until its NOTE OFF or the next trig, so a note you click in the roll while the arpeggiator is on has no NOTE OFF: it repeats up to the next trig. Drag the end of the note to make the run shorter.
  • SID: it needs two or more notes. They stay in the cycle after you release them, until a new chord.
  • ADD: it starts on the first note. Each extra key joins while one key is held.

Play keys: TRUE plays the notes in the order of the chord, UP from low to high, DOWN from high to low, CYCLE up and then down, and RND in a random order. With RND the roll draws the notes outlined, because the pitches vary.

To copy, paste or clear the arpeggiator of a track:

  1. Click ▾ beside COPY, CLR and PASTE on the LCD, then Copy….
  2. Tick Arp (and anything else the track should carry) and click Copy.
  3. Select the other track, open ▾ again, choose Paste… and click Paste into 1 track. The track now has the arpeggiator of the first.
  4. A clear from Clear… turns the arpeggiator off.

Each is one undo step: press [⌘] + [Z] to take it back. See chapter 11, "Super copy".

The arpeggiator settings

ARPEGGIATOR ENVELOPE TRIGGING SWITCHES

The Trig keys AMP, FLT and LFO choose which envelopes the arpeggiator's notes fire again. A MIDI track has no envelopes, so the keys read "none on MIDI".

ARPEGGIATOR RHYTHM AND OFFSET TRACK

Under the values is a strip of cells, one per step of LEN, up to 16. It repeats while the arpeggiator runs. ON plays the step and OFF rests; click a cell or focus it and press Enter or Space to toggle it. The words have the same meaning on both plates.

  • Click a cell to mute it. Click it again to switch it on.
  • Drag a cell up or down to give its note an offset from minus 24 to plus 24 semitones. Drag past the top for +24 and past the bottom for minus 24.
  • Click a cell past the end, or a key of the LEN row under the strip, to set the length of the strip from 1 to 16.

TRANSPOSE

Transpose changes the pitch of the notes while they play. The programmed notes stay as they are. Click Transpose.

  1. Set TRACK, the transpose of the selected track, by dragging the box. The value runs from −64 to +63 semitones. You can also click a key of the keyboard picture, for example G.
  2. Set PAT · all, the transpose of the whole pattern, for example by typing +5. All tracks follow it and no track's own transpose moves.
  3. Under Scale choose ---, FIX, MAJ or MIN.

Transpose works while the pattern plays. Press [SPACE], click the E key and the pattern goes on playing with the new transpose. Press [⌘] + [Z] to take it back.

The transpose tab
The transpose tab

The line above the keyboard picture says what the track plays, for example plays +5 semitones.

  • ---: no scale. The transposes of the track, the pattern, the song and the multi trig add up. Any note can sound.
  • FIX: only the track transpose acts. Use it for drums and effects.
  • MAJ and MIN: transposed notes stay in the major or minor scale of the key. Keys outside the scale are hatched, in the picture and in the roll.

For MAJ and MIN, click a key of the keyboard picture to set the root key. A click on E sets the key to 4. With --- and FIX, a click on a key sets the track transpose so that C plays that key, upward from C. Hold [⌥] and click to go down to it. The note also sounds while you hold the button.

SWING

Swing delays every other sixteenth note. The SWG field of the LCD sets the amount for the pattern, from 50 to 80 %. Drag the field up or down, or scroll over it.

THE SWING TRACK

Each step of a track can swing. A step that swings comes late by the amount of SWG. Swing does something only on a step with a trig.

  1. Right-click a step in the roll (Ctrl-click on a Mac), or select steps and click the ⋯ on the selection.
  2. Choose Swing. A tick shows when every selected step swings. On a selection it sets every step: on when one of them has it off, else off. It is one undo step.
  3. A small teal slant over a note shows that its trig swings.

To swing four steps at once:

  1. Click Pattern and pick track 1 in the rail.
  2. Drag over four steps in the roll with [⌘] held, then choose Swing in the ⋯ menu. Swing is on for all four, in one undo step.
  3. Press [⌘] + [Z]. All four are as before.

Each track has its own swing steps. The marks show for the selected track. A new pattern swings every second 16th step, so most off beat notes carry the mark.

To copy, paste or clear the swing row of a track, tick Swing in Copy…, Paste… or Clear… of the LCD's ▾ menu (chapter 11, "Super copy"). A clear sets it back to every second 16th step. Press [⌘] + [Z] to take each back.

SLIDE

A slide makes a locked value glide to the next lock of that parameter instead of jumping. Without a lock on the step, or without a later lock, a slide does nothing. The glide ends on that lock whether its step has a trig or not. A trig in between that does not lock the parameter plays the kit value, and the glide goes on from there to the lock. The glide of a pitch is PORTAMENTO, in the trig setup.

  1. Right-click a step in the roll, or select steps and click the ⋯ on the selection.
  2. Choose Slide. A tick shows when every selected step slides. On a selection it sets every step, in one undo step.
  3. A small ramp over a note shows a step that slides and holds a lock. In the lock lane the glide is drawn from one lock to the next.

You can also draw it in the lock lane. Press on the dot at the top of a lock bar and drag sideways to the right. A dotted ramp shows where the glide goes: to the next lock of that parameter, on a step with a trig or without one, whatever further you drag. Trigs between them without a lock do not stop it. Let go and the step slides, in one undo step. A slide belongs to the step, so every parameter locked there glides to its own next lock. If the parameter has no later lock, the lane says so and nothing is set. Click the ramp's line to take the slide off. Dragging up or down from the dot changes the lock as before.

Shift-drag from a lock draws a slide. Shift-drag from an empty step draws a ramp of locks. Hold Shift on a lock bar and drag sideways out of its column. A line follows the pointer and the next lock of that parameter is marked as the target. Drop on that lock and the step slides, in one undo step. Drop anywhere else, press Esc, or move left of the start, and nothing is set. If there is no later lock, the line still follows and the drop does nothing.

To copy, paste or clear the slide row of a track, tick Slide in Copy…, Paste… or Clear… of the LCD's ▾ menu (chapter 11, "Super copy"). Press [⌘] + [Z] to take each back.

THE MUTE MODE

Mutes are global: they do not belong to the pattern. The machine holds them.

  • Click M on a track in the rail, or on the Mix workspace, to mute it. Click S to solo it.
  • Press [M] with a track selected to mute it. Press [M] again to unmute it. [⌥] [M] mutes every synth track and [0] unmutes every track.
  • Press [M] to mute or unmute the selected track.
  • Press [⌥] + [M] to mute every track. When none is audible, it unmutes every track.
  • Press [0], or click M/S off in the rail, to unmute and unsolo everything.
  • Drag across M or S keys to set every track you cross as the first one became.

The Perform workspace has a Mutes card with all twelve tracks, T1 to T6 and M1 to M6. A lit key means the track is audible.

Prepare mutes

To change several mutes together:

  1. Open Mix.
  2. Hold [⇧] and click two M keys. Each key shows + or X for the change to come. Nothing is sent yet.
  3. Let go of [⇧]. Both tracks mute together.
Prepared mutes
Prepared mutes

MINIMISING THE MUTE WINDOW

The mute window of the machine is a screen of its own. The editor has no such window, so there is nothing to minimise.

POLY MODE

In poly mode all six engines play the track in focus, with six voices. The sequencer then plays the chord notes of that track's trigs as chords. Out of poly mode a trig plays only its first note.

  1. Press [4].
  2. Select the track with the numbered keys in the title of the Assign card.
  3. In the Keyboard bar, click Poly. The machine's poly mode is on, on that track.
  4. Click another numbered key. Poly mode moves to that track.
  5. Click Pattern. The rail marks the poly track ×6 and dims the others.
  6. On Perform, click Auto track to switch poly mode off.
Poly mode on track 3

The other five tracks are silent until you leave poly mode. The line under the keyboard modes says so, and on Pattern the rail dims those tracks and marks the poly track ×6. Chapter 5 describes poly mode.

16. The MIDI sequencerMonomachine Editor

16

The MIDI sequencer

MM manual pp.1-70 to 1-72

The Monomachine has six MIDI tracks next to its six synth tracks. They send notes and controller values to other instruments. The editor edits them on Pattern, with the same roll, docks and rows.

USING THE MIDI SEQUENCER

  1. Press [1].
  2. Click MIDI under the rail, or click SEQ on the second line of the LCD until it reads MIDI. The rail shows M1 to M6.
  3. Click a track. It shows its MIDI channel, for example CH 03. M mutes it and S solos it.
  4. Draw notes in the roll as on a synth track. See chapter 11. A note you click in the roll of one MIDI track changes that track only.
  5. To write a chord, hold [⇧] and click another pitch on a step that has a note. The notes of a chord share one length.

On Kit the same SYNTH and MIDI keys switch between the six synth tracks and the six MIDI tracks. On Perform, the Mutes card has M1 to M6 for the MIDI tracks. Click one to mute the track and click it again to unmute it.

A MIDI note has a real length. To set it:

  1. Switch Draw on, choose 1/16 and click a cell. The note is 6 ticks long, one step.
  2. Drag the end of the note over two more steps. The length reads 18, three steps.
  3. Press [⌘] + [Z] to take a change back.

The editor writes the note's LEN, 6 to a step. The row under the roll is VEL, the velocity of each note. You can lock any value of the MIDI page on a step with the lock lane. See chapter 13.

A MIDI track in the roll

THE MIDI PAGE

Click MIDI page in the header of the lock lane. The tab holds these values:

  • LEN: the length of a note, 1 to 127. 127 lasts until a NOTE OFF. Dragging a note's end sets it.
  • VEL: the velocity.
  • PB: the pitch bend.
  • PCHG: a program change. It is sent only when you lock it on a step.
  • CC 1 to CC 4: the values of four controllers.

Below the controller values are the boxes CL1 to CL4. They choose the controller number of each. Choose AFT to send aftertouch.

To write a value on a step:

  1. Select a MIDI track and a step that has a note.
  2. In the lock lane choose MIDI page, then the value: VEL, PB or PCHG.
  3. Draw the bar on the step. The value is a lock of that step. A program change goes out only when you lock it.
  4. Type 74 in CL1 to make the first controller CC 74. Type AFT in CL2 to send aftertouch from the second. The numbers belong to the selected track only.

The Channel keys 1 to 16 set the MIDI channel of the track. Choose 4 and only that track changes.

COMPARISON

A MIDI track has no trig tracks, so its row under the roll shows the velocity, without the A, F and L dots. The step menu has no envelopes or trigless trig for it. It has an arpeggiator without envelope switches, swing, slide and transpose, in the same tabs as a synth track.

  1. Drag across four step columns of Slide under the roll. Those steps slide.
  2. Click Swing on a column to flip the swing of that step.
  3. Open the transpose tab and type +3 in TRACK. The pattern holds 3 for the track.
  4. Open the Arp tab. It says a MIDI track has no envelope switches.
The docks on a MIDI track

The MIDI page is stored in the kit, so edits of it are kit edits. Raise VEL, save the kit to its slot and the slot holds the value.

The internal tracks can send MIDI too. On the GLOBAL page, the Control out 1 card sends the notes of the sequencer, the arpeggiator or the keyboard to MIDI out, with or without the sound of the tracks. See chapter 19.

  1. Open GLOBAL.
  2. On Control out 1, click OUT for Sequencer. The page warns that the tracks play no sound.
  3. Click INT+OUT for Keyboard, then INT for Sequencer. The warning goes.
17. The song modeMonomachine Editor

17

The song mode

MM manual pp.1-73 to 1-80

The song mode plays patterns in a set order. Each row of a song names a pattern and how it plays: how many times, transposed or not, the whole pattern or a part of it, with some tracks muted, at a tempo of its own. Command rows loop back, jump forward or halt the song. Use a song for a finished arrangement, or for a set of loops to play live.

The Monomachine holds 24 songs. A song has up to 200 rows.

In the editor the song mode is the Song workspace. Press [5], or click the Song tab. The Songs column on the left holds the 24 song slots. The middle column holds the PATTERN, CHAIN and SONG keys over the pattern palette, and in song mode the Selected row. On the right, the Arrangement shows every row of the song as a cell, 16 cells to a line.

The Song workspace
The Song workspace

The machine plays the song. The editor writes the song into the machine and shows what the machine reports: the mode, the row that plays and the tempo.

The three keys over the palette say what the machine plays and what a click on a pad does:

  • PATTERN: the machine is in pattern mode. A pad click goes to that pattern.
  • CHAIN: the machine is in pattern mode and a pad click adds the pattern to its chain.
  • SONG: the machine is in song mode. A pad click adds a row to the song.

To put the machine in song mode:

  1. Click SONG.
  2. The key lights when the machine reports song mode. The line over the bank letters reads the song number and its row count, for example SONG 01 · 65 rows · stopped.
The PATTERN, CHAIN and SONG keys

On PATTERN the machine plays patterns and a pad click queues that pattern. On CHAIN the pads number the chain and the machine stays in pattern mode. On SONG the pads add rows and the Selected row card shows.

On the machine you press [PATTERN/SONG]. In the editor you can also click <PLAY> on the second line of the LCD, on every workspace: it reads PAT in pattern mode and SONG in song mode, and each click switches.

LOAD SONG

Loading a song makes it the song the machine plays in song mode, and the song the Arrangement shows. Its slot is lit in the Songs column, and the chip at the top of the column reads its number and name.

  1. Stop the machine. Press [SPACE] if it plays.
  2. Click a slot in the Songs column. The slot is selected. The machine still holds its song.
  3. Click Load, or press [ENTER]. The machine loads the song, and its slot is lit.

A paused machine is not stopped, and it keeps its song: the editor says so and asks you to stop it first. In a DAW, the host's Stop (or a MIDI Stop from the DAW) stops the machine, so you can load a song after it, also with LOAD SONG SysEx from the DAW. The host's Play then plays the loaded song from row 1.

After you edit the song in song mode, the editor loads the edited song itself. You do not load it by hand.

The song slots
The song slots

Each slot shows its number, its name and its rows. An empty slot reads EMPTY and is drawn faint. Press the arrow keys to move the selection while a slot has the focus.

SAVE SONG

The editor writes each edit into the slot of the song the machine holds as you make it. Save is the machine's SAVE SONG: the machine stores the song it holds into that slot, with its name.

Save a song

  1. Click Save.
  2. If the machine has not loaded your latest edits yet, the editor asks first. Click Load the edits, then save to store the song as you see it.

Save a song into another slot, with a name

  1. Select an empty slot, or a slot to write over, in the Songs column.
  2. Click Save to…. The slot shows a name field with the name of the machine's song.
  3. Type a name, up to 14 characters, and press [RETURN]. Press [ESC] to cancel.

The slot now holds the song, with the new name. The machine still holds the song it had.

Name a song

  1. Select the slot.
  2. Click Rename, press [F2], or double-click the slot.
  3. Type the name and press [RETURN].

Names are in capitals. The editor keeps to letters, digits, spaces and a few signs.

Copy, paste and clear a slot

  1. Select a slot and click Copy, or press [⌘] + [C].
  2. Select another slot and click Paste, or press [⌘] + [V]. The slot holds a copy of the song, with its name.

You can also drag a slot onto another. The song is copied there.

To empty a slot, select it and click Clear, or press [DELETE] or [BACKSPACE]. The rows and the name are removed. The slot reads EMPTY.

When a paste, a copy or Clear would write over a song, the editor asks first. Press [⌘] + [Z] to undo a paste, a copy, a name or a clear.

The song slots after a copy and a save

SONG PLAY

In song mode the machine plays the song from row 001, row by row, to its END row.

  1. Click SONG over the palette, or click <PLAY> on the LCD until it reads SONG.
  2. Press [SPACE]. The song plays. The Arrangement header reads Playing and the arrangement is framed.
  3. Read what plays on the line over the bank letters: SONG 01 · row 017 of 65 · B01 means song 01, row 017 of 65 rows, pattern B01. The pattern field of the LCD reads the song and the row in the same way.
  4. Press [SPACE] again to stop. The mark leaves the arrangement.

The Arrangement marks the row that plays. It moves from row 001 to row 002 as the first row ends.

The row that plays
The row that plays
What plays, in song mode: the line over the bank letters

You can go to pattern mode and back while the song plays. Click PATTERN: the machine plays a pattern and holds its place in the song. Click SONG and the song goes on from that place.

On the machine [PLAY] pauses a song that plays, and [STOP] stops it. In the editor hold [⇧] and click the play key, or press [⇧] + [SPACE]: the song holds its row and step, and the play key blinks. Click the play key to go on from there. [SPACE] stops.

SONG TRANSPORT

On the machine you move the song pointer to another row while the song plays, and the song goes on from there when the current row ends. In the editor you start the song from the row instead:

  1. Click the row's cell in the Arrangement.
  2. Click ▶ From here in the Selected row card, or press [ENTER].
  3. The editor asks to set <TRANSPORT> to ACCEPT. Confirm. The machine takes ACCEPT, goes to song mode and plays from that row.

To start from another row, click row 2 and press [ENTER] again.

Playing from a row
Playing from a row

The machine goes to SONG mode if it was in pattern mode and plays the song from the first step of that row. The editor sends the machine a MIDI song position, the steps of the rows before it, and then Continue.

The editor shows where the song is. While the song plays, the Arrangement marks the row that plays and the bar above the grid fills up to it. The mark comes from the machine itself, so it follows repeats, loops and jumps.

SONG EDITING

The Arrangement is where you build the song. Each cell is a row: the pattern it plays, with marks under the name for what else the row does. You can edit the song while it plays.

On the machine each row has columns that you step through with the arrow keys and set with the LEVEL knob. In the editor you select a cell and set the row in the Selected row card.

On the machineIn the editor
ROWthe place of the cell in the Arrangement, 001 to 200
PATthe pattern name in the cell; ‹ and › in Selected row
REPRepeat
TRNTranspose; single tracks under More
OF LNPart, under More
XTRATempo; Mutes, under More
The arrangement and the selected row

Select a row

  • Click a cell in the Arrangement.
  • Press [←] or [→] for the row before or after.
  • Click a bar in the time bar above the grid. Each bar is as long as its row plays.

The last row of every song is END. The song stops there.

Add patterns

  1. Click SONG over the pattern palette.
  2. Click a bank, A to H. The pads show its 16 patterns, each with its length, or "empty".
  3. Click a pad. A new row with that pattern goes in after the selected row, and becomes the selected row.

You can also drag a pad onto the Arrangement. Drop it on a cell and that row plays the new pattern. Drop it on the free cell after the last row and a new row goes in before END.

Set a row

  1. Select the row.
  2. Click ‹ or › to step to the pattern before or after.
  3. Click + beside Repeat to set how many times the row plays, 1 to 64.
  4. Click − or + beside Transpose to transpose all the tracks of the pattern for this row, in semitones.

Hold [⇧] and click − or + to change a value by ten.

Play part of a pattern

A row can play part of its pattern: from a start step, for a number of steps. Use it to build odd bar lengths, or to swap the end of a pattern for a fill.

  1. Select the row and click More.
  2. Under Part, set Offset, the first step that plays, and Length, the number of steps. The bar above shows the steps that play.
  3. To play the whole pattern again, click Whole pattern.

Insert, move and delete rows

  • Duplicate puts a copy of the selected row after it.
  • ← and → in the Selected row header move the row one place earlier or later. You can also drag a cell to another place.
  • Delete, [DELETE] or [BACKSPACE] or <CLR> on the LCD deletes the selected row. Press [⌘] + [Z] to bring it back.
Rows added and deleted

On the machine you insert a row with [FUNCTION] + [DOWN] and remove one with [FUNCTION] + [UP]. In the editor a new row comes from a pad, from Duplicate or from a paste.

Copy, paste and undo

  1. Select a row and press [⌘] + [C], or click <COPY> on the LCD.
  2. Select the row to paste after.
  3. Press [⌘] + [V], or click <PASTE>. The copy goes in after the selected row, with the same pattern, repeats, transpose and mutes.

Press [⌘] + [Z] to undo the last edit.

Read the cells

The marks under a pattern name say what else the row does.

MarkMeaning
×4the row plays four times
120the row has a tempo of its own, in beats per minute
M3three tracks are muted
+5, −7the row's transpose, in semitones
T±single tracks are transposed
~the row plays part of its pattern

The marks come in that order, for example 120 M3 +2 T±. A row with none of them shows none. When the cells are too narrow for words, letters stand for them, in the same order: B for the tempo, M for the mutes, ± for the transpose and T for single tracks, for example BM±. Hold the pointer over the cell to read them in full. Click the marks to open More for that row.

On the machine a T replaces the TRN value. The editor shows both.

The Arrangement header counts the rows, out of 200. While the song plays, it reads Playing and the machine's place in bars and beats. The line under the chip in the Songs column shows the song's rows, its length in bars and its playing time at the current tempo. On the Song workspace the LCD's second line shows the same: SONG, ROWS, BARS and TIME.

When the machine hears an edit

The editor writes each edit into the song on the machine. An edit made while the machine is stopped plays at the next start. An edit made while the song plays is heard from the next start of the song. An edit made in pattern mode is there when you switch to song mode.

SONG EDIT TRANSPORT

On the machine you start the song from any row: select the row and press [ENTER/YES]. In the editor select the row and press [ENTER], or click ▶ From here (see "SONG TRANSPORT").

The machine counts the bars and beats the song has played in the EDIT SONG header. The editor shows the same counter in the Arrangement header while the song plays: Playing · 002:03 is bar 2, beat 3. The length of the whole song is in the Songs column and on the LCD.

  1. Click Song. Stop the machine, then click SONG over the pattern palette.
  2. Press [SPACE]. The header reads Playing and the bars and beats played.
  3. A bar later the counter reads 002.
  4. Press [SPACE] again. The counter goes.

SONG LOOPS

A loop row sends the song back to an earlier row, a set number of times. Loops keep a song short and its shape clear. They also make parts longer than the 64 steps of one pattern.

On the machine a loop is a value of the PAT column, after END. In the editor a loop is a command row of its own.

  1. Select the last row of the part to repeat.
  2. Click Add loop in the Selected row header. A loop row goes in after it. Its cell reads ↺ and the row it goes back to, with ×2 under it.
  3. Click − or + beside Back to to set the first row of the part.
  4. Click − or + beside Times to set how many times the part plays, 1 to 63. Click Forever for a loop that never ends. The cell shows ∞.
A loop row: its command, the row it goes back to and how many times

SONG JUMP

A jump row sends the song forward to a later row. The rows between are not played.

On the machine a loop becomes a jump when you set its row after the loop. In the editor you choose the command.

  1. Select a command row, or add one with Add loop.
  2. Under Command, click JUMP.
  3. Click − or + beside Jump to to set the row to go to. The cell reads → and that row.

SONG HALT

A halt row stops the song where it stands. The song waits there until you choose a row to go on from.

On the machine a loop becomes a halt when it points at itself. In the editor you choose the command.

  1. Select a command row, or add one with Add loop.
  2. Under Command, click HALT. The cell reads HALT.

To go on after a halt, start the song from a row before it with ▶ From here. A row after the halt cannot be counted to: start it on the machine.

SONG TRACK TRANSPOSE

Besides the transpose of the whole pattern, a row can transpose single tracks: the six synth tracks and the six MIDI tracks.

  1. Select the row and click More.
  2. Under Per track, the INT line holds the synth tracks T1 to T6, the MIDI line the MIDI tracks M1 to M6.
  3. Click − or + on a track to transpose it, in semitones. The track shows its value. The cell shows T±.

SONG EXTRA

A row can mute tracks and set a tempo of its own.

Mute tracks on a row

  1. Select the row and click More.
  2. Under Mutes, click T1 to T6 for the synth tracks, M1 to M6 for the MIDI tracks. A muted track's key is dark. Click it again to unmute.
  3. The cell shows M and the number of muted tracks, for example M3.
The selected row with its settings

On the machine you set the mutes with the [TRIG] keys 1 to 6 and 9 to 14.

Set a tempo for a row

  1. Select the row. Beside Tempo, Keep is lit: the row plays at the tempo before it.
  2. Click Keep. The row takes the current tempo as its own, and Keep goes out.
  3. Click − or + to set the tempo, 30 to 300 BPM. The cell shows the tempo as a number.

To take the row's tempo off, click Keep again.

18. RoutingMonomachine Editor

18

Routing

MM manual pp.1-81 to 1-86

Routing is on the Mix workspace. Press [3], or click the Mix tab. The six synth tracks have a strip each. Under the strips is the Routing bar, and under it a drawing of the signal path: the tracks, the three buses AB, CD and EF, the outputs and the input jacks.

The Mix workspace
The Mix workspace

Click a track in the drawing to select its strip. The lines under the drawing say what each bus carries and where it goes, for example AB: T1 + T2 › OUT A/B.

THE MIXER

Each strip holds, from the top: the sound's trim values (AMP VOL, DIST, DSND), PAN, the LEVEL fader, the buses the track sends to, the input, and the M and S keys. Double-click the LEVEL fader to set it to 100, the level a new track starts at. That is one undo step.

The Out keys AB, CD and EF on a strip choose the buses the track feeds. A lit key means the track sends to that bus. A track can feed more than one bus.

Tracks add into a bus in track order. An effect on a bus therefore hears only the tracks before it.

FX MACHINES

An effect machine needs an input and a trig to work. When you choose an effect machine for a track on Kit, the editor sets its input and sets the amplitude envelope values DEC and REL to 64, as the machine starts it. The page tells you so. A trig on the track then opens the effect.

AUDIO INPUTS

An effect track has an In menu on its strip. The audio inputs are INP A, INP B and INP AB. The drawing shows a dashed line from the input jack to the track.

To use an effect as a first stage in a chain, give the track the machine THRU. Choose it in the machine picker on Kit.

NEIBOR ROUTING

NEIBOR is an input that takes the sound of the track before. The drawing shows an arrow from the neighbour. Effects can follow each other this way. Track 1 has no neighbour, so its menu has no NEIBOR.

MIX BUS ROUTING

BUS AB, BUS CD and BUS EF are inputs that take what a bus carries. If the effect track also sends to the same bus, it replaces what was there: the line below the drawing reads "INSERT". If it sends elsewhere, it takes a copy of the bus: a send. The line names the track that "takes a copy".

OUTPUT METERS

Under each bus line of the drawing, next to its output jack, is a meter with two thin bars, left over right. It measures the output pair after the volume: A/B, C/D and E/F. The solid bar is the level, the pale bar behind it is the peak, and the thin mark is the highest peak, held for a moment before it falls. The scale runs from -60 dB at the left to 0 dB at the right. The small square at the left end fills for a few seconds after a sample went over 0 dB.

The meters work only while the Mix workspace is open. A pair the host has not switched on is dimmed.

ROUTING MODES

Click a mode on the Routing bar. The field ROUTE on the second line of the LCD steps through them on a click. The Routing card of the GLOBAL panel has the same keys.

  • 3xSTEREO: the three buses go to the three stereo outputs, AB to A/B, CD to C/D and EF to E/F. This is the default.
  • 3xSTEREO + AB=MIX: as 3xSTEREO, and CD and EF are also added to A/B.
  • 6xMONO: each track goes to its own output, A to F. The buses are not sent out.
19. Global settingsMonomachine Editor

19

Global settings

MM manual pp.1-87 to 1-111

The machine keeps eight global slots. One is active. The settings are on the GLOBAL page. Click Global in the top bar, or choose GLOBAL… in the engine menu. The page opens over the workspace, which dims behind it. Press [ESC], or click the key at the right of its head, to go back. A click beside the page does not close it.

The GLOBAL page
The GLOBAL page

Every change is stored in the active slot and made active at once. The page has the cards Control, Sync, Routing, Audio and Control out 1.

GLOBAL SLOTS

The head of the page holds the keys 1 to 8. The lit key is the active slot. Click another key to make that slot active.

To copy a global slot to another:

  1. Click Copy. The editor keeps all the settings of the active slot. Paste is now on.
  2. Click the key of the slot to copy to. It becomes the active slot.
  3. Click Paste. The editor asks first, because the settings of that slot are replaced. Click Paste to go on, or Cancel.

To clear the active slot, click Clear. The editor asks first. The slot then holds the global the machine ships with.

Undo takes back a paste or a clear, as any other edit.

The GLOBAL page with its eight slot keys

To clear a slot:

  1. Click Clear. The editor asks.
  2. Click Clear in the question. The slot holds the factory global again, and the page shows it.

TURBO MENU

The machine negotiates its MIDI speed with a cable. The editor has no cable to negotiate, so it has no turbo menu.

AUDIO

MASTER TUNE

The master tune sets the pitch of A for the whole machine. It is 440.0 Hz as the machine ships.

  1. In the Audio card, click − or + beside Master tune. Each click moves it 0.1 Hz.
  2. Hold [⇧] and click to move it 1 Hz.

The tune runs from 400.0 to 499.9 Hz, as on the machine.

ROUTING

The Routing card sets the routing mode: 3xSTEREO, 3xSTEREO + AB=MIX or 6xMONO. It is the same setting as the Routing bar on Mix. See chapter 18.

CONTROL

MIDI CHANNELS

The Control card sets the channels the machine listens on.

  • Base channel: OFF, or 1 to 16. Track t listens on the base channel plus t.
  • Channel span: how many tracks, counting from T1, have a channel of their own. 6 gives all of them.
  • Auto track: notes on this channel play the selected track.
  • Multi trig: notes on this channel play the tracks as the multi trig mode says (chapter 9).
  • Multi map: notes on this channel start patterns as the multi map says.

Click − or + to change a value. The base channel reads as a range, for example 1 to 6, when the span is more than one.

To see what a track without a channel looks like:

  1. Click Global in the top bar and click − beside Channel span down to 0. No track has a channel, and the page says so.
  2. Press [ESC], and click M of a track on the rail. The editor refuses: nothing is muted, and the message offers the fix.
  3. Click Give each track its own channel. The span reads 6.
  4. Click M again. The track mutes.

A track has a channel only if its channel is 15 or lower. A base channel of 16 reaches no track. When a track has no channel of its own, the card says which tracks, and that mutes and notes cannot reach them. The editor then sends their sound values as kit dumps.

MORE ON THE MONOMACHINE MIDI FUNCTIONALITY

The machine takes NRPN control and uses program change to select patterns. Automation and MIDI from a DAW reach it as they reach the machine.

A note on a track's channel plays that track. Six notes sent at one moment, one on each of the six channels, play six voices. In a DAW each track also has host parameters for synthesis, amplification, filter, effects, the three LFOs, level and mute, so a lane of automation moves the knob. A program change on the base channel selects a pattern. When the host stops, the editor sends All Notes Off on every channel, so a held note ends.

CONTROL OUT1

Control out 1 sets where the notes of the sequencer, the arpeggiator and the keyboard go. The Control out 1 card has a row for each: Sequencer, Arp and Keyboard. Click one of:

  • INT: the internal tracks play the notes. Nothing goes to MIDI out.
  • OUT: the notes go to MIDI out only. The tracks make no sound.
  • INT+OUT: both.

The machine ships with INT for the sequencer and the arpeggiator, and INT+OUT for the keyboard. The sequencer sends its trigs as NRPN on the base channel. The arpeggiator and the keyboard send notes. The keyboard is the TRIG keys of the machine.

CONTROL OUT2

The Sync card holds two switches for what the machine sends. Tempo out sends the MIDI clock. Ctrl out sends MIDI start and stop. They go to the standalone's MIDI output, or to the plug-in's MIDI output in a DAW. Do not feed that output back into an input of the same standalone, for example one IAC bus as both: the clock then circles. The AUDIO / MIDI panel warns about it. The Control card has Prg change out: choosing a pattern then sends a program change on the base channel.

CONTROL IN

  • Tempo in: INT uses the machine's own tempo. EXT follows the MIDI clock.
  • Ctrl in: ON makes the machine react to MIDI start, stop and continue.
  • Prg change in: reads BASE. The machine always takes a program change on its base channel, so you cannot change it.

In a DAW a new plug-in sets Tempo in to EXT and Ctrl in to ON itself. With EXT the machine follows the host's tempo, loops and position. Set Tempo in to INT and the machine runs on its own clock there: no clock from the host reaches it and the host's Play does not start it. The project keeps the choice. In the standalone, EXT follows the clock that arrives at a MIDI input.

MULTI MAP EDIT

The multi map starts patterns from key ranges. It is on the Perform workspace, in multi map mode. It is stored in the global slot.

  1. Press [4].
  2. In the Keyboard bar, click Multi map.
  3. The table lists the ranges from the lowest key. Click − or + beside a range's upper key to move the limit. The last range always ends at G-9.
  4. Choose the pattern in the Pattern list. CUR plays the current pattern.
  5. Set OFS, the first step. LEN is the number of steps and needs an offset first. TRN is the transpose and TIM the timing.
  6. Click Split selected range to cut a range in two. Click × to delete a range.

Bands on the keyboard show the ranges. A key you play shows the pattern it starts.

The Pattern list of a range offers CUR and all 128 patterns, A01 to H16.

MECHANICAL SETTINGS

Knob resolution, the velocity curve and the joystick mapping belong to the hardware. The editor has no setting for them.

FILE

On the machine the FILE menu sends and receives SysEx. In the editor you write a .syx file on your computer, and you open one to send it to the machine.

Export

  1. Choose EXPORT SYSEX… in the engine menu (the engine name at the left of the LCD). The Export SysEx panel opens.
  2. All is ticked: every kit, pattern, song and global the editor holds goes into one file, as the machine's ALL.
  3. To choose, untick All. Each kind has its row: Kits, Patterns, Songs, Globals and Waveforms. Tick the kinds you want.
  4. Set the first and the last slot of each kind. Click a value to step it up, [⇧]-click to step it down, or turn the wheel, drag up or down, or use the arrow keys. A kind with data starts from its first to its last used slot.
  5. Click Save .syx… and choose where to put the file. A message says what went into it.

Import

  1. Choose IMPORT SYSEX… in the engine menu, or drop a .syx file on the window (macOS only).
  2. The import window previews the file. It has a tab for each kind: Kits, Patterns, Songs, Globals and Other.
  3. A slot grid shows the slots. A click leaves a slot out or takes it in again. Hold [⇧] and click to choose a range.
  4. Click Import. The window shows a bar. Stop ends the import, Hide puts the window away. The import goes on: IMPORT SYSEX… in the engine menu shows the window again, with its report when it is done. While it runs, [ESC] and a click beside the window leave it open.
  5. A report lists what the machine did with each slot.

The tick Read back and compare, beside Verify only, is on at first and stays as you set it. With it on, the import reads every slot back after it sends and compares it with the file. With it off, the import ends after the send. The report then says how many items were sent and that they were not read back.

Globals and other messages are off unless you tick them. Importing a global changes the channels the machine listens on. Undo takes an import back in one step, but it does not put back a global. Before it sends, the editor reads the slots it has not read yet. If a slot does not answer, the report ends with how many slots cannot be undone. Use Export SysEx… first to keep a copy of the globals in a file.

Original and specific place

The Place row under the grid has two keys. Original place, the default, puts each item in the slot it came from, as ORIG.

Specific place is SPEC. A value shows the first slot of the kind on the tab, for example Kits from K01. Step it as any value. The grid moves the items to where they land, each kind from its own first slot. When an item lands on a slot that holds data, Import asks first and names the slots. An item past the last slot is not sent.

Verify only

Verify only, beside Import, is VERF. It writes nothing. The editor reads each slot the items land in and compares it with the file. The report marks = the same, ≠ different and ? no answer. Verify only reads the slots whatever the state of Read back and compare.

The machine's SYSEX RECV screen

The Monomachine takes a dump only on its SysEx receive screen. The editor opens it for you. With a real Monomachine over MIDI, the sync field on the second line of the LCD reads SEND and the number of waiting edits. Click it and follow the steps.

DIGIPRO MANAGER

The DigiPRO manager of an MKII sends, receives, renames and erases user waveforms. In the editor it is the DigiPRO card at the bottom of the GLOBAL page. Click GLOBAL in the top bar to open it.

The card shows the 64 positions, W01 to W64, as the machine counts them. A user waveform shows a u and its name. A position without one holds its factory waveform. The first time you open the card, the editor reads the positions from the machine. This takes a while: a factory waveform answers nothing, so the editor waits for each one. Click Read to read them again.

Click a position to select it. The card draws a user waveform and shows its name.

Receive waveforms

  1. Select the position the first waveform goes to.
  2. Click Load… and choose a file. A .syx file holds one waveform or a bank of them. A WAV or AIFF file must hold one period of the sound, as C6 expects. The editor names it after the first four letters of the file name.
  3. The editor lists where each waveform goes and which user waveforms it replaces. Click Load, or Replace.

The editor opens DIGIPRO MGR on the machine, sends the waveforms, writes them and reads the positions back. The waveforms of a bank go to the selected position and the ones after it. Those that would go past W64 are left out.

Send waveforms

Select a user waveform and click Save .syx…. [⇧]-click Save .syx… to save every user waveform as one bank. The machine sends user waveforms only. Export SysEx… in the engine menu saves them too: tick Waveforms and set the range.

Rename a waveform

  1. Select a user waveform and click Rename.
  2. Type up to four characters: A to Z, 0 to 9, space and - + . / #. Press [ENTER].

Copy a waveform

Select a user waveform and click Copy. Select another position and click Paste. The editor asks first when that position holds a user waveform.

Erase waveforms

Select a user waveform and click Erase. The editor asks first. The factory waveform of that position comes back. [⇧]-click Erase to erase every user waveform.

Undo on the card takes back the last change to the waveforms. [⌘] + [Z] does not reach them: they are not part of a kit, a pattern, a song or a global.

Digibanks belong to the +Drive, which the editor does not emulate. A bank file on the computer takes their place: save one with [⇧]-click Save .syx…, load it with Load….

+DRIVE SETTINGS

The +Drive, its snapshots and its Digibanks are hardware. The editor does not emulate them.

MIDI SEQ

The channel of each MIDI track, and the controller numbers CL1 to CL4, are on the MIDI page of Pattern. See chapter 16.

20. Early startup menu, technical informationMonomachine Editor

20

Early startup menu, technical information

MM manual pp.1-110 to 1-116

On the machine you hold a key while you switch it on to open the early startup menu. It holds the test mode, the resets and the OS upgrade. The editor starts the machine for you, with the OS you gave it, and has no such menu. The resets are in the engine menu instead.

TEST MODE

The test mode checks the hardware of the machine: its keys, knobs, joystick and outputs. The editor runs on the emulated machine and has nothing to test.

EMPTY RESET

The empty reset clears the memory of the machine.

  1. Choose RESET MACHINE… in the engine menu (the engine name at the left of the LCD). A question says what the reset clears. Cancel is the default: [ESC] answers it. A click beside the question does nothing.
  2. Click Empty reset…. The editor asks a second time.
  3. Click Clear everything. The Empty reset panel opens. The editor writes an empty kit, pattern and song into every slot through the SYSEX RECV screen, then reads each one back.
  4. Read the report and click Done.

The globals stay. A global is reset in its own slot in GLOBAL (chapter 19).

FACTORY RESET

The factory reset brings back the factory kits, patterns and songs. The editor reads them from a second Monomachine that it starts from your own ROM, unheard. Your machine does not change until that data is read.

  1. Choose RESET MACHINE… in the engine menu. Cancel is the default.
  2. Click Factory reset…. The editor asks a second time.
  3. Click Factory reset. The editor prepares the factory data, which takes a few seconds. Then the Factory reset panel opens. The editor writes every kit, pattern and song through the SYSEX RECV screen and reads each one back. This takes a few minutes.
  4. Read the report and click Done.

The globals and the user waveforms stay. To reset a global, use Clear in its own slot in GLOBAL (chapter 19).

Start from factory memory… in the same question restarts the emulated machine as on a new install and deletes the saved machine memory. The globals are reset too, and it cannot be undone. See "MACHINE MEMORY" in chapter 24.

SOFT RESET

The soft reset restarts the machine and keeps its data. In the editor, close the editor and open it again.

MIDI UPGRADE, SEND UPGRADE

The OS upgrade runs on the real machine. The editor does not upgrade the OS. It runs the Monomachine OS 1.32B that you give it as a ROM.

MKI / MKII DIFFERENCES

The MKI and the MKII run the same OS. The MKII adds the user waveforms of the DigiPRO machines. The editor draws the panel of either model.

  1. Open the engine menu at the left of the LCD and choose PLATE: MKI or PLATE: MKII. The panel changes to the other model: the MKI has a light-blue LCD, the MKII a bluish-white one.
  2. Choose it again to go back.
The MKII panel
The MKII panel

With MKI chosen, the machines that need the MKII are grey in the machine list.

SPECIFICATIONS

The specifications of the hardware, its connectors, memory and sizes, belong to the machine. The editor lists none of them.

CREDITS, CONTACT

The credits and the contact of the manufacturer belong to the machine's manual. The editor shows its own version in the top bar and in the title of the editor's menu.

21. Appendix A: machine referenceMonomachine Editor

21

Appendix A: machine reference

MM manual pp.A-1 to A-15

The Monomachine has 22 machines: 15 for a synth track, GND-GND among them, which is silent, and 7 FX machines. This appendix lists them and the knobs each one gives the SYN page. You choose a machine in the machine picker of the Kit workspace (chapter 6, "ASSIGNING A MACHINE"); the picker shows the same names, in families, and the pointer over a machine names its eight knobs. Every machine also has the AMP, FLT, EFX and the three LFO pages, which are the same for all of them. Two of the machines exist only on the MKII.

The machine picker
The machine picker

SWAVE-SAW

Eight saw oscillators. <UNIL>, <UNIW> and <UNIX> set the unison, <SUBX>, <SUB1> and <SUB2> the sub oscillators and <TUNE> the pitch.

SWAVE-PULSE

Pulse oscillators with unison and sub oscillators. <PW> sets the pulse width, <PWAD> and <PWRS> move it over time.

SWAVE-ENS

An ensemble of oscillators. <PCH2> to <PCH4> pitch the extra voices: OFF, -12 to +12 semitones, or an interval (2/3, 3/4, 4/5, 5/6 below, 6/5, 5/4, 4/3, 3/2 above), <WAVE> picks the wave and <CHRL> and <CHRW> set the chorus.

SID 6581

A model of the SID chip. <WAVE> picks the wave, <MOD> the modulation, <MSRC> and <MFRQ> its source and rate.

DPRO-WAVE

A wave player on the DigiPRO. <WAVE> picks one of the 32 waves, S01 to S32, <WP> shapes it, <SYNC> and <SFRQ> set oscillator sync.

DPRO-BBOX

The beat box, a set of 24 drum sounds played by key. <PTCH> sets the pitch, <STRT> the start point, <RTRG> and <RTIM> the retrigger.

DPRO-DDRW

A machine built on two waves. <WAV1> and <WAV2> pick them from the 64 waves, D01 to D64, <MIX> blends them and <TIME>, <BR1>, <WID> and <BR2> shape the draw between them.

DPRO-DENS

A stack of voices from one wave. <WAVE> picks it, D01 to D64. <PCH2> to <PCH4> pitch the extra voices as on SWAVE-ENS and <CHRL> and <CHRW> set the chorus.

FM+STAT

A static FM machine. <1FRQ>, <1FIN>, <1ENV> and <1FB> set the first operator, <2FRQ> and <2VOL> the second, <TONE> the tone. <1FRQ> and <2FRQ> step through 24 frequencies, from 1/64 to 4 times the note.

FM+PAR

A parallel FM machine. Three operators have a frequency and an envelope each, <TONE> sets the tone. <1FRQ>, <2FRQ> and <3FRQ> step through the same 24 frequencies as FM+STAT, 1/64 to 4.

FM+DYN

A dynamic FM machine. The first operator has frequency, frequency envelope, volume and volume envelope, the second frequency, envelope and feedback. <1FRQ> and <2FRQ> change in fine steps and show the frequency as the machine writes it, a fraction or a number.

VO-6

A speech machine. <VOC1> and <VOC2> pick the vowels, <CONS> the consonant, <CLEN> its length and <CVOL> its volume.

VO-6 TUTORIAL

VO-6 says a word when you lock its vowel and consonant on each note.

  1. Click the Kit tab and select track 3 on the rail.
  2. Click the machine name and choose VO-6.
  3. Click the Pattern tab and select track 3 on the rail again.
  4. Switch the piano roll's Draw on.
  5. Click five notes into the roll.
The lock lane
The lock lane
  1. In the lock lane open the SYN page. Lock <CONS> on each note with the wheel, using M, N, M, SJ, N in that order.
  2. Lock <VOC1> on each note with a drawn bar.

The roll names the consonant of each note. Play the pattern to hear the word.

GND-GND

Silence. The machine makes no sound.

GND-SIN

A sine wave with <TUNE>. It is the machine of an empty track (chapter 6, "CLEAR MACHINE").

GND-NOIS

Noise. <ST>, <RED> and <STON> shape it and <TUNE> sets the pitch.

FX-THRU

A machine that passes its input through. <INP> picks the input.

FX-REVERB

A reverb. <DEC>, <DAMP> and <GATE> shape the tail, <MIX> blends it, <HP> and <LP> filter it, <INP> picks the input.

FX-CHORUS

A chorus. <DEL>, <DEP> and <SPD> set delay, depth and speed, <FB> the feedback, <WID> the width, <LP> a filter, <MIX> the blend, <INP> the input.

FX-DYNAMIX

A compressor. <ATK> and <REL> set the times, <THRS> the threshold, <RAT> the ratio, <GAIN> the make-up gain, <RMS> the detector, <MIX> the blend, <INP> the input.

FX-RINGMOD

A ring modulator. <WAVE> picks the wave, <EXT> the external input as the modulator, <MIX> the blend, <INP> the input.

FX-PHASER

A phaser. <CNTR> sets its centre, <DEP> and <SPD> the depth and speed, <FB> the feedback, <WID> the width, <MIX> the blend.

FX-FLANGER

A flanger. <DEL>, <DEP> and <SPD> set delay, depth and speed, <FB> the feedback, <WID> the width, <MIX> the blend, <INP> the input.

22. Appendix B: MIDI control referenceMonomachine Editor

22

Appendix B: MIDI control reference

MM manual pp.B-1 to B-6

The Monomachine takes notes, controllers, NRPN values and a few system messages. This appendix lists them and says where the editor uses each one. The editor sends them to the emulated machine, or to a real Monomachine over MIDI, as you work: you do not write them by hand.

CHANNELS

Each track listens on its own channel: the base channel plus 0 to 5. You set the base channel and the span in GLOBAL, in the Control section (chapter 19). The on-screen keyboard, the home row keys and the roll keys use these channels. Notes from a MIDI keyboard or a DAW use them too, and a note on a channel that no track listens on plays nothing.

  1. Click GLOBAL in the top bar. The panel opens with the MIDI channels.
  2. Click the minus beside Channel span until it reads 0. No track has a channel, and the panel says so.
  3. Close the panel and click the M of a track on the rail. The editor refuses and offers the fix in a notice.
  4. Open GLOBAL again and click Give each track its own channel. The span reads 6 and M mutes the track.
The MIDI channels in GLOBAL

NOTE ON / OFF

A note on starts the amp, filter and LFO envelopes of a track and a note off releases them. The on-screen keyboard, the home row keys and the keys of the piano roll send them.

MULTI TRIG CHANNEL

The multi trig channel plays all tracks at once, splits the keyboard between tracks, starts the sequencer or transposes it. The Perform keyboard sends these notes.

MULTI MAP CHANNEL

Notes on the multi map channel trigger patterns. The Perform keyboard sends them.

AUTO CHANNEL

Notes on the auto channel go to the active track. The Perform workspace has an Auto track setting for it.

CC: JOYSTICK UP / DOWN

The joystick sends controller 1 for up and controller 2 for down. The assign pad of the Perform workspace sends them.

CC: MUTE

Controller 3 mutes a track. The mute keys send it.

CC: LEVEL

Controller 7 sets the level of a track. The LEVEL fader sends it.

CC: PAN

Controllers 10 and 62 set the pan of a track. The PAN control sends them.

CC: SYNTHESIS 1 TO 8

Controllers 48 to 55 carry the eight values of the SYN page.

CC: AMP

Controllers 56 to 63 carry the eight values of the AMP page.

CC: FILTER

Controllers 72 to 79 carry the eight values of the FLT page.

CC: EFFECTS

Controllers 80 to 87 carry the eight values of the EFX page.

CC: LFO 1 TO 3

Controllers 88 to 95, 104 to 111 and 112 to 119 carry the values of LFO 1, LFO 2 and LFO 3.

CC: ALL NOTES OFF

The panic command, [⌘] + [.] or Panic in the transport menu, lets every held note go. It sends controller 123 on the channel of each track. Controller 120, which the manual names for this, does nothing on OS 1.32B.

  1. Press [SPACE]. The machine plays.
  2. Right-click the play key and click Panic. Every note goes off and the machine stops.

NRPN PARAMETERS

An NRPN message carries a track, a parameter and a value. The values of the MIDI page go out as NRPN 0x38 to 0x3F.

NRPN PITCH

The machine takes a pitch for a track by NRPN. The editor does not send it.

NRPN NOTE OFF, TRIG TRACK

The machine releases a note or triggers the amp, the filter or the LFO of a track by NRPN. The editor does not send these.

NRPN MULTI ENV

The multi envelope has the NRPN range 0x40 to 0x45. The multi envelope of the Perform workspace sends it.

PITCH BEND

Pitch bend works per track. The joystick pad sends it.

PROGRAM CHANGE

A program change on the base channel selects a pattern. The firmware reacts to it when your host sends one, for example from a clip. With Prg change out on, choosing a pattern in the editor sends one out.

SONG POINTER, CLOCK, START, CONTINUE, STOP

These system messages sync the machine to a host. The firmware handles them, and the editor uses them when it follows the host's clock (Tempo in EXT). A loop in the DAW arrives as a song position and a continue. When the host stops, the editor sends All Notes Off on every channel as well. With Tempo in on INT none of these reach the machine.

The machine's own MIDI out carries notes, controllers, program changes, pitch bend, pressure, clock, start, stop and continue. It never carries SysEx.

23. Appendix C: SysEx referenceMonomachine Editor

23

Appendix C: SysEx reference

MM manual pp.C-1 to C-6

The Monomachine is edited and backed up with SysEx messages. This appendix lists them by their message number and says where the editor uses each one. You do not write them by hand: the editor sends them as you work, and writes or reads them in a .syx file when you use Export SysEx… and Import SysEx… (chapter 19, "FILE").

0x50 / 0x51 GLOBAL DUMP, REQUEST

The global dump holds the data of one global slot: routing, MIDI channels, control in, control out 1 and 2, the MIDI sequencer settings, the multi map and the master tune. The editor reads and writes all of these. A few bytes have no known use, and the editor keeps them as the machine sent them.

  1. Click GLOBAL in the top bar.
  2. Click the plus beside Master tune. The tune goes up by 0.1 Hz.
  3. Hold [SHIFT] and click the minus. The tune goes down by 1 Hz.
  4. Press [⌘] + [Z] twice. The tune is as before.
The master tune in GLOBAL

0x52 / 0x53 KIT DUMP, REQUEST

The kit dump holds a whole kit. The kit library and the SysEx panel send and read it.

0x54 UNUSED

The machine does not use message 0x54, and neither does the editor.

0x55 SET CURRENT KIT NAME

This message renames the kit that is loaded. The Rename control of the kit library sends it.

0x56 SET ACTIVE GLOBAL

This message chooses the global slot in use. The slot keys of the GLOBAL panel send it: click key 2 and it lights, and the machine takes slot 2 as the active global. A slot made active while a dump is arriving on the SYSEX RECV screen stays active.

0x57 LOAD PATTERN

This message switches the machine to another pattern. The pattern chooser sends it.

0x58 / 0x59 LOAD / SAVE KIT

These messages load a kit from a slot of the machine and save the current kit to one. The kit library uses them.

0x5B ASSIGN MACHINE

This message gives a track a machine, with its start mode. The machine picker sends it.

0x5C SET TRACK ROUTING

This message sets the output bus and the input of a track. The Mix workspace sends it.

0x5D / 0x5E DIGIPRO WAVEFORM DUMP, REQUEST

These messages carry the user waveforms of the DigiPRO. The DigiPRO card of the GLOBAL page requests each position to list them, and Export SysEx… requests them for a file. A factory waveform answers nothing. The machine takes a waveform dump only on GLOBAL > FILE > DIGIPRO MGR > RECEIVE: the editor opens that screen with the machine's keys, sends the dumps and writes them. Load, Rename, Paste and Undo on the card send them. Over HW MIDI you open the screen yourself.

0x5E SET GATE BOX PARAMETER

This message sets a reverb parameter of the gate box. The editor does not use it: the reverb values go out as controllers (appendix B).

0x61 SET TEMPO

This message sets the tempo, from 30 to 300 BPM. The TEMPO field of the LCD sends it.

0x67 / 0x68 PATTERN DUMP, REQUEST

The pattern dump holds one pattern. Every edit of the sequence and the pattern chooser use it.

0x69 / 0x6A SONG DUMP, REQUEST

The song dump holds one song. The Song workspace sends and reads it.

0x6C / 0x6D LOAD / SAVE SONG

These messages load a song from a slot and save one to it. The Load and Save controls of the Songs column send them.

0x70 TO 0x72 STATUS REQUEST, SET, RESPONSE

The status messages carry the slot, the pattern or song mode, the poly setting and the tracks of the machine. The editor reads and sets them as you change the pattern or song mode, the poly setting and the kit state.

TURBOMIDI SPEED MESSAGES

TurboMIDI messages negotiate a faster speed on the cable between a host and a real machine. The editor does not send them.

24. Beyond the hardwareMonomachine Editor

24

Beyond the hardware

The editor runs the real Monomachine operating system and adds a few things around it. This chapter describes them.

MACHINE MEMORY

A Monomachine keeps what you save when you switch it off: its kits, patterns, songs and globals stay in its memory. The editor does the same. When you save on the machine, the editor writes what you saved to a file on your computer, slot by slot. A new session starts from factory memory with the saved slots put back in.

Only a save writes the file: a kit, pattern, song or global stored into its slot. That is SAVE KIT, a change to a pattern (the machine stores pattern edits as you make them), SAVE SONG, a change to a global, a SysEx dump the machine takes in, a storage image you load. It makes no difference whether you save in the editor or on the machine's own keys. The editor writes the file a second or two after the save. Turning a knob, automation from a DAW and changes to the kit that plays that you have not saved write nothing, and neither does playing. In a DAW the machine follows the DAW's clock; that setting is never saved.

A new session is a new plug-in in a DAW project, a new DAW project, or a start of the standalone editor. It has every slot you saved, wherever you saved it. The standalone editor also keeps the kit that played when you quit it, with its unsaved changes.

Start from factory memory

  1. Choose RESET MACHINE… in the engine menu, the drop-down at the left of the LCD.
  2. Click Start from factory memory…. The editor asks a second time.
  3. Click Start from factory memory. The machine restarts with its factory memory, as on a new install, and the saved memory file is deleted. This takes a few seconds.

New sessions now start from factory memory until you save again. The reset has no undo: click Export SysEx… in the question first to keep a way back.

Turn it off

Choose KEEP MEMORY: ON in the engine menu. It reads KEEP MEMORY: OFF, and new sessions start from factory memory. The editor no longer writes the file. The file stays, so when you turn it on again, new sessions start with the memory you saved before.

Two editors at once

Two Monomachine editors open at the same time, in one DAW project or in two, share the same file. Each writes the slots it saves and leaves the others. When two editors save the same slot, the last save wins.

When the file cannot be used

The file is written in one step, so a crash leaves the old memory or the new one. If the file is damaged, the machine starts from factory memory and the editor says so. It keeps the file beside the new one as machine-memory.unusable with the date and time in its name, and your next save writes a new memory file. If the file was written by a newer editor, the editor leaves it as it is and saves nothing over it. It says so; move the file away to save again.

If the editor cannot write the file, because the disk is full or the folder is read only, it says so and keeps the old file. It tries again at your next save and when it closes. Your saves stay in the session. The standalone editor starts with them next time, not with the old file, and writes them then.

The file is machine-memory.bin in the memory folder of the editor's data folder: Documents/Gearmulator Preview/Monomachine/memory. It holds the slots you saved, nothing else. It holds no firmware.

FACTORY SONGS PLAY

The songs of the factory memory are in the song slots of the editor, and they play.

  1. Press [5], or click the Song tab.
  2. Click a song slot. It is only selected, and the machine keeps the song it has.
  3. Click Load, or press [ENTER]. The machine takes the song while it is stopped, and the arrangement on the right shows its rows.
  4. Click the SONG key in the middle of the page, so that the machine plays the song and not a pattern.
  5. Press [SPACE]. The machine starts, the step moves and the song goes on to a later row. The output is not silent.
  6. Press [SPACE] again. The machine stops.
A factory song loaded

Every factory song that holds rows plays this way. The arrangement follows the machine as it plays. See "LOAD SONG" in chapter 17.

FACTORY PATTERNS PLAY

The patterns of the factory memory are there too, A01 to H16.

  1. Click the pattern field of the LCD. The pattern chooser opens.
  2. Click the pattern you want. The machine goes to it and loads the kit it recalls.
  3. Press [SPACE]. The step moves through the pattern and the output is not silent.
  4. Press [SPACE] again, and pick another pattern.
A factory pattern
A factory pattern

Patterns that hold notes, spread over all 128, play the same way one after the other.

GEN ROLLS A RHYTHM

The machine has no such function: you set the hits by hand. The GEN bar on Pattern rolls a rhythm for the selected track from a few settings. It writes ordinary trigs, so you can edit the result as any other.

  1. Press [1], or click the Pattern tab, and pick a track on the rail.
  2. Read the GEN bar under the roll. It offers the generator of that track. Its modes are EUCLID, RANDOM and KEEP.
  3. Click the R key, or press [R], until the notes change. Each press rolls a new variation.
  4. Click a value of the bar, for example Hits with a Euclid setting or Density with RANDOM, to change it. A click steps the value up, a [⇧]-click down.
  5. Press [⌘] + [Z]. The whole run of rolls goes back in one step.

Hold [⌥] and the bar changes every track at once, over the whole pattern. Defaults puts the bar back to its starting values.

The Kit workspace after a roll of GEN and MUTATE

MUTATE CHANGES A SOUND

The machine has no such function. MUTATE nudges the sound of the selected track at random. It sits at the top of Kit, beside the machine name.

  1. Click the Kit tab and pick a track on the rail.
  2. Click the R key of MUTATE. The sound changes. Click it again for another roll.
  3. To keep the change to one part of the sound, click the chips of the Scope: SYN, AMP, FLT, EFX, LFO. Switch FLT on and SYN off, and only the filter moves.
  4. Click the Amount value to say how far a roll goes.
  5. Click UNDO in the top bar, or press [⌘] + [Z], to bring the sound back.

CLEAR

When you play with a sound, Clear puts the selected track back as the kit's slot stores it. On a synth track it restores the machine, the seven pages, the level, the outputs and input, the assign rows, the key tracking, portamento and legato switches and the track the notes are forwarded to. On a MIDI track it restores the MIDI page. The other tracks, the multi envelope, MULTI TRIG and the kit name stay as they are. The kit library's Reload loads the whole kit again. Clear does one track.

  1. Click the Kit tab and pick a track on the rail.
  2. Turn a few knobs. Clear turns on.
  3. Click Clear. The values are the stored ones, and the key is off again.
  4. Press [⌘] + [Z]. Your edits are back, and the key is on.

Clear is off while the track is as stored. Saving the kit makes the saved sound the stored one.

SOLO

S on a track plays that track alone. The mutes you had come back when you let go.

  1. Click S on the strip of a track on Mix, or on its entry in the rail. The other synth tracks are muted.
  2. Click S again. The mutes are as they were before.

The solo is saved with the project, in the DAW and in the standalone editor. Open the project again and the solo is on, the other synth tracks are muted, and the mutes you had before the solo come back when you end it.

UNDO AND REDO

The machine has no undo. Every edit of the editor can be taken back and done again, across kits, patterns and songs.

  1. Make an edit, for example click an empty cell of the piano roll.
  2. Press [⌘] + [Z], or click UNDO in the top bar. The edit is gone.
  3. Press [⌘] + [⇧] + [Z], or click REDO. It is back.

A drag, a paint or a run of rotates is one undo step. A SysEx import and the Empty reset are one step each: Undo writes back the kits, patterns and songs they overwrote. A global is not put back (chapters 19 and 20). A kit you leave without saving is kept as the machine's UNDO KIT: choose it in the kit library to get the edited kit back, still unsaved, in its own slot.

TYPED VALUES

Instead of turning a value, you can type it.

  1. Click the Kit tab and pick a track.
  2. Hold [⌘] and click a value box, for example in the filter. A field opens over it with the value it shows. Press [ENTER] on a focused box and the field opens as well.
  3. Type a number and press [ENTER]. The box shows it and the machine has it.
  4. A number out of range is refused: the field stays and nothing is sent. Press [ESC] to leave the field with the value as it was.

A value that shows names, such as a waveform, takes a name. Type it in small letters if you like. A name the value does not have is refused, and the message lists the names it has.

With a value focused, press [↑] or [↓] to step it, and [⇧] for larger or finer steps. Double-click a box to put it back to its default. [⌘] + [Z] takes back a typed value in one step.

THE STEP MENU

Right-click a step in the roll or on a trig row. A menu offers what a step can do: its trig, accent or slide, copy, cut, paste here, duplicate, clear and the fill of every second or fourth step from it.

  1. Click the Pattern tab and pick a track.
  2. Switch Draw on, and click an empty cell of the roll. A note is there.
  3. Right-click the note. Its menu opens.
  4. Choose Slide. The note slides.
  5. Right-click the note again and choose Copy. Right-click an empty step and choose Paste here. The note lands there.

Each choice is one undo step. [ESC] leaves the selection, and [⌘] + [Z] takes the choices back in turn.

SELECT, COPY AND PASTE STEPS

You select steps with the mouse and copy, paste and clear them, in one track or in several.

  1. Click the Pattern tab and pick a track that has a note.
  2. Hold [⌘] and click a note in the roll. It is selected. Hold [⌘] and drag to select a block of steps. Hold [⌘] and [⇧] and click a step of another track to take that track in.
  3. Press [⌘] + [C], or click COPY in the top bar.
  4. Hold [⌘] and click an empty step. Press [⌘] + [V], or click PASTE. The block lands there from its first step and track.
  5. Press [⌘] + [D] to repeat the block right after itself.
  6. Click CLR. Only the selected steps are cleared.
  7. Press [ESC] to leave the selection, and [⌘] + [Z] for each step you took.

To paste into several tracks, copy the steps, hold [⇧] and click the headers of the other tracks to mark them, and press [⌘] + [V]. All of them take the copy, and the rest of their pages stays as it was. A paste puts the steps on the page you look at, not on the first page of the track.

The keys of the computer reach the operating system as well: [⌘] + [C] and [⌘] + [V] work from the keyboard as from the top bar.

COPY, PASTE AND CLEAR WHAT

The machine's super copy and super clear choose the parts of a track to take. The editor has the same in its what menus.

The Copy what window
  1. Click the Pattern tab and pick a track that has notes.
  2. Click the arrow beside COPY CLR PASTE and choose Copy…, or press [⌘] + [⇧] + [C].
  3. Tick the parts to take: Notes, Slide, Swing, Arp, Transpose, Machine + sound and the others in the list. Click Copy.
  4. Pick the other track on the rail.
  5. Click the arrow again and choose Paste…, or press [⌘] + [⇧] + [V]. Click Paste into 1 track. The parts you ticked are the first track's.
  6. Press [⌘] + [Z]. The whole paste is one undo step.

To clear parts, press [⌘] + [⇧] + [BACKSPACE], tick Notes alone, and click Clear. The notes go and the slides stay.

DROP A FILE ON THE WINDOW

Drop a SysEx file on the window of the editor, and the import window opens with a preview of it. It is the same as IMPORT SYSEX… in the engine menu. See "FILE" in chapter 19.

  1. Drag a .syx file from your computer onto the window of the editor. The import window opens with the preview of the file.
  2. To leave it, click Cancel. The window closes and nothing is sent.

SYSEX IMPORT WITH A PREVIEW

The machine takes a SysEx dump without showing you what is in it. The editor lets you look inside the file before it sends anything.

  1. Choose IMPORT SYSEX… in the engine menu.
  2. Read the preview. It has a tab for each kind and a grid of the slots.
  3. Tick the kinds you want, and choose where each one goes with the Place row.
  4. Click Import, or Verify only to compare without writing. A report says what happened to each slot.

The tick Read back and compare beside Verify only decides whether the import reads the slots back after it sends them. The full procedure is in "FILE" in chapter 19.

NOTES FROM A MIDI KEYBOARD LIGHT THE TRACK

The track you play lights up. The number of the track on the rail and its light on Mix show it while a note is held.

  1. Click the Perform tab.
  2. Hold a key of the keyboard on the page with the mouse. The key is lit. Let go and it goes dark.
  3. Hold [A] on the computer keyboard. Its key is lit while you hold it.
  4. Play a MIDI keyboard on a channel the machine plays. The keys of the notes you hold are lit, and each goes dark when you let go of it. On a channel the machine does not play, none is lit.

THE SELECTED TRACK FOLLOWS THE LAST TRACK PLAYED

The machine has no such function. With it on, the track you select changes to the last synth track you played from a MIDI keyboard. It is off until you turn it on, and the project keeps the choice.

  1. Open the engine menu and choose FOLLOW PLAYED TRACK: OFF. It reads FOLLOW PLAYED TRACK: ON.
  2. Play a MIDI keyboard on the channel of track 4. Track 4 is selected.
  3. Play it on a channel no synth track plays. The selection stays where it was.
  4. Choose the entry again to turn it off.

A track's channel is the base channel plus the track's number, inside the CHANNEL SPAN of the global. The keys of the computer keyboard never move the selection. With the HW MIDI engine it does nothing, since the port then carries the machine's own MIDI. While a question is open, or LEARN waits for its note, the selection stays where it is.

A DUMP FROM THE DAW WITHOUT SYSEX RECV

The machine takes a kit, pattern, song or global dump only on GLOBAL > FILE > SYSEX RECV. The editor's AUTO RECEIVE takes it on any screen, as the Machinedrum does: a dump that reaches the editor on its MIDI in (a MIDI track in the DAW, a Max for Live device, a librarian sending to the standalone) lands on the machine by itself. It is on until you turn it off, and the project keeps the choice. A project saved by 0.8 or earlier has it on.

  1. Send a kit, pattern, song or global dump from the DAW to the editor. The editor opens SYSEX RECV on the machine, sends the dump as IMPORT SYSEX… does, and goes back to the main screen a few seconds later. A message names what went.
  2. Press [⌘] + [Z] to put back what the dump replaced. A burst of dumps is one step.
  3. To have the machine's own behaviour (a dump outside SYSEX RECV is dropped), open the engine menu and choose AUTO RECEIVE: ON. It reads AUTO RECEIVE: OFF. Choose it again to turn it back on.

The machine plays on while it takes the dump. A dump into the kit that plays replaces your unsaved edits of that kit, as on the machine. With the HW MIDI engine it does nothing: open SYSEX RECV on the machine yourself.

THE CPU METER AND THE SPEED-UPS

The machine has no such function. The emulation needs processor time, and the CPU meter at the right of the top bar, after the version, shows how much of the audio time it takes.

The CPU meter
The CPU meter
  1. Press [SPACE]. While the machine plays, the meter moves.
  2. Click the meter. Its details open under it: the average, the worst block, the speed of the machine, the rate and block size, the speed-ups, and whether the editor runs native or under Rosetta.
  3. Press [ESC] to close the details.

The speed-ups make the emulation use less time and do not change the sound. They are on by default. To switch them, choose Speed-ups in the Developer part of the editor's menu, or in the details of the meter. Speed-ups (each)… in the details lists every one of them to switch alone.

THE OUTPUT METER AND VOLUME

At the right end of the LCD, two bars show the level of the left and right outputs, and a volume line sits beside them.
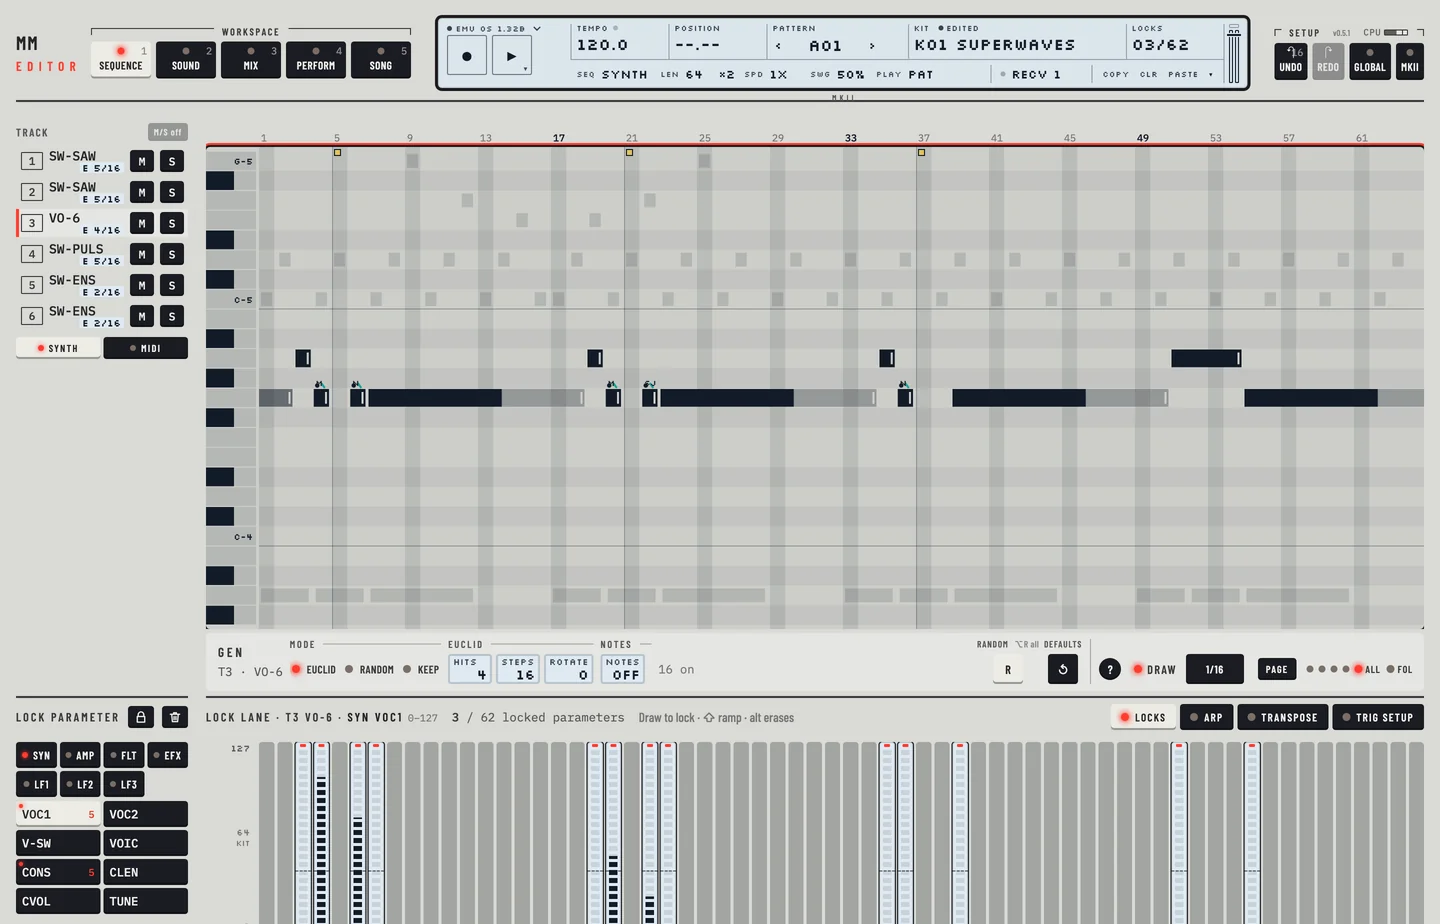
The output meter and volume
  1. Drag the volume line down. A readout under the LCD says the level while it changes, for example -6 dB, and goes a moment after you let go.
  2. Scroll a notch up. The volume rises by 1 dB.
  3. Drag it to the foot to switch the output off.
  4. Double-click it to put it back to 0 dB.
  5. Press [SPACE]. The bars follow the peaks of the output.

THE EDITOR'S MENU

Right-click the empty part of the header, or the track rail. The editor's menu opens, with the editor and its version as its title. It holds the zoom of the page, the updates, the log folder, Save Diagnostics… and the Developer switches. Save Diagnostics… asks where to save and writes one zip: the editor's log, its version and your system, your audio and MIDI setup, the editor's settings and the last performance capture, never a ROM, the machine's memory, a project or a sample. Send that zip with a bug report. It also works when the page does not start: right-click the empty window.

  1. Right-click the header. The menu opens.
  2. Move to Zoom and press the right arrow. Its steps open, with the first one focused. Click a step. The menu closes and the page zooms.
  3. Right-click again. Zoom names the new step.
  4. Choose Updates, then Check Daily. Open Updates again: the tick of Check Daily has turned.
  5. Press [ESC] to close a submenu. Press [ESC] again to close the menu.

The keys [⌘] + [=], [⌘] + [-] and [⌘] + [0] zoom as well.

THE KEYBOARD VIEW

The keyboard view shows a drawn keyboard with the words of each key, and a search.

  1. Press [?], or click the ? key in the top bar. The view and the list of keys open.
  2. Look for a key, or type in the search to find it.
  3. Press [ESC] to close it.

THE COMPUTER KEYBOARD PLAYS

The letter keys play the selected track from any workspace.

  1. Click the Pattern tab and pick track 1 on the rail.
  2. Press [A]. Track 1 plays a note.
  3. Press [W], [T] and [P] for the black keys. [A] and [S] are still the white keys C and D.
  4. Press [Z] or [X] to move the octave, and [C] or [V] for the velocity.

On the Monomachine Editor [T] is a black key, so tap tempo is [B].

TAP TEMPO

Tap a key to the beat and the editor takes the tempo you tap.

  1. Press [B] five times, about half a second apart. The tempo follows, for example 119 BPM.
  2. On Pattern, where [B] switches Draw, press [⇧] + [B]. It taps on every workspace.

The tempo is the average of your last taps.

PATTERN QUEUE AND CHOOSER

The pattern chooser shows all 128 patterns, A01 to H16, in eight banks, with each pattern's length and the kit it recalls. Empty ones read EMPTY.

The pattern chooser
The pattern chooser
  1. Click the pattern field of the LCD. The chooser opens.
  2. Press a letter, A to H, or click a bank key. The selection moves to that bank.
  3. Click a pattern. The machine goes to it, and loads its kit.
  4. Press [ESC] to close the chooser.

While the machine plays, a pattern you choose is queued. Click › on the LCD and the next pattern waits. It starts at the end of the pattern you hear. Hold [⇧] and click to go at once. With the machine stopped, a click goes there at once.

In the chooser you can copy a pattern, clear it and paste a copy of another into it. Each is one undo step, and a clear asks first.

KIT AND SONG SLOTS

The kit library and the song slots work with the same keys: load, copy, paste, rename and clear a slot. Each can be undone.

The song slots
The song slots

Kits

  1. Click KIT on the LCD. The kit library opens.
  2. Click a kit. It loads. Hold [⌥] and click to select a slot without loading it.
  3. Click Copy, hold [⌥] and click another slot, and click Paste. Press [⌘] + [Z] and the slot is back as it was.
  4. Click Rename, type a name and press [ENTER]. The editor asks before it writes. Or press [F2].
  5. Press [DELETE] and answer the question. The slot is cleared. A kit you leave without saving is kept as the UNDO KIT.
  6. Press [ESC] to close the library.

Songs

  1. Click the Song tab.
  2. Click a slot to select it. Click Load to give its song to the machine.
  3. Press [F2], type a name and press [ENTER].
  4. Click Copy, select another slot and click Paste. No question is asked. You can also drag a slot onto another to copy it.
  5. Select a slot, choose Save to…, type a name and press [ENTER]. The machine's song goes into that slot.
  6. Click Clear. The editor asks first. Answer it, and the slot is empty. [⌘] + [Z] brings the song back.

PIANO ROLL

The roll on Pattern draws notes with a length and moves them. There is no mode to switch: it always draws. It writes the same step data as the machine's own entry.

The piano roll
The piano roll
  1. Click the Pattern tab and pick a track.
  2. Set Len to 1/16.
  3. Click an empty cell. A note of that length is there, and a NOTE OFF on the step after it, so that it does not run into the next note.
  4. Click Len to 1/8 and click another cell. The note is two steps long.
  5. Drag the end of a note over more steps to make it longer. It then lasts up to the next note.
  6. To paint, press an empty cell and drag sideways. Every step you cross gets a note at that pitch. Hold [⌥] and drag over them to erase them. Each paint or erase is one undo step.
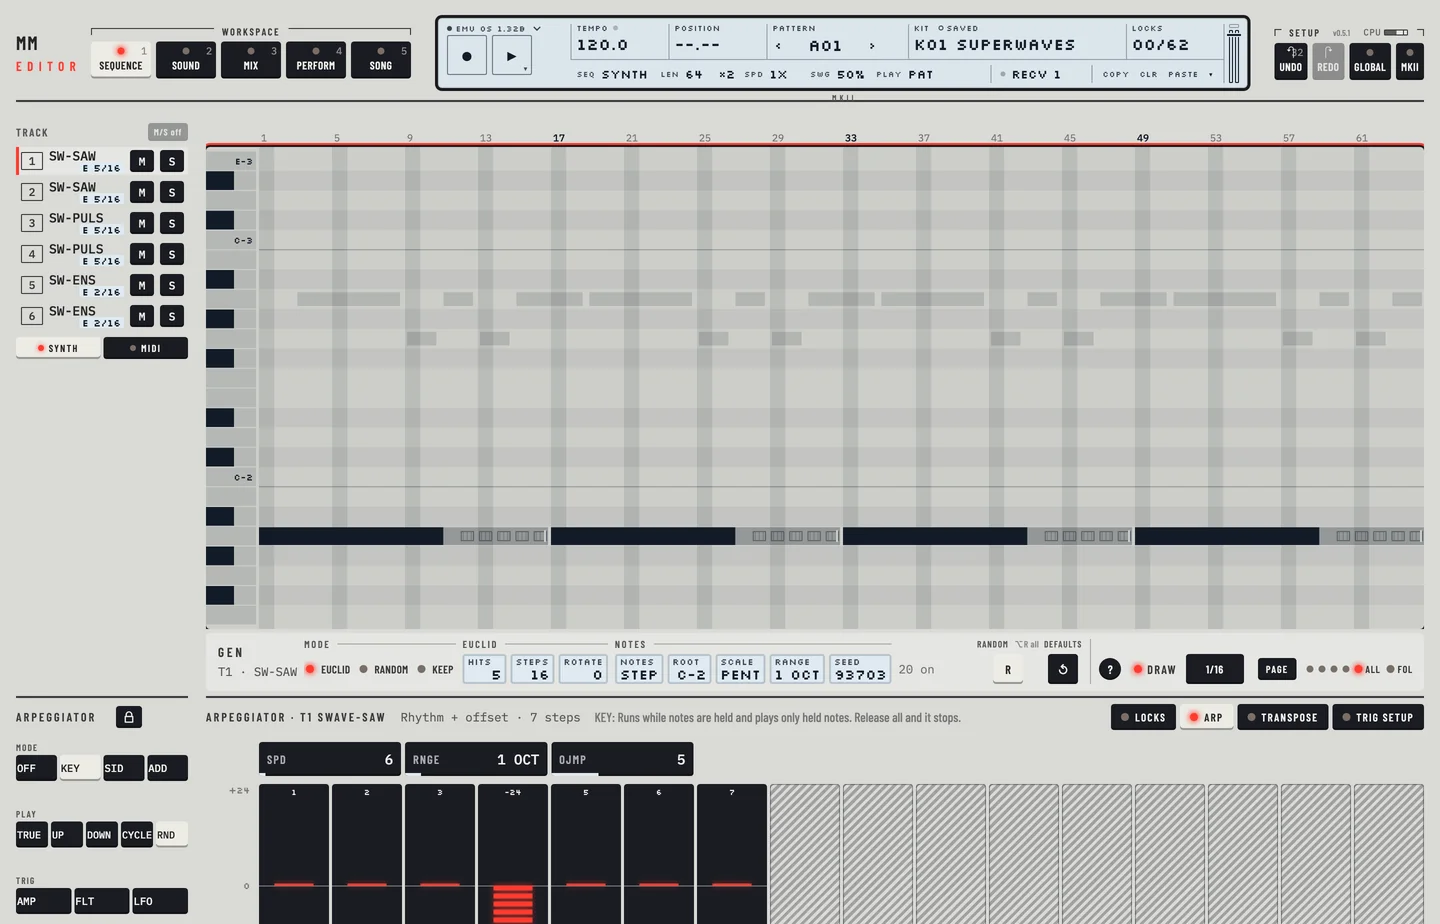
  7. Drag the body of a note four steps right. It moves, with its NOTE OFF. Drag it up or down to change its pitch.
  8. Click a note to select it. It stays selected. Press [DELETE] or [BACKSPACE], or double-click the note, to remove it. The editor writes no NOTE OFF for the removed note, so the note before it runs on.
  9. Hold [⌘] and drag over steps to select them, then press [DELETE] or [BACKSPACE] to remove what is selected.
  10. Press [⌘] + [Z] for each step you took.

The keys at the left of the roll play the track. A key is lit while you hold it with the mouse, with the computer keyboard or with a MIDI keyboard, as on Perform.
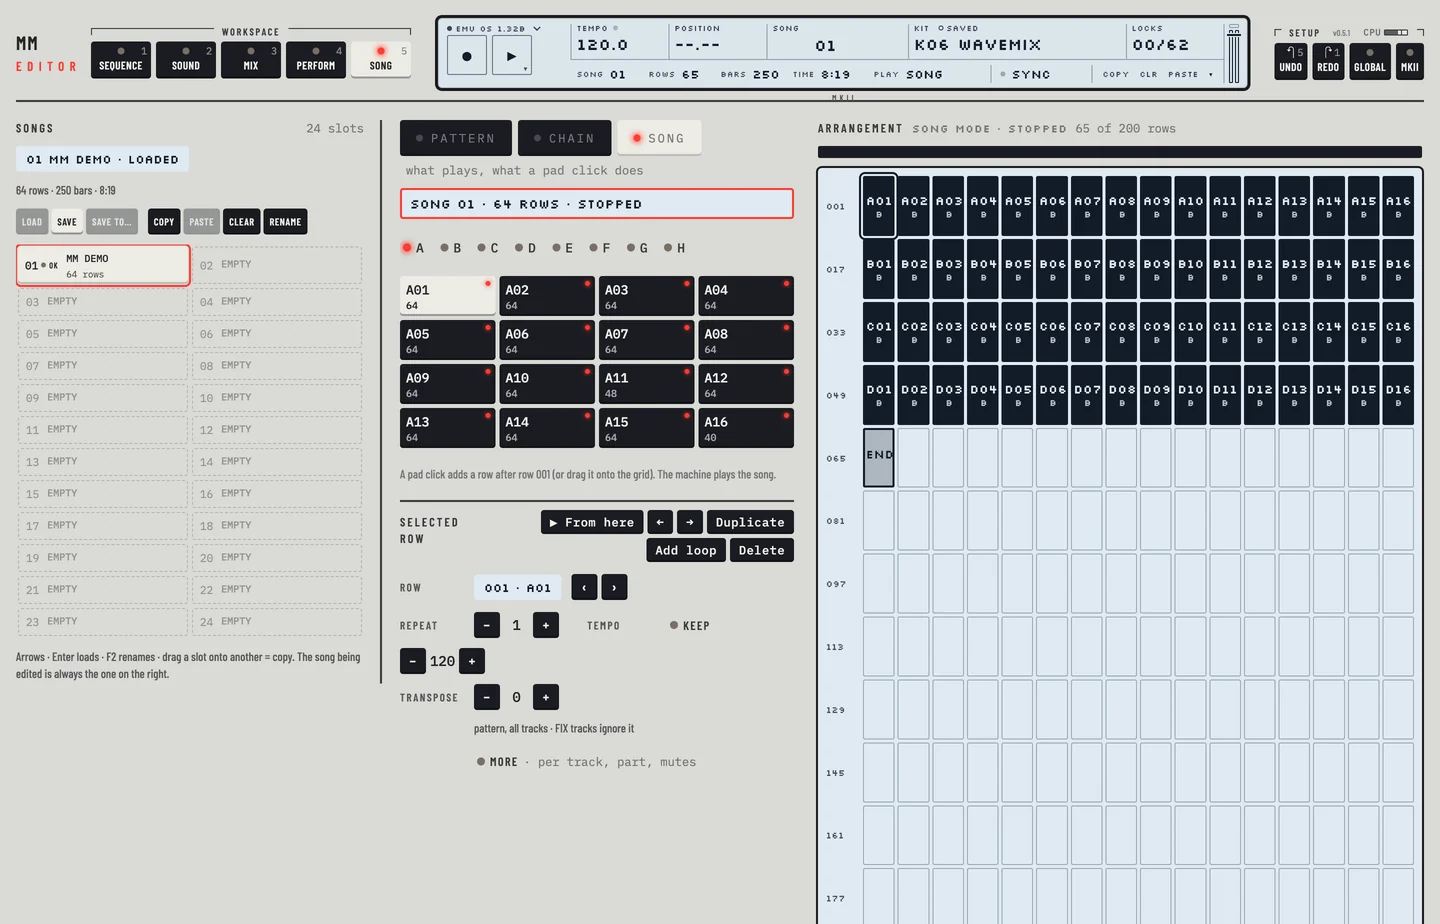
On Transpose, click a key of its keyboard to set the transpose of the track. On a MIDI track the length is a number of ticks: a 1/16 note is 6, and three steps are 18.
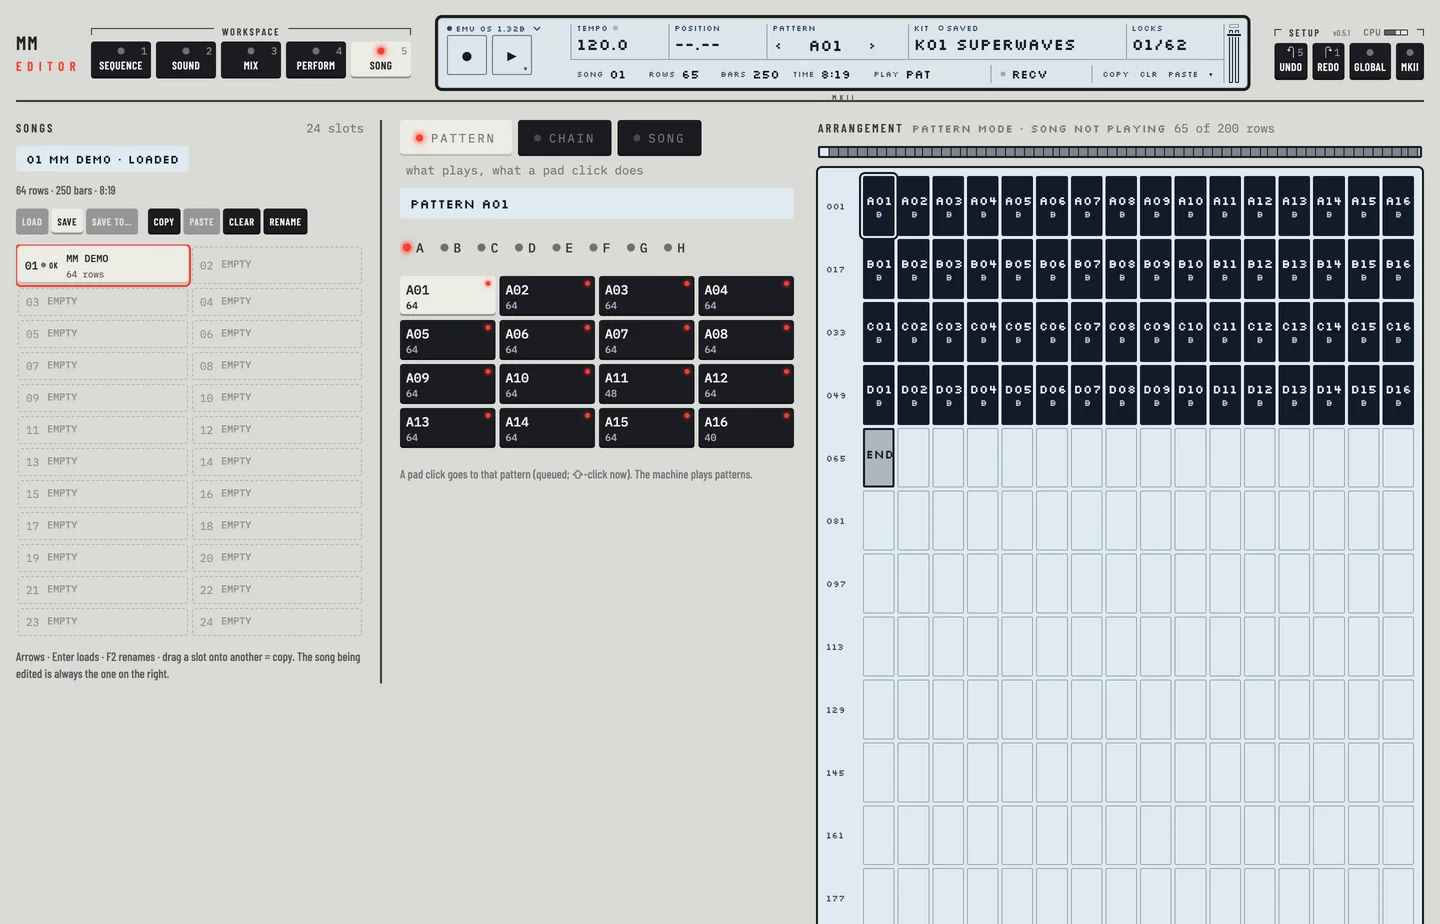
WHAT YOU DRAW IS WHAT PLAYS

What you enter in the sequencer is what the machine plays. The notes you draw reach the machine, and when you clear the pattern the machine plays silence.

Four notes drawn in an empty pattern
  1. Click the Pattern tab.
  2. Click the pattern field of the LCD and pick a pattern with no notes.
  3. Pick track 1 in the rail.
  4. Click four cells of the piano roll. Each click draws a note.
  5. Press [SPACE] and let the pattern run. The position moves through the pattern and the output is not silent.
  6. Press [SPACE] to stop. Press [⌥] + [DELETE] or [⌥] + [BACKSPACE]. The pattern is cleared and the notes are gone.
The pattern cleared
The pattern cleared
  1. Press [SPACE] again. The position moves through the pattern and the machine plays silence.

MIDI LEARN

The Monomachine has no such function. With MIDI Learn a knob or fader of your controller moves any value of the editor, on any track. The machine's own CC map stays for everything you do not map.

  1. Click the Control key in the Setup group, right of Learn, or press [6]. Click it again to leave.
  2. Press Learn (L). The key lights.
  3. Click a value, for example the DEC of the amplifier on track 1.
  4. Turn a knob on your controller from one end to the other and back. The mapping is made, and the knob now moves that value.
  5. To reverse a mapping, select it in the list and click the INV key. To remove it, click the × key.
  6. Press [ESC] to leave Learn.

Every value of the page can be learned. Values that belong to no track are learned too: the tempo, the master tune on the Global page, the five values of the multi envelope on the Perform tab and the SWG value of the playing pattern. So are the transpose of the pattern and of each track (with its scale and key), everything of the arpeggiator (play, mode, range, speed, octave jump, length, the envelope switches and the value of each of its steps), the assign table of each synth track (the page, destination and amount of every row, and mirror, HPF and LPF) and every value of the six MIDI tracks (the MIDI page, the four CC numbers and the channel). Click one in Learn as you would a track value. On the Control page they have a column of their own, FX, at the right of the matrix. To add one without learning, choose Global values in the first list under Add, then the value in the second. A learned CC moves the value as a click on the page does, and a turn of a knob is one undo step. A choice, such as an arpeggiator mode or an assign page, is learned over its entries: the CC spreads across the list. The effects of a synth track are on its EFX page and are learned like any other track value. Names cannot be learned.

A button that sends 127 and 0 is learned as the highest and lowest value. Only control changes are mapped, 128 at most, and they are saved with the project. A learned CC wins over the machine's own CC on that channel: the page says what it hides, for example "Overrides the machine's CC 21 on channel 1: T1 DEC", and removing the mapping gives the CC back. Learn is off while the HW MIDI engine is in use, and the page says why.