Pattern sequencer
The pattern sequencer plays 16 tracks, one step after another, in a loop. A pattern is up to 64 steps long. The Machinedrum holds 128 patterns in 8 banks of 16, A01 to H16. Each step can hold a trig, an accent, a slide and parameter locks.
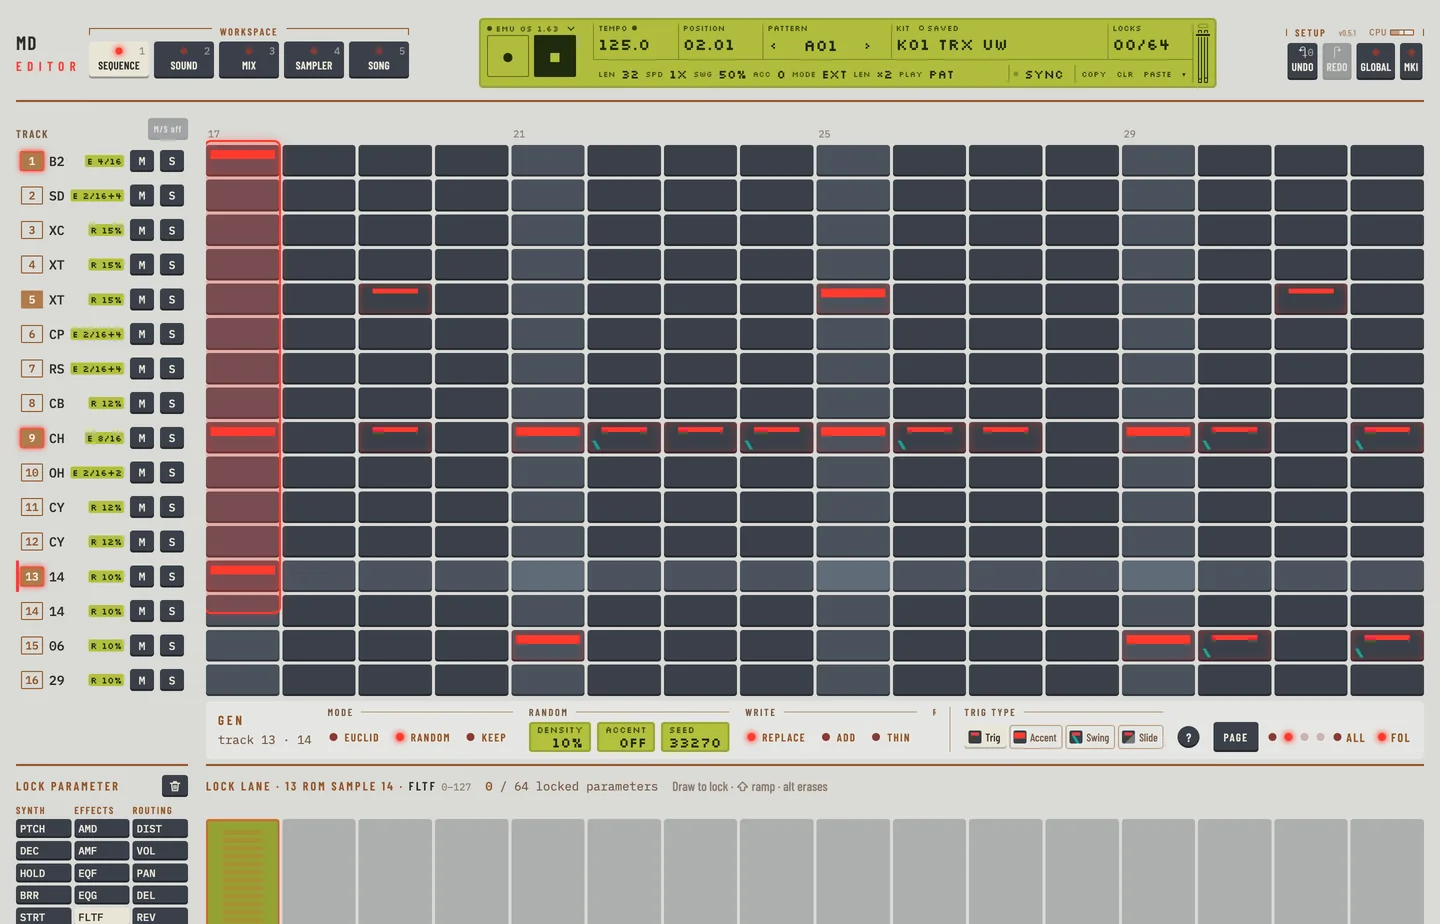
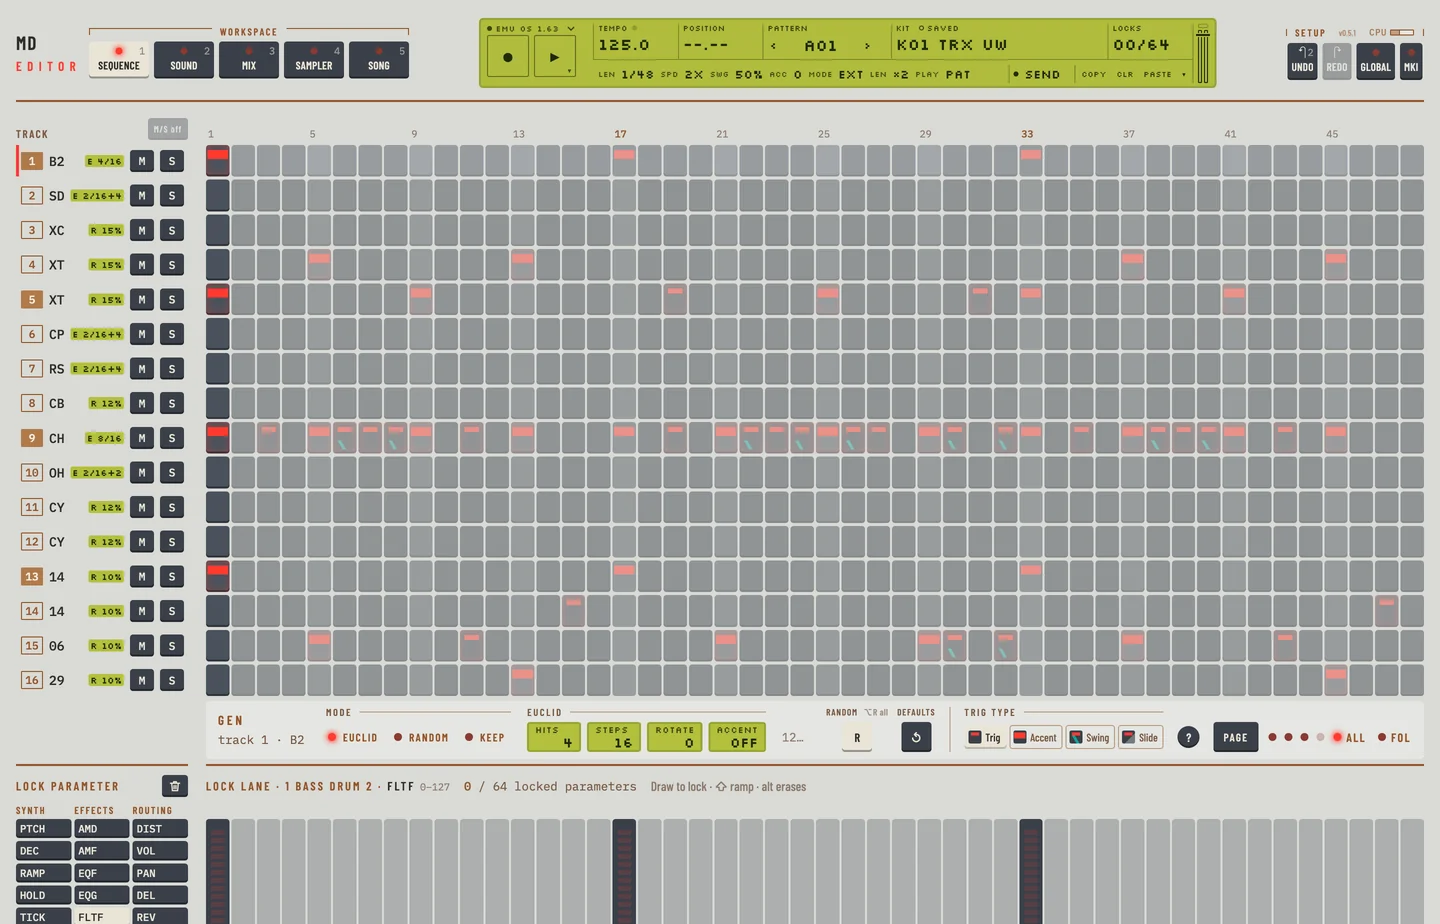
In the editor the sequencer is the Pattern workspace. Press [1], or click the Pattern tab. The 16 tracks run down the page, the steps across it, 16 steps to a page. The lock lane lies under the steps. The LCD keeps the tempo, the pattern, the kit and the lock count on every workspace. Its second line holds the pattern's own values: <LEN>, <SPD>, <SWG>, <ACC> and <MODE>.
Keys are written as on a Mac. [⌘] is [CTRL] on Windows and Linux. [⌥] is [ALT]. The machine's [FUNCTION] key has no twin in the editor. Its second jobs follow [⌥] or have a control of their own, and each section says which.
CLASSIC VS EXTENDED #
MD manual p.35
The machine edits patterns in one of two modes.
In CLASSIC a pattern has no kit of its own and no locks play. Locks that are in the pattern are kept. Patterns are 32 steps long at most.
In EXTENDED each pattern is linked to a kit, and the machine loads that kit when the pattern is chosen. Parameter locks play. Patterns can be 48 or 64 steps long.
To change the mode:
- Open the Pattern workspace.
- Click <MODE> on the second line of the LCD. It reads EXT or CLASSIC.
In CLASSIC the lock lane is greyed and says "CLASSIC: locks muted". The locks are all still there. The pattern chooser and the kit library say which mode is on. In EXTENDED the chooser shows the kit of each pattern as K01 to K64.
TEMPO #
MD manual p.36
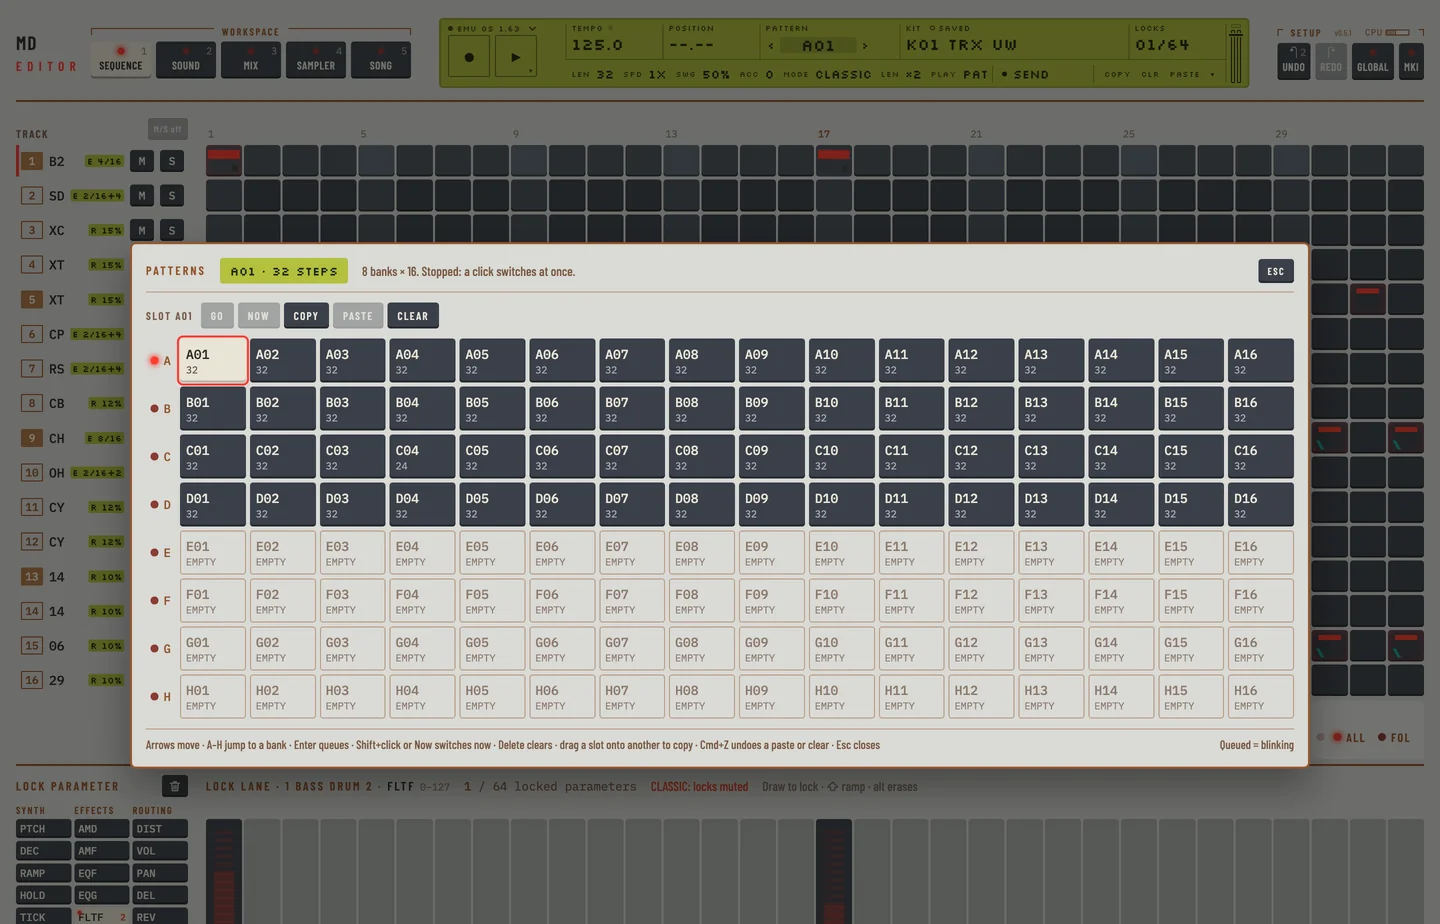
The <TEMPO> field in the LCD is the tempo window of the machine. It reads in beats per minute with one decimal. The range is 30 to 300.
- Drag the field up or down. A pixel is half a beat per minute. Hold [⇧] and a pixel is a tenth.
- With the field focused, press the up and down arrow keys: one beat per minute, or a tenth with [⇧].
Click the field without dragging to open the TEMPO window. It holds what the machine's TEMPO menu holds:
- − and + change the tempo by one beat per minute, or a tenth with [⇧].
- TAP taps the tempo, as [⇧] + [B] does.
- NUDGE shifts the tempo for a moment, as [LEFT] and [RIGHT] on the machine. Press and hold −10 % or +10 %. The tempo is 10 % slower or faster while you hold it, and goes back when you let go. The keys [-] or [=] do the same while held.
- Change on release holds a dragged tempo back until you let go of the field, as [FUNCTION] held does on the machine. The field shows the new tempo while you drag and the machine takes it at the release.
- Sync says whether the tempo comes from the machine or from MIDI clock. Sync in GLOBAL opens the GLOBAL page.
Press [Esc] or click outside the window to close it.
TAP TEMPO #
MD manual p.36
Tap a key to the beat and the machine takes the tempo you tap.
- Press [T] or [B] twice or more in time. [⇧] + [B] taps on every workspace of both editors.
- A message reads "Tap tempo" and the new tempo.
The tempo is the average of your last taps, up to five. A pause of over two seconds starts the count again.
EXTERNAL SYNCHRONIZATION #
MD manual p.36
In a DAW a new plug-in follows the host's tempo and transport. The <TEMPO> field is marked, and it cannot be edited. A drag, an arrow key or a tap says "The DAW sets the tempo. Change it there."
Tempo in in the GLOBAL panel is the switch. Set it to INT and the machine runs on its own clock in the DAW: <TEMPO> edits again, PLAY and STOP are the machine's, and the DAW's tempo and transport no longer reach it. Set it to EXT to follow the DAW again. The project keeps the choice.
To make the machine follow the MIDI clock of another device, set Tempo in to EXT in the GLOBAL panel. See "SYNC" in chapter 10.
PATTERN SELECTION #
MD manual p.37
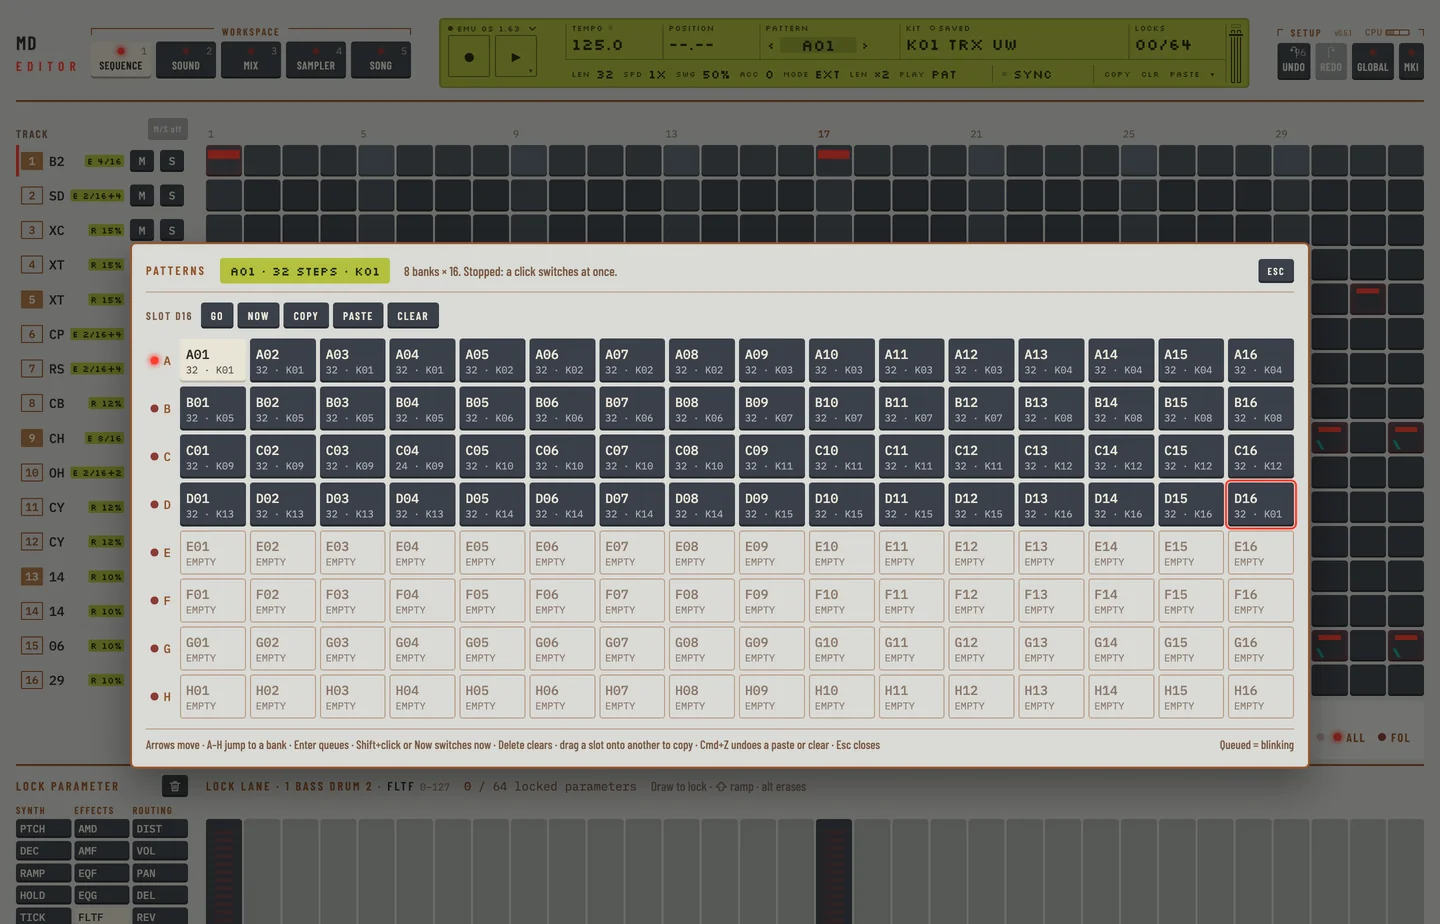
The pattern chooser shows all 128 patterns as eight banks of 16 slots. Each slot gives the pattern's name, its length in steps and, in EXTENDED, its kit. A slot with no pattern reads EMPTY.
To choose a pattern:
- Click the pattern name in the <PATTERN> field of the LCD. The chooser opens. The arrows beside the name step to the previous and next pattern without it.
- Click a bank letter, or press the key A to H, to go to that bank. The arrow keys move over the slots.
- Click a slot, or press [ENTER]. While the machine is stopped, the pattern changes at once. While it plays, the pattern is queued and starts at the end of the pattern that plays. The pattern name in the LCD and the queued slot blink until it does.
- Click a slot with [⇧] held, or click Now, to change at once, without waiting for the end of the pattern. While the machine plays, it stops, loads the pattern and plays again.
- Press [ESC] to close the chooser.
The button under Slot reads Go while the machine is stopped and Queue while it plays.
If the kit has unsaved edits and the new pattern links another kit, the editor asks before it changes.
On the machine you hold a bank key for two seconds so that you can choose the pattern with a second key. The editor has no such wait: you click the bank and the slot.
PATTERN CHAINING #
MD manual p.37
A chain plays patterns of one bank in the order you pick them, and starts again at the first.
- Press [5] to open the Song workspace.
- Click CHAIN over the pattern palette.
- Click a bank letter.
- Click the patterns in the order you want. Each pad shows its number in the chain. After the second pad the machine plays the chain at once. While it plays, the chain starts at the end of the pattern. While it is stopped, [PLAY] starts at the first pad.
- Click a numbered pad to take it out. Back takes out the last pad. Clear ends the chain.
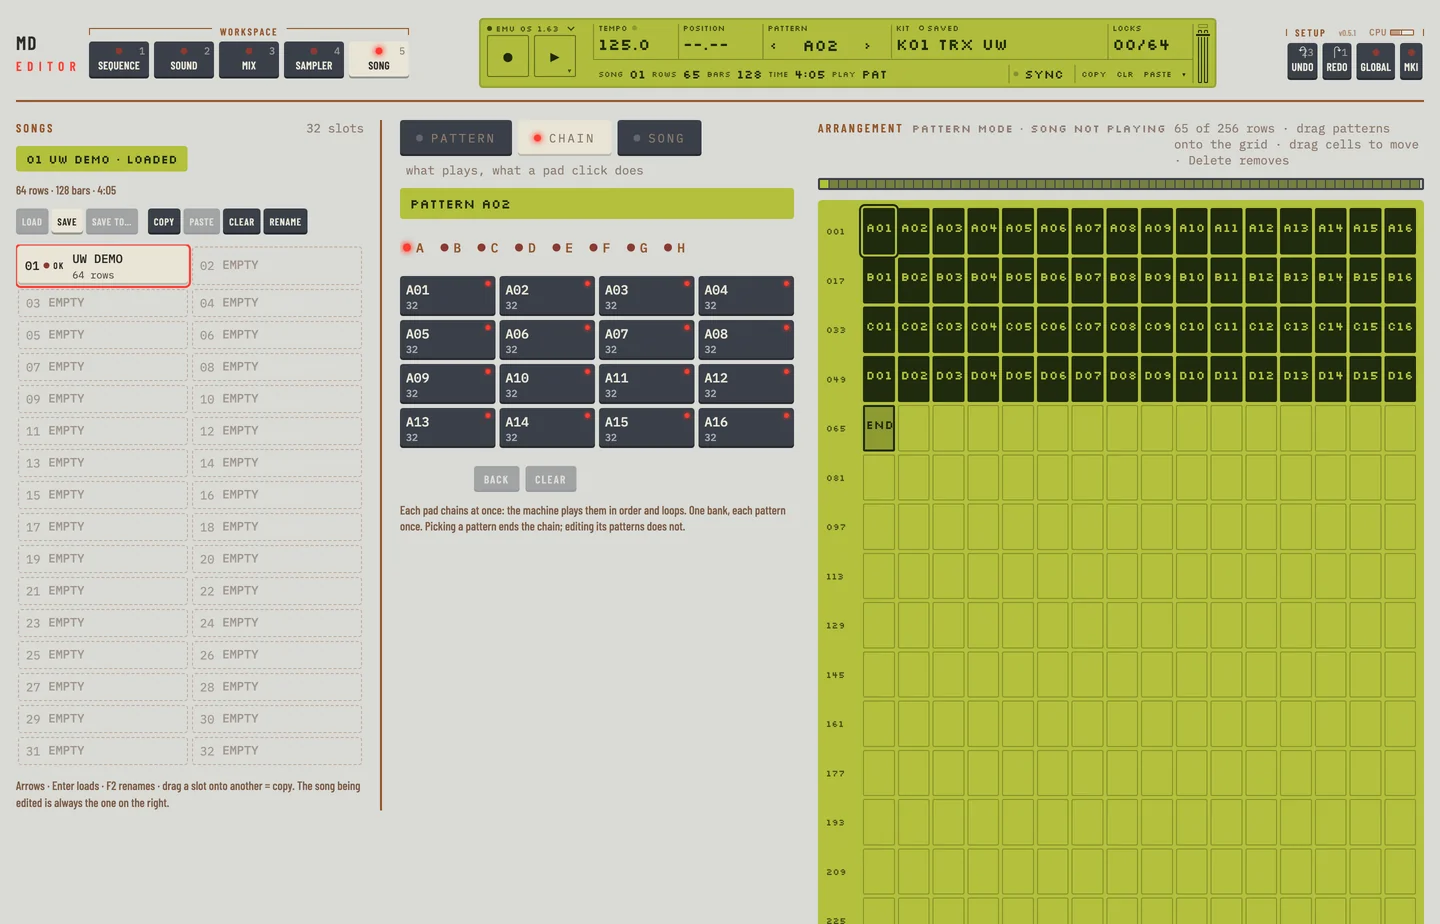
A chain holds up to 16 patterns of one bank, each pattern once. The palette says which pattern plays now and which comes next. Choosing a pattern ends the chain. Editing the patterns in it does not.
A pattern queued while the machine plays starts at once when you stop:
- While a pattern plays, choose another one: click › next to the pattern on the LCD, or a pattern in the pattern chooser. The LCD shows its name, blinking: it is queued.
- Press [STOP] (click ▶ or press [SPACE]). The machine stops and the queued pattern is the current one.
- Press [PLAY] to start it from its first step.
PARAMETER TWEAKING #
MD manual pp.37, 38
On the machine you hold [FUNCTION] and turn a knob to move that parameter on all 16 tracks. In the editor you hold [⌥] and drag a value on Kit or Mix. The same knob moves on every track by the same amount.
To sweep the filters of all tracks, hold [⌥] and drag the FLTF or FLTW value.
The ‹ and › keys beside the kit name in the <KIT> field of the LCD load the kit before or after, as a click in the kit library does. When the kit has unsaved edits the machine asks first.
To drop the tweaks of a kit and load its stored sound again:
- Click the kit name in the <KIT> field of the LCD. The kit library opens.
- Click Reload under Current. The button is available only when the kit has unsaved edits. The edits are lost and the kit is as stored.
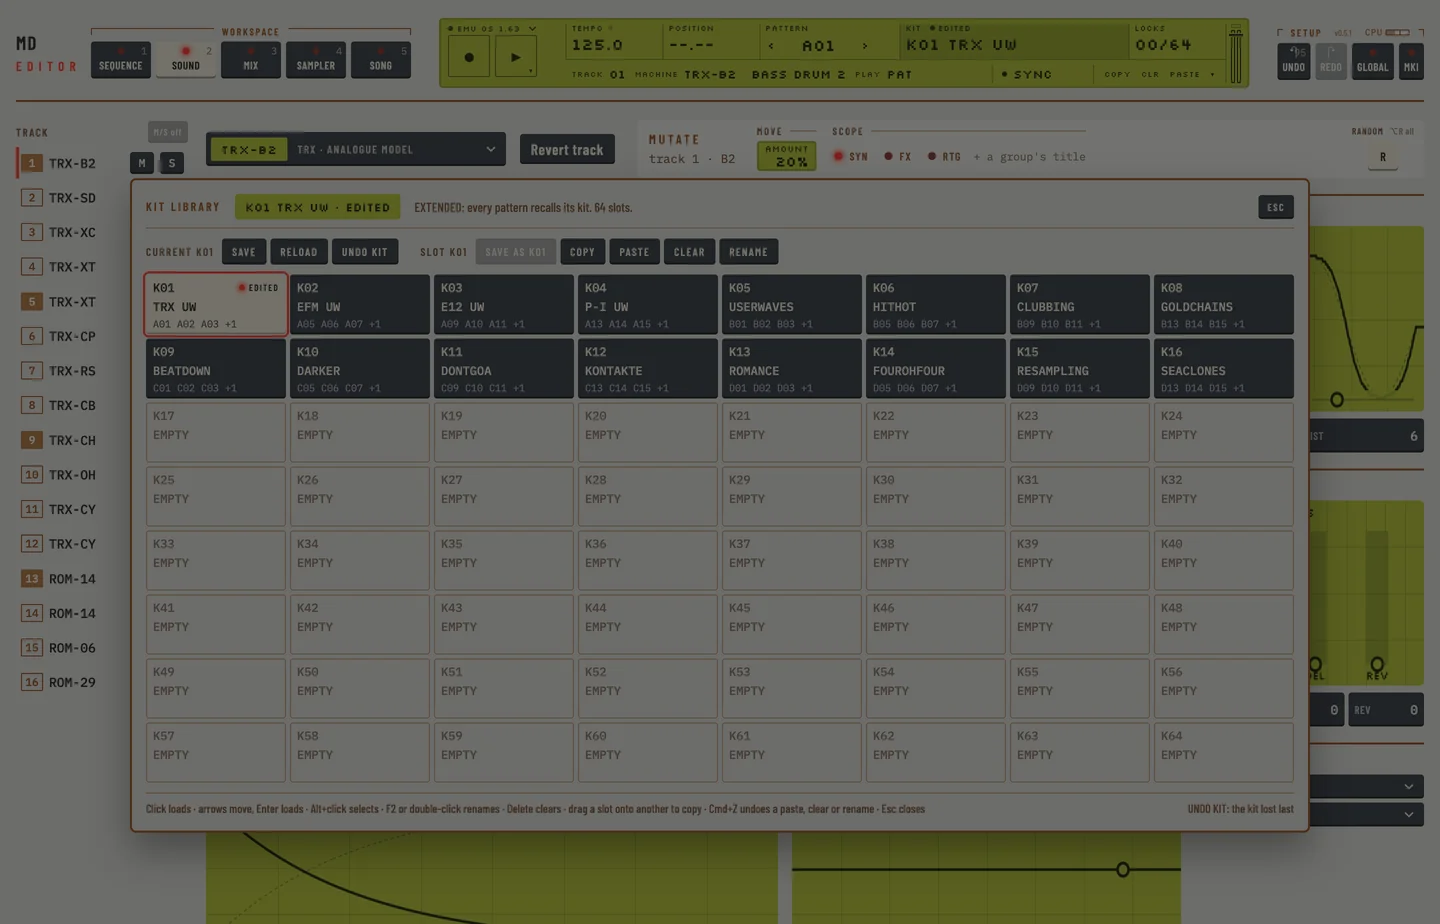
The machine keeps the edits you lose in its UNDO KIT.
SCALE SETUP #
MD manual p.38
The scale of a pattern is its length and its speed.
Length
A pattern has a total length of 16, 32, 48 or 64 steps, and a length inside it, from 1 step up to the total.
- Click <LEN> on the second line of the LCD to step through 16, 32, 48 and 64. Click with [⇧] to step back. You can also drag or scroll on it.
- Hold [⌥] and click, drag or scroll on <LEN> to set the length inside the total. The field then reads the length and the total, for example 12/16.
Steps past the length are dimmed in the grid. In CLASSIC the total is 32 at most.
To double a pattern, click the <LEN> ×2 key. The new half is a copy of the steps and locks of the first half. This is one undo step. The editor refuses a pattern past 64 steps, and past 32 in CLASSIC, and says why.
When you make the total longer, the editor does what the machine does: if no track has a trig past the old total, the steps you had repeat into the new ones, with their accents, swings, slides and locks. From 16 to 64 steps the first page fills all four pages. If a track has a trig past the old total, nothing is copied. A message says what was copied. Press [⌘] + [Z] to take it back.
Speed
Click <SPD> to step through the tempo multipliers 1X, 2X, 3/4X and 3/2X. Click with [⇧] to step back. You can also drag or scroll on it: three notches of the wheel walk the four speeds.
GRID RECORDING #
MD manual p.39
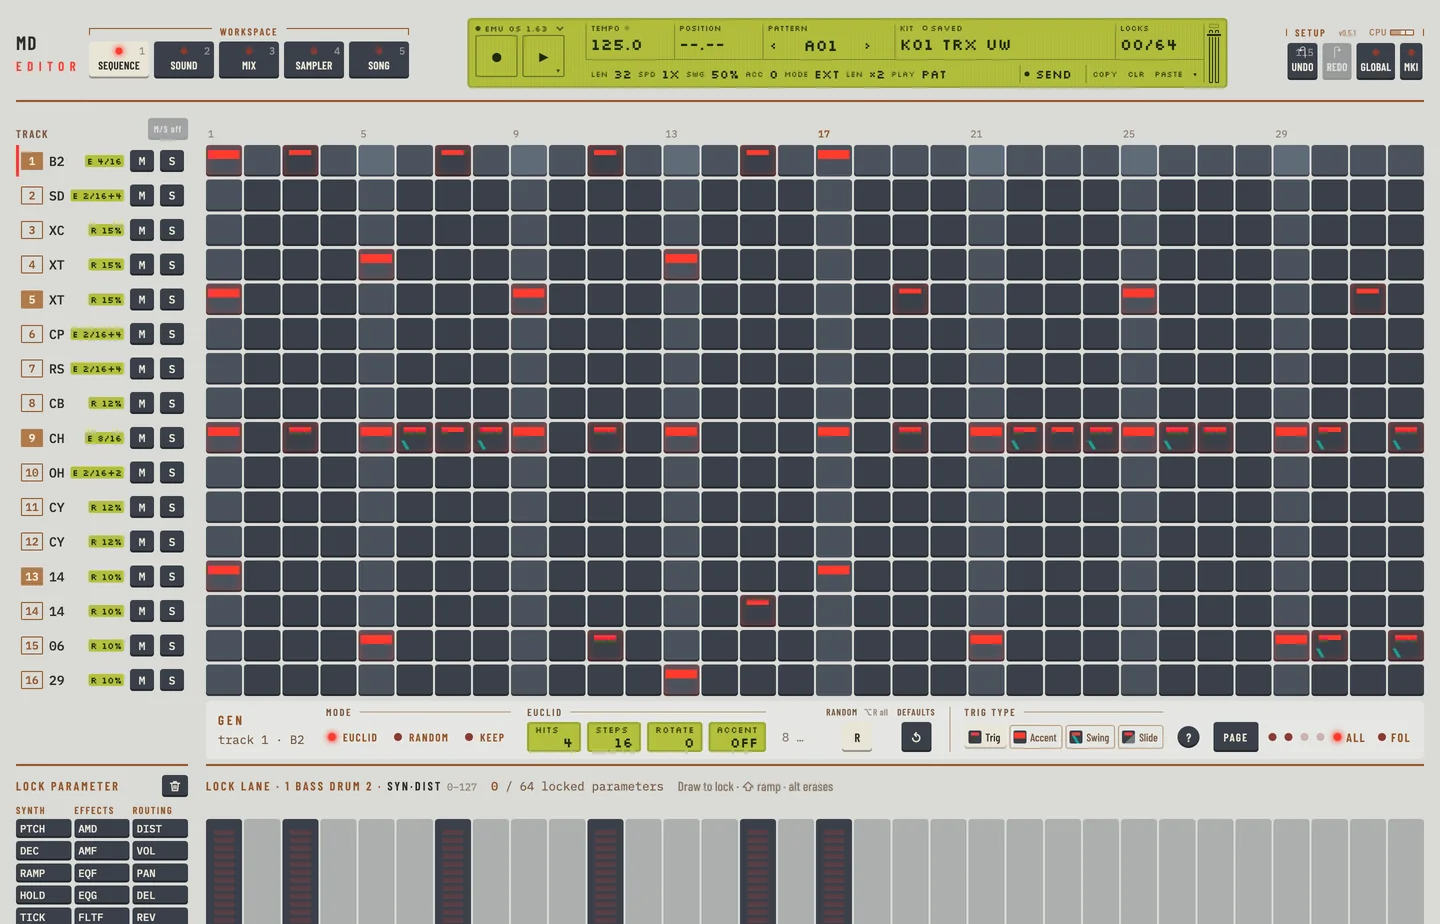
In grid recording you place the trigs one step at a time. The pattern plays while you work, and each change is in the pattern at once.
- Click a step to put a trig on it. Click it again to take the trig off.
- To place several, press on a step and drag. Every step you cross becomes what the first one became.
- To reach the other steps of a long pattern, click Page or press [[] or []]. Click Page with [⇧] to go back. The four lights show the page you see.
- Click All to see every step on one screen. Click Fol to make the page follow the play position.
There is no save. Every change is in the pattern. To keep the original while you try something, copy the pattern to another slot first. See "PATTERN COPY".
Move the notes
Press [⌥] + [←] or [⌥] + [→]. The selected track moves one step earlier or later. Its trigs, accents, slides and locks move, and the steps at the ends wrap round. A run of presses while you hold [⌥] is one undo step.
PATTERN PAGE FUNCTIONALITY ON MKI UNITS #
MD manual p.39
This is a feature of the MKI hardware. The editor offers the MKII model only (see chapter 13). Its Page control shows the pages as four lights, as described under GRID RECORDING.
LIVE RECORDING #
MD manual pp.39, 40
In live recording you play the tracks and the machine puts the trigs on the steps.
- Press [SPACE].
- Click ● in the top bar, or press [⌥] + [SPACE] to start recording and playing in one press. The key lights.
- Click the steps of a track, or press the keys A to L, which play the selected track. The track sounds and the machine writes the trig on the step it plays. The machine quantises it.
- Click ● again to stop recording. The pattern goes on playing.
While recording is on, a click on a step plays the track, and the other edits of the pattern wait. A right-click on a step says "Wait until live recording stops."
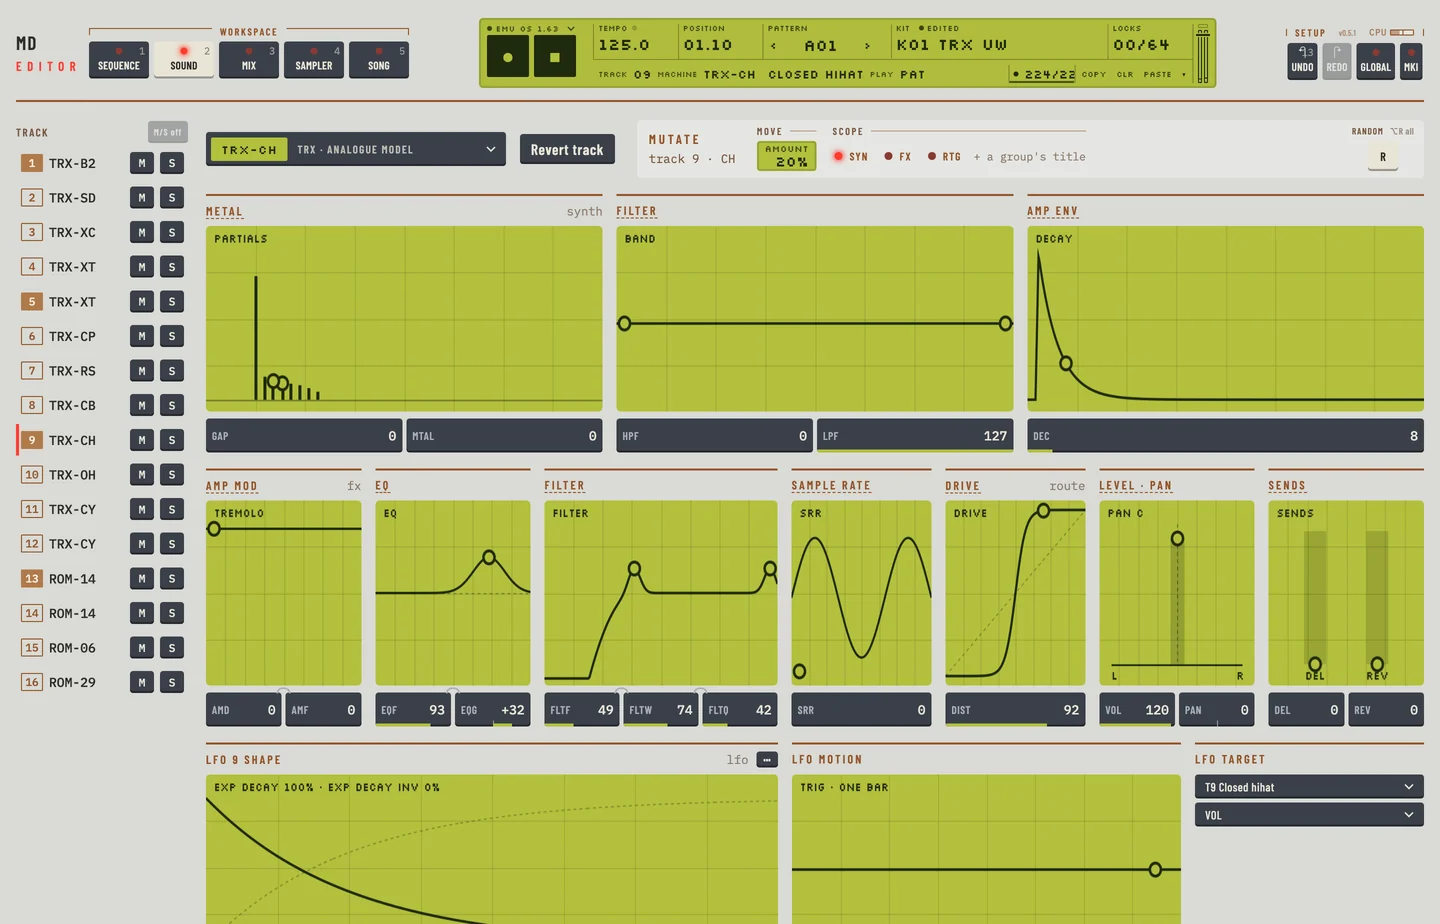
To take trigs out while recording, as the machine does with [EXIT/NO] and a [TRIG] key:
- Select the track on the rail.
- Hold [DELETE] or [BACKSPACE]. The track's header is marked red. The machine removes the track's trigs on each step that plays while the key is down.
- Let the key go to stop erasing.
Only the selected track is erased. The erase ends by itself when recording stops.
NOTE COPY #
MD manual p.40
You select steps, then copy, cut, paste or duplicate them. The copy carries the trigs, the accents, the slides and the locks.
To select steps:
- [⌘]-click a step.
- [⌘]-drag over steps and tracks. The selection is a block of steps by tracks.
- Click or drag the step numbers above the grid. This selects steps of the selected track. Drag down over the grid to add tracks.
- [⌘]-[⇧]-click a step to extend the selection. [⌘] + [A] selects every step of every track up to the length.
To use the selection:
- Press [⌘] + [C].
- Select the step where the block is to start, on the track where it is to start. A single [⌘]-click does it.
- Press [⌘] + [V]. The block lands with its first step on the step you chose.
[⌘] + [X] copies and clears. [⌘] + [D] copies the block to the steps right after it; press it again for one more copy. [⌘]-drag the selection to drop a copy where you let go. [ENTER] switches the trigs of the selection on, or off when each has one. [ESC] clears the selection.
Select a step or steps and click the small ⋯ on the selection for the step menu; a right-click on a step opens it too. It holds trig, accent, slide, copy, cut, paste, duplicate, clear, and Fill every 2nd and Fill every 4th from that step. On a selected step the menu acts on the whole selection.
The <COPY>, <CLR> and <PASTE> keys on the LCD do the same as the keys. They are marked when they act on a selection.
CLEAR NOTE PARAMETER LOCKS #
MD manual p.40
To take locks off a step, use one of these:
- Select the step and press [DELETE] or [BACKSPACE], or choose Clear in the step menu. This clears the trig and its locks together.
- Hold [⌥] and drag over the bars of the lock lane. This erases the locks it crosses and leaves the trigs.
- Press [⌘] + [⇧] + [BACKSPACE], tick Locks only and click Clear. The locks of the track go and the trigs stay.
- Click the bin key above the parameter keys to clear every lock of the parameter on this track. Hold [⌥] and it clears every lock of the track.
Press [⌘] + [Z] to take a clear back.
TRACK COPY #
MD manual p.41
- Select the track by its header. Drag across the step numbers above the grid, from the first step to the last.
- Press [⌘] + [C].
- Select another track. [⌘]-click its first step.
- Press [⌘] + [V].
To paste into several tracks at once, click their headers with [⇧] held. The headers are marked. [⌘] + [V] then fills every marked track, as one undo step. Press [ESC] to take the marks off.
To choose what goes with the track, as the machine's SUPER COPY does:
- Select the track.
- Click ▾ at the right of <COPY> <CLR> <PASTE> on the LCD, then Copy…, or press [⌘] + [⇧] + [C]. The Copy what window opens.
- Tick the parts to copy. Pattern has Trigs, Accent, Swing, Slide and Locks, each with the number of steps it holds. Kit has Machine + sound and LFO.
- Click Copy. Every step of the track is copied, not only the page you see.
- Select the track to paste into. Click ▾, then Paste…, or press [⌘] + [⇧] + [V].
- The parts copied are ticked. Untick any you do not want. Under To tracks the selected track is lit, or the tracks marked with [⇧]. Click a track key to light or unlight it.
- Click Paste into 1 track (the key says how many). Each lit track takes the ticked parts.
The paste is one undo step: press [⌘] + [Z] to take it back. The window remembers what you ticked the last time.
CLEAR TRACK #
MD manual p.41
- Select the track.
- Click All so that every step shows, then click <CLR>.
Or select all the steps of the track by the step numbers and press [DELETE] or [BACKSPACE].
To clear only some parts of the track, as the machine's SUPER CLEAR does:
- Select the track.
- Click ▾ at the right of <COPY> <CLR> <PASTE>, then Clear…, or press [⌘] + [⇧] + [BACKSPACE].
- Tick the parts to clear and click Clear. Clearing Trigs clears their locks too. Machine + sound sets the sound's values to neutral and keeps the machine.
Press [⌘] + [Z] to take the clear back.
TRACK PAGE COPY #
MD manual p.42
- Select the track and go to the page to copy.
- With no steps selected, press [⌘] + [C]. The page you see is copied.
- Go to the page and track where it is to land.
- Press [⌘] + [V].
CLEAR TRACK PAGE #
MD manual p.42
Click <CLR> on the LCD. The page you see of the selected track is cleared. Hold [⌥] and the key reads <ALL>: it clears the whole pattern.
PATTERN COPY #
MD manual p.43
A copy of a pattern takes its notes, its locks and its kit link.
- Open the pattern chooser.
- Click the slot to copy, then click Copy or press [⌘] + [C].
- Click the slot to copy to, then click Paste or press [⌘] + [V].
Or drag one slot onto another.
If you paste over the pattern that plays and it links another kit, the machine loads that kit. The editor asks first when the kit that plays has unsaved edits.
CLEAR PATTERN #
MD manual p.44
To clear the pattern that plays, hold [⌥] and click <CLR>, which then reads <ALL>. Or press [⌥] + [DELETE] or [⌥] + [BACKSPACE].
To clear any pattern, click its slot in the pattern chooser and click Clear, or press [DELETE].
The chooser keeps the length, the speed, the swing, the accent and the kit link of the pattern. It takes out the trigs and the locks.
Press [⌘] + [Z] to take the clear back.
TRACK MUTING #
MD manual pp.44, 45
Every track has an M key to mute it and an S key to solo it. They sit in the track rail and in the strips of Mix.
- Click M to mute or unmute the track.
- Press and drag across the keys. Every key you cross becomes what the first one became.
- Press [M] to mute the selected track on any workspace. [⌥] + [M] mutes every track, or unmutes them all when none is audible. [0], or M/S off, unmutes and unsolos everything.
To prepare mutes and apply them together, as the machine's mute window does:
- Hold [⇧] and click M on the tracks. Each track shows + for a track it will unmute or X for a track it will mute.
- Let go of [⇧]. All the changes apply at once.
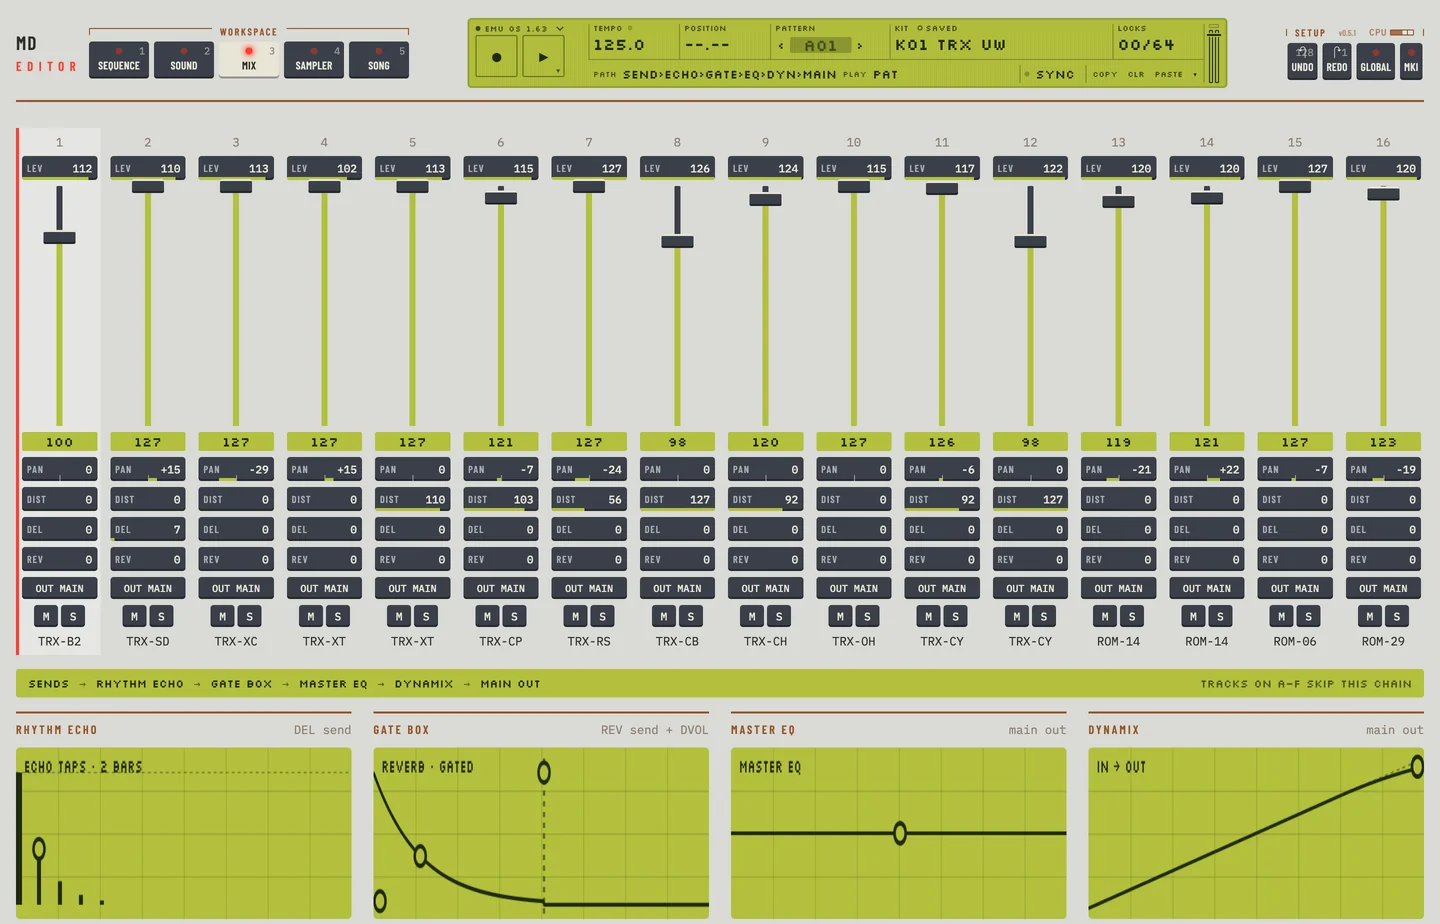
The mutes are the machine's. The editor reads them from the machine's memory, whoever set them, and they stay when you change pattern or switch between pattern and song mode. A solo is the editor's: it mutes the other tracks on the machine, and when you let the solo go it gives your mutes back.
On the machine you can minimise the mute window. In the editor the keys are always on the page.
ACCENT TRACK #
MD manual pp.45, 46
An accent makes a step louder. The accent amount sets how much louder.
- Click <ACC> on the LCD, or drag or scroll on it, to set the amount from 0 to 15. Click with [⇧] to go down.
- Click a step with [⇧] held to put an accent on it. The step needs a trig. Do the same again to take it off.
The trig types
The keys Trig, Accent, Swing and Slide in the bar under the grid say what a click on a step paints. They are the machine's accent, swing and slide windows (FUNCTION + B/F, C/G and D/H). The lit key is the one in use.
- Click Accent. The key lights.
- Click a step with a trig. It gets an accent. Click it again to take the accent off.
- Drag across steps to paint accents on every step with a trig that you cross. The first step decides: on or off. The drag is one undo step.
- Press [ESC], or click Trig, to paint trigs again.
A step without a trig takes no accent. The editor says so.
All tracks or this track
A pattern holds one accent row for all tracks and one for each track. With Accent lit, All tracks and This track show over the keys.
- All tracks: an accent on a step accents that step on every track. The step legend says "(all)".
- This track: each track has its own accents. Click the steps of the track you want.
The pattern keeps both rows. Switch back and the other row is there again. This is the machine's [RIGHT] key in the accent window. Each of accent, swing and slide has its own setting.
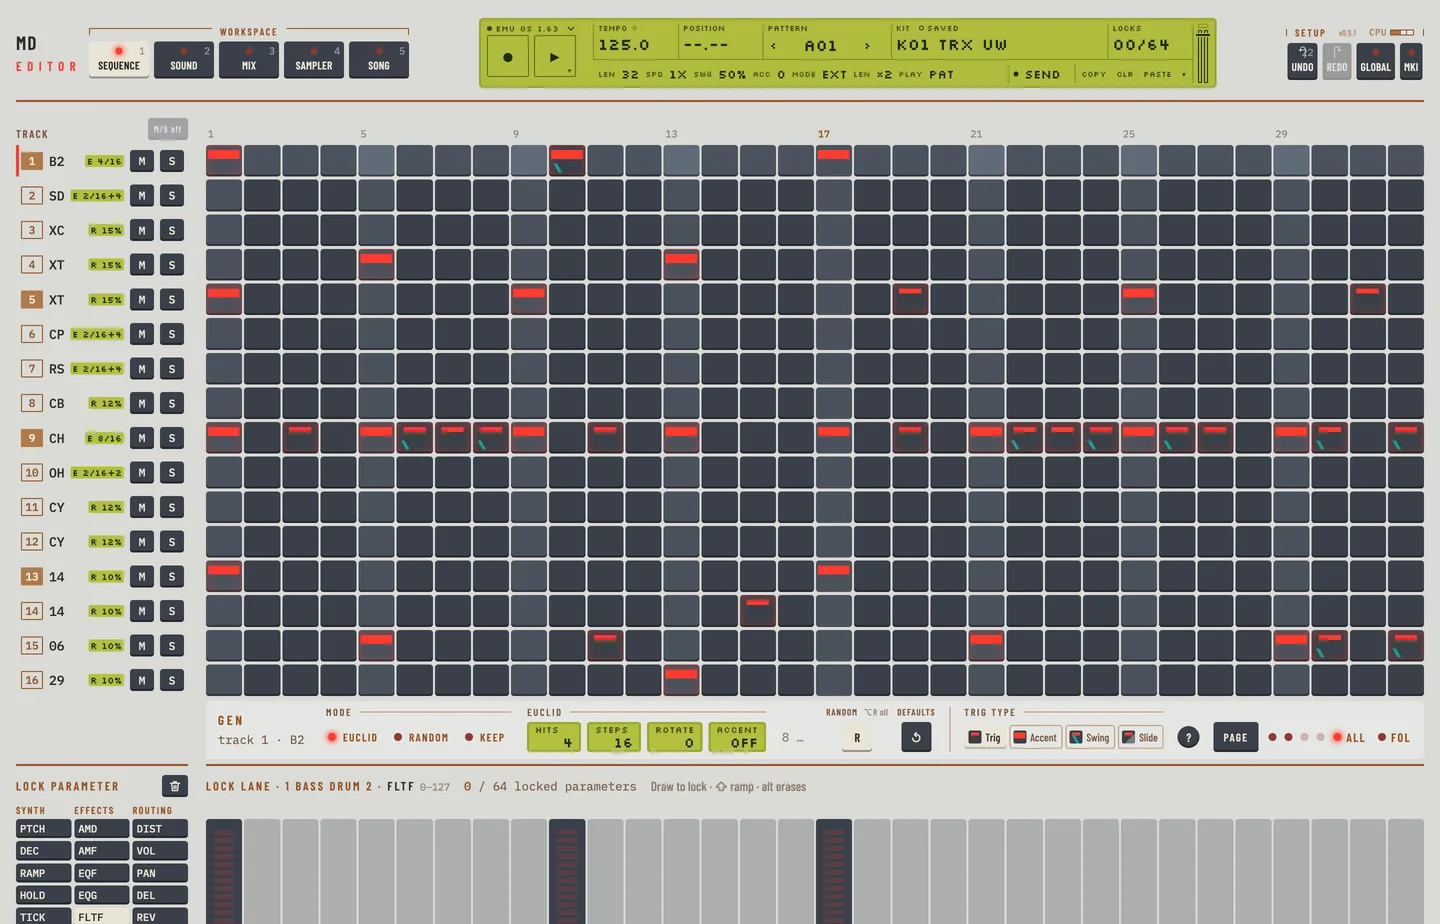
To copy, paste or clear the accents of a track, tick Accent in Copy…, Paste… or Clear… of the LCD's ▾ menu (see "Track copy"). A selection copy also takes the accents with the steps.
SWING #
MD manual pp.46, 47
Swing delays the steps of the swing row. Click <SWG> on the LCD, or drag or scroll on it, to set the amount from 50 to 80 percent. Click with [⇧] to go down. At 50 percent nothing swings.
To choose which steps swing:
- Click Swing in the bar under the grid.
- Click a step with a trig. A teal mark shows on it: the step swings. Click it again to take the swing off.
- Drag across steps to paint swing on every step with a trig that you cross.
- Press [ESC] to paint trigs again.
With All tracks the swing row is shared: a mark on a step swings that step on every track. With This track each track has its own swing steps. Every track uses the same <SWG> amount.
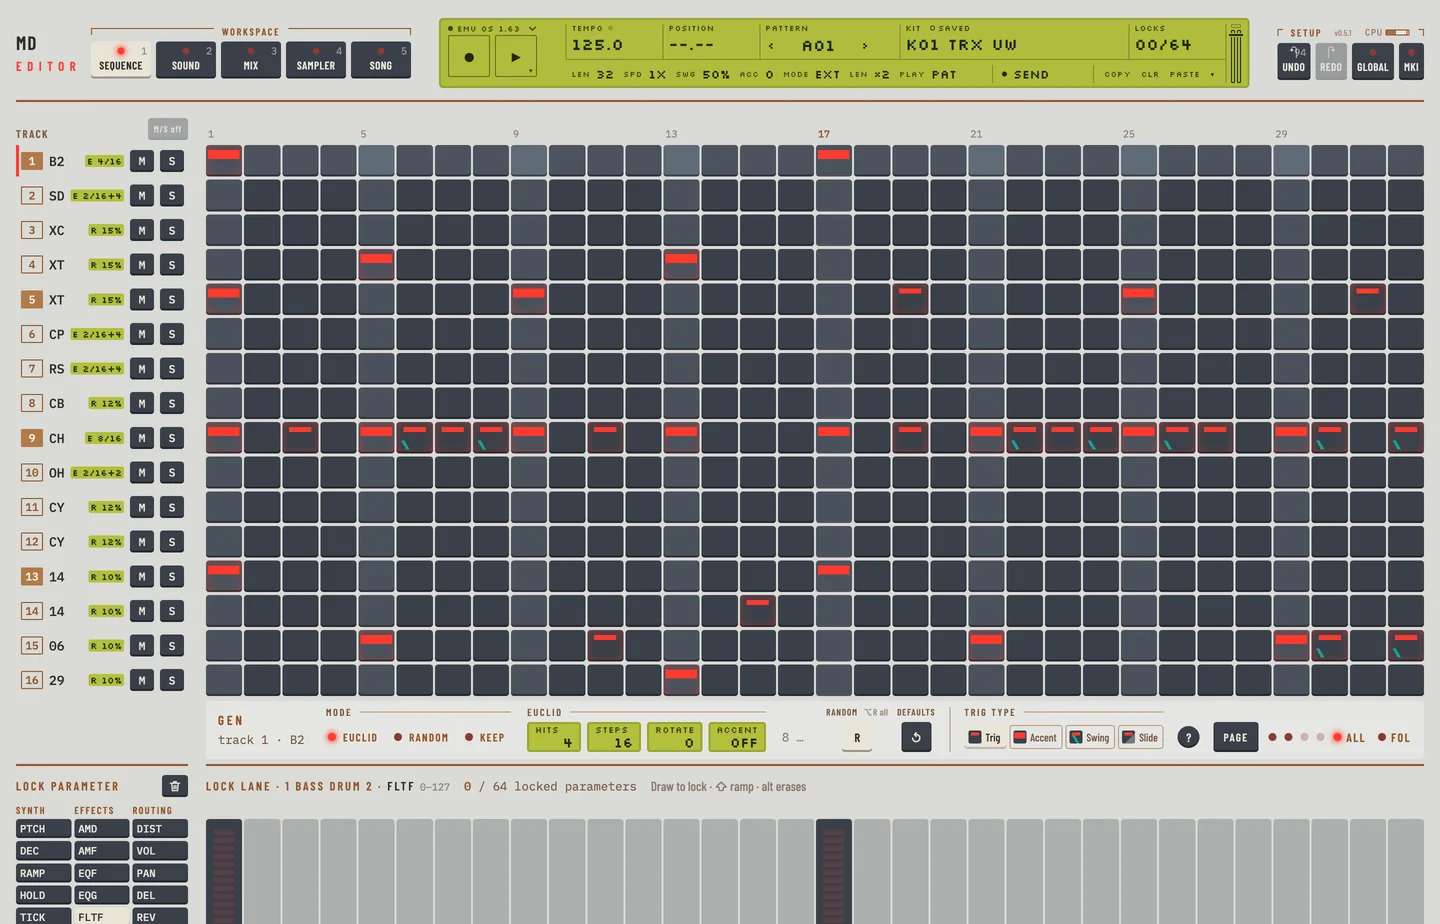
Tick Swing in Copy…, Paste… or Clear… of the LCD's ▾ menu to copy, paste or clear the swing steps of a track (see "Track copy"). A selection copy also takes the swing steps with the steps.
PARAMETER LOCKS #
MD manual pp.47, 48
A parameter lock gives one parameter its own value on one step. The step has to hold a trig. A pattern holds 64 locked parameters. A track and a parameter with any lock count once.
Lock a parameter
- Select the track.
- In the rail under Lock parameter, click the key of the parameter. The keys are in three groups: Synth, Effects and Routing. A number on a key tells how many steps it has locked.
- Drag over the bars of the Lock lane. Each step with a trig takes the value where the pointer crosses it. Steps with no trig are hatched and take no lock.
- Hold [⇧] and drag to draw a ramp, a straight line from where you press to where you let go.
- To move one lock, scroll on its step. Four values a notch, or one with [⇧].
- To make a lock glide to the next trig, drag its dot sideways. See "Parameter lock slide".
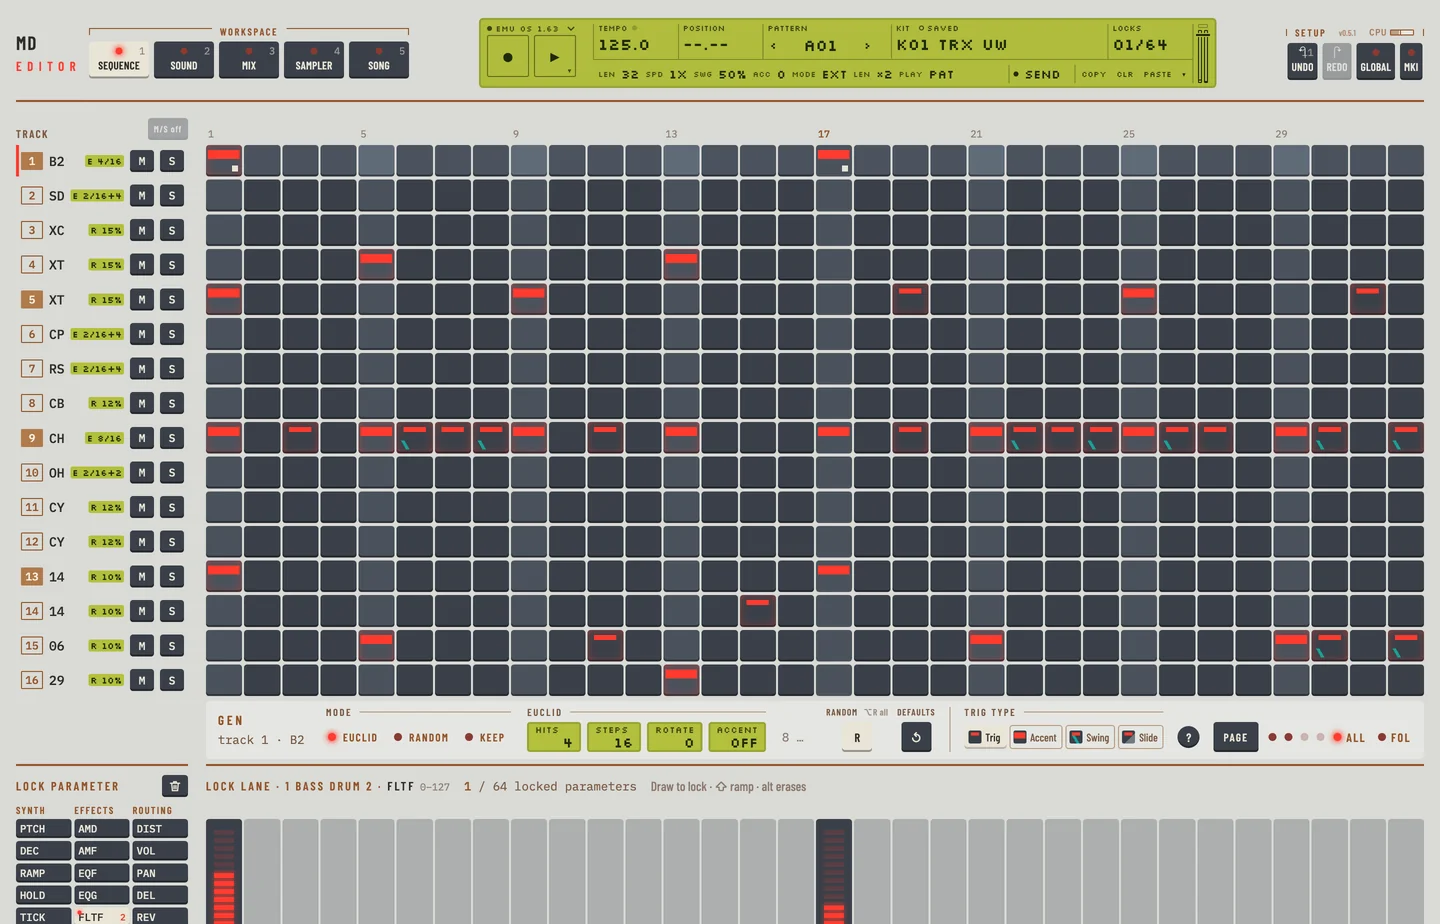
The lane shows the value locked on each step, and a solid line shows the value of the kit, with its number at the right end of the lane. Rest the pointer on a step, or select it, to read its lock as a number at the top of its bar. Drag the labelled KIT ↕ handle at the left of the lane header to change the kit value, or focus it and use the arrow keys. The whole drag is one undo step and draws no lock. The line across the steps is a reference: a plain click or vertical drag on a step edits its lock, even when its value equals the kit value. A bipolar parameter draws from the centre: up for right or boost, down for left or cut.
The lock count
The <LOCKS> field of the LCD and the header of the lane count the locked parameters, for example 41 / 64. The count turns to a warning from 52. At 64 the editor refuses a new lock and tells you to clear a lane first.
Locks in CLASSIC
Locks play only in EXTENDED. In CLASSIC they are kept and do nothing. The lane is greyed.
Remove locks
See "CLEAR NOTE PARAMETER LOCKS".
PARAMETER LOCKS IN LIVE RECORDING MODE #
MD manual p.48
While you record live, a value you move is locked.
- Start live recording. See "LIVE RECORDING".
- Move a value, for example on Kit.
- The machine locks the next trig whose step has not started. The editor marks that step and says which value it locked. A trig that is playing is too late.
To take the locks of one value out while recording, as the machine does with [EXIT/NO] and a pressed DATA ENTRY knob:
- Select the track on the rail.
- Press the value and keep the mouse button down. The press is the knob held; it does not change the value.
- Hold [DELETE] or [BACKSPACE] as well. The track's header and the value are marked red. The machine removes the track's locks of that value on each step that plays while both are down.
- Let them go to stop.
The trigs and the locks of the other values stay. Press the value first, or within a moment of [DELETE] or [BACKSPACE]: the key on its own erases trigs. A value that cannot be locked, such as a master effect, removes nothing; the editor says so. If you let the value go while [DELETE] or [BACKSPACE] is still down, nothing more is removed until you let the key go. The value does not move while it is held for this, even after you let the key go, until you let the mouse go.
PARAMETER LOCK SLIDE #
MD manual pp.49, 50
A slide makes a locked value glide instead of jump. Without a slide a lock changes the value exactly when its step plays. A step that slides takes its locks gradually to the next trig.
The rule, as the machine keeps it:
- A slide is a mark on a step, and only the parameters locked on that step glide. A parameter without a lock on that step stays as it is.
- The glide runs in a straight line from the lock to the value on the next trig of the track, and it arrives exactly when that trig plays. The speed follows the tempo.
- The value on the next trig is its lock of the parameter. If that trig has no lock of the parameter, the glide ends at the kit value.
- A lock further on is not the target. A glide always ends on the next trig, whether or not that trig locks the parameter.
- The mark belongs to the track, or to the whole pattern when All tracks is on. With All tracks the step slides on every track that has a trig there.
To set a slide on the grid:
- Click a step with a trig, with [⇧] and [⌥] held. The step shows a slide mark.
- Do the same again to take it off.
You can also click Slide in the bar under the grid. Then a click or a drag on steps with a trig paints slides. Press [ESC] to paint trigs again.
With Slide lit, choose All tracks or This track. With All tracks the slide goes on the step of every track, and the step legend says "(all)". With This track each track has its own slides.
To draw a slide in the lock lane:
- Select the track and the parameter, as in "Lock a parameter".
- Press on the dot at the top of a lock bar and drag sideways to the right. A dashed ramp shows where the glide goes: to the next trig of the track, whatever further you drag. If that trig has a lock of the parameter the ramp ends at the top of its bar. If it has none the ramp ends on the kit line.
- Let go. The step slides, in one undo step.
Hold [⇧] on a lock bar and drag sideways out of its column for a rubber band instead. A line follows the pointer and the next trig is marked as the target. Drop on that step and it slides. Drop anywhere else, press [Esc], or move left of the start, and nothing is set. Dragging up and down inside the column is the ramp of locks, as before.
Click the line of a ramp to take the slide off. With All tracks that takes it off every track. Dragging up or down from the dot changes the lock, as before. A lock on a step without a trig is never played, so no ramp starts or ends there.
To copy, paste or clear the slides of a track, tick Slide in Copy…, Paste… or Clear… of the LCD's ▾ menu (see "Track copy"). A selection copy also takes the slides with the steps.