User interface and connectors
The Monomachine has a front panel of keys and knobs, an LCD, a keyboard on the SFX-6 and a row of sockets at the back. The editor has none of these as pictures. Its page holds the same functions as controls of its own, and this chapter names, for each part of the machine, the control that does its job.
The page has a top bar and a body. The top bar holds the workspace tabs, the LCD with its two lines, and the setup keys Undo, Redo, Global and Learn. The MKI / MKII plate is in the engine menu of the LCD. The body shows the track rail on the left and the workspace on the right.
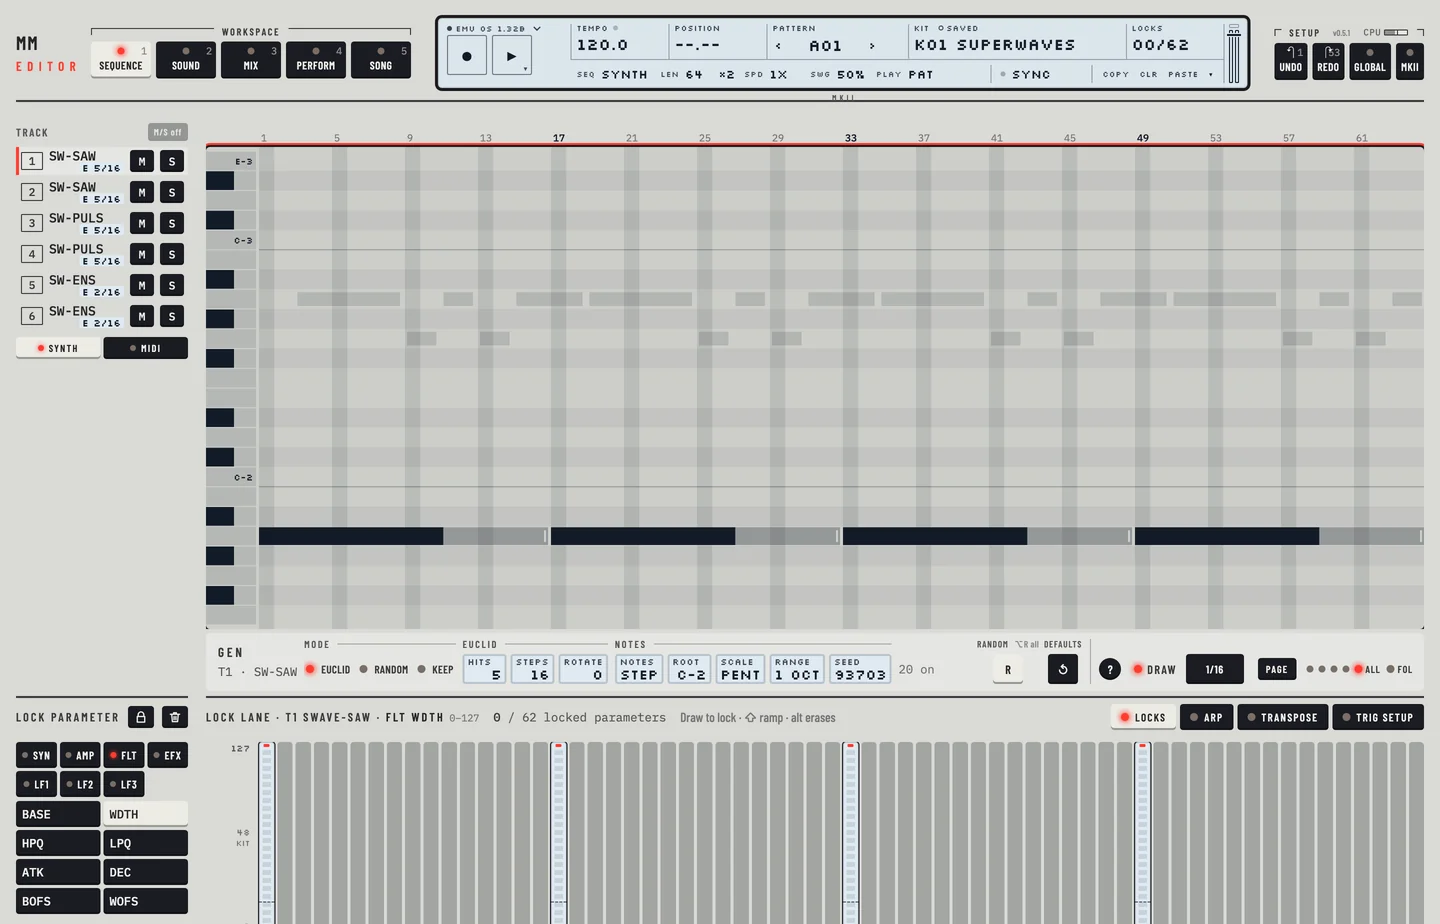
The workspaces are Pattern, Kit, Mix, Perform and Song. Press [1] to [5] to go to one. A sixth workspace, Control, appears only when the plug-in has MIDI mapping on, and it is pressed with [6].
MASTER VOLUME AND LCD #
MM manual p.1-4
The machine has one master volume knob. The editor has none: the application or the host sets the output level.
The LCD of the machine is the LCD in the top bar. It holds the fields <TEMPO>, <POSITION>, <PATTERN>, <KIT> and <LOCKS>, the record and play keys, and a second line of fields that changes with the workspace. Chapter 3 describes it.
Not in the editor yet: The machine's own screen is not shown after start-up. What it would show is spread over the page.
LEVEL AND DATA ENTRY #
MM manual p.1-4
On the machine the LEVEL knob sets the level of the selected track and the eight DATA ENTRY knobs set the parameters of the page shown. In the editor every parameter is a value box.
- LEVEL is the LEVEL fader of each track in the Mix workspace.
To set the level of a track:
- Click Mix.
- Drag the LEVEL fader of the track. The level follows the fader.
- Press [⌘] + [Z]. The fader goes back to where it was.
- A value box changes when you drag it up or down, or sideways. Each pixel of drag is one step.
- Turn the mouse wheel over a value box to step it, one step a notch.
- Click a value box and press the arrow keys to step it ([↑] or [↓]).
- Double-click a value box to set it to its default.
- Hold [⌘] and click a value box to type its value, or press [ENTER] on a value box that has the focus. Type the value and press [ENTER], or press [ESC] to leave it as it was. A box that shows names takes a name, for example SAW for an LFO's wave, in small or capital letters. PAN takes L12, C or R5. A value the box cannot show is refused, and the field says what it takes. Each typed value is one undo step.
To type a value:
- Click Kit and pick a track in the rail.
- Hold [⌘] and click a value box. A field opens over it with the value it shows.
- Type a value and press [ENTER]. The box shows it and the machine has it.
- Hold [⌘] and click the box again and type 999. The field stays and refuses the value.
- Press [ESC]. The field closes and the value is as it was.
- Double-click the box to set its default, then press [⌘] + [Z] to take the default back. Press [⌘] + [Z] once more to take back the typed value in one step.
The machine's accelerated edit, where you press a knob and turn it for larger steps, is a different gesture here. Hold [⇧] while you drag for fine steps, a quarter as fast. Hold [⇧] while you turn the wheel, or press Page Up or Page Down on a focused value, to step by ten.
DATA PAGE #
MM manual p.1-4
The machine has seven DATA pages for each track: SYN, AMP, FLT, EFX, LF1, LF2 and LF3. It shows one at a time on its eight knobs. The Kit workspace shows every page of the selected track at once, in groups of a few values. The Pattern workspace has the page tabs SYN, AMP, FLT, EFX, LF1, LF2 and LF3 in the track rail. They choose the parameters the lock lane edits.
Pressing both DATA PAGE keys on the machine opens the multi envelope. In the editor the multi envelope is the first card of the Perform workspace. What it shapes depends on the multi trig mode of the kit, which the card names: see chapter 9.
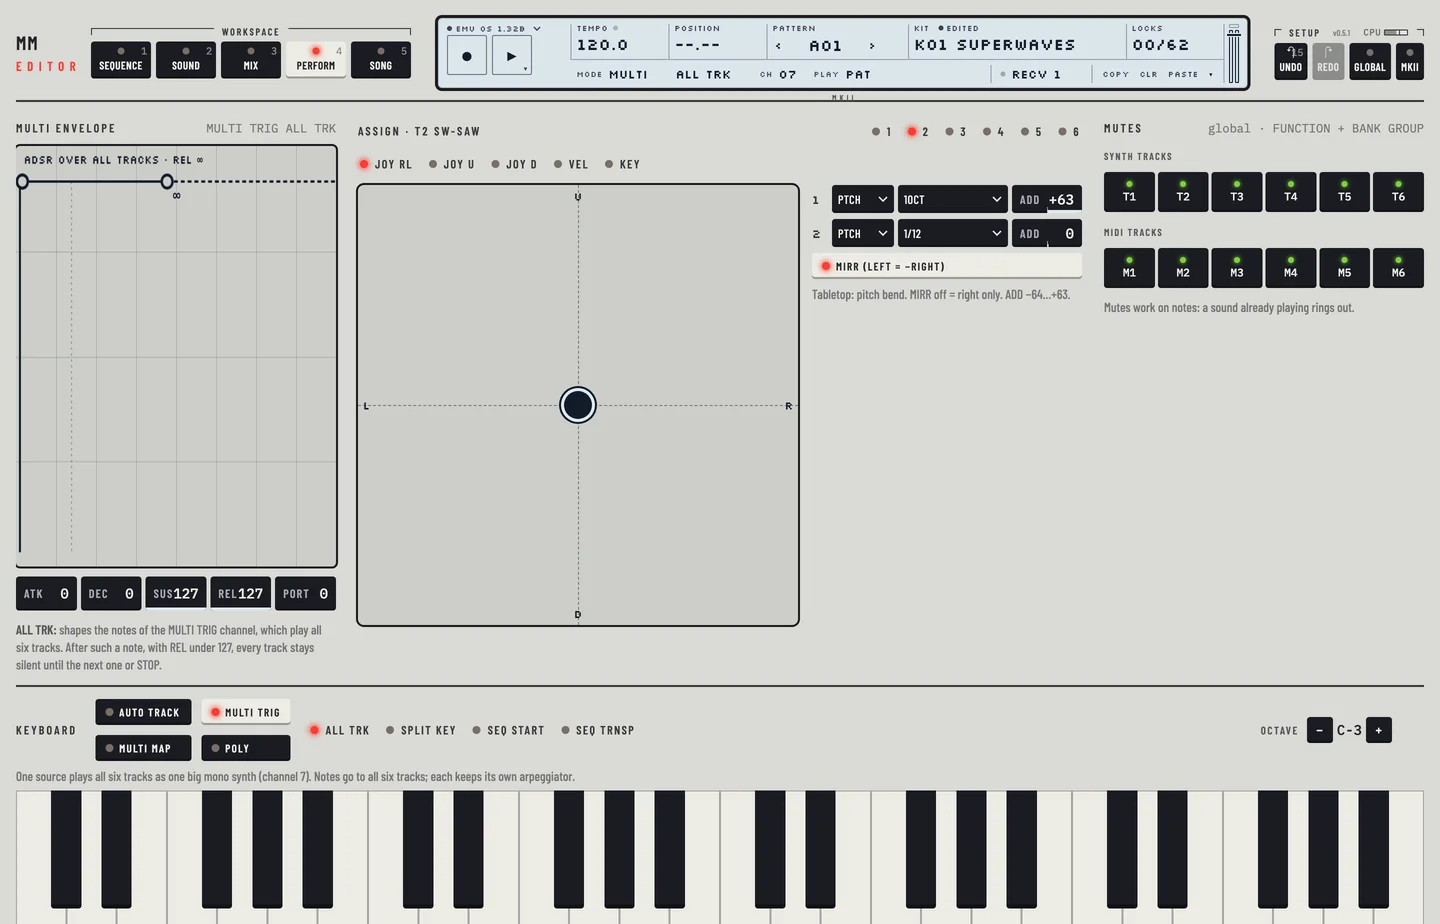
To see what the multi envelope shapes:
- Click Perform. With the keys on Auto track, the Multi envelope card names the multi trig mode of the kit and says to choose Multi trig.
- Click Multi trig, then the mode SPLIT KEY. The card says the envelope has no effect there.
- Click ALL TRK. The card says it shapes the multi trig notes and when it silences every track.
- Click SEQ START. The card says it shapes the pattern that a multi trig note starts.
- Click the first mode again, then Auto track.
TRACK KEYS #
MM manual p.1-4
The six TRACK keys select the track you edit.
- Click a track in the rail at the left of the page.
- Press [↑] or [↓] to select the track before or after.
- In the Mix workspace, click the track's node in the routing graph.
- Play the track from a MIDI controller with FOLLOW PLAYED TRACK on in the engine menu. See "THE SELECTED TRACK FOLLOWS THE LAST TRACK PLAYED" in chapter 24.
To mute a track, click M in its rail row or press [M]. Click S to solo it. Drag across several M keys to mute or unmute each track you cross as the first one became.
To prepare mutes, hold [⇧] and click M on the tracks. Each track shows + or X for the change it will make. The changes apply when you let go of [⇧]. This is the machine's mute window.
- [⌥] + [M] mutes every track. When none is audible it unmutes every track.
- [0] unmutes and unsolos every track. The M/S off key at the head of the rail does the same.
- The Mutes card of the Perform workspace lists all twelve tracks, T1 to T6 and M1 to M6.
A muted track dims in the rail. The selected track is lit.
To mute and solo tracks:
- Click Mix, then click M on track 1. The track is muted. Click M again to unmute it.
- Click S on track 3. The other synth tracks are muted. Click S again and the mutes are as before.
- Drag across the M keys of tracks 1 to 3. Each track you cross changes as the first one did.
- On the keyboard press [M]: the selected track is muted. Press it again to unmute it. Press [⌥] + [M] to mute every synth track and [0] to unmute every track.
- Click M/S off in the rail to unmute and unsolo every track.
TEMPO KEY #
MM manual p.1-4
The <TEMPO> field of the LCD is the tempo window of the machine. Drag it up or down: a pixel is half a beat per minute, and [⇧] makes it a tenth. With the field focused, the arrow keys step it.
To tap a tempo, press [⇧] + [B]. The editor uses the average of your last taps. On every workspace except Pattern a plain [B] taps too. On Pattern that key switches the piano roll's Draw mode.
To tap a tempo on Pattern:
- Press [⇧] + [B] five times, about half a second apart.
- <TEMPO> follows your taps. Draw mode stays as it was.
FUNCTION KEY #
MM manual p.1-4
The machine's [FUNCTION] key gives the other keys a second job. The editor has no such key. The second jobs are separate controls on the page, or they follow a modifier key of your computer. Hold [⌥] and the keys it changes say what they do then: <CLR> becomes the clear of the whole pattern, for example.
KIT AND SONG KEYS #
MM manual p.1-4
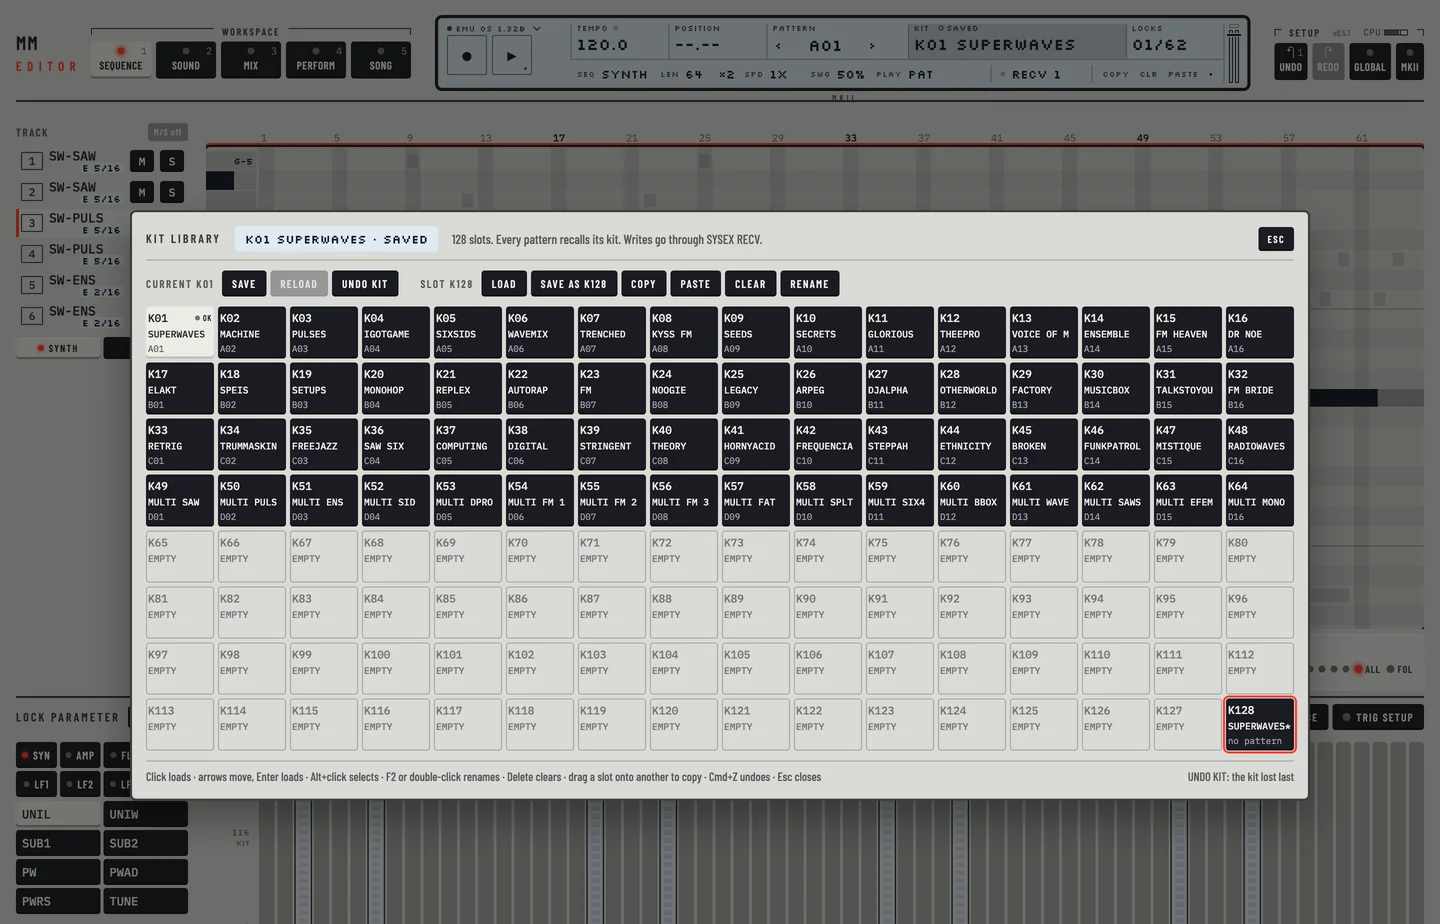
On the machine [KIT] opens the kit menu. In the editor click the <KIT> field of the LCD to open the kit library. Chapter 6 describes it.
- Click <KIT> on the LCD. The kit library opens.
- Click another kit. It loads.
- Click the first kit again, then press [ESC].
The Song workspace ([5]) is the song menu: see chapter 17.
[FUNCTION] + [KIT] opens the global menu. In the editor open it in one of three ways:
- click Global in the top bar;
- choose GLOBAL… in the engine menu, the drop-down at the left of the LCD;
- press the GLOBAL link in the AUDIO / MIDI panel.
The GLOBAL page opens over the workspace. It holds the eight global slots and the Control, Sync, Routing, Audio and Control out 1 settings, the master tune among them. [ESC] goes back to the workspace. Chapter 19 describes it.
- Click Global in the top bar. The GLOBAL page opens under the top bar, over the workspace.
- Click the Mix tab. The page closes and Mix shows.
TRIG KEYS #
MM manual p.1-5
The sixteen TRIG keys play notes and set trigs. In the editor:
- The keys [A S D F G H J K L] play the selected synth track, from any workspace. They are the white keys C to D. [W E T Y U O P] are the black keys above them.
- Press [Z] or [X] to move the octave down or up, from −4 to +6. The A key then plays any note from MIDI 0 to 120, and the keys above it stop at 127. Press [C] or [V] to step the velocity through 20, 40, 60, 80, 100 and 127.
- The on-screen keyboard in the Perform workspace plays notes by click or drag.
- Clicking in the piano roll of the Pattern workspace plays the pitch.
To set a trig on a step, as the TRIG keys do in grid mode, click the piano roll, or open the step menu (the ⋯ on a selected step, or a right-click).
On the machine, [BANK] + [TRIG] picks a pattern. In the editor click the <PATTERN> field of the LCD for the pattern chooser, or the ‹ and › keys beside it. Chapter 4 describes picking.
- Click › beside <PATTERN>. The next pattern is selected.
- Click ‹. The pattern before it is selected again.
To play notes from the keyboard:
- Click Pattern and pick track 1 in the rail.
- Press [A]. Track 1 plays.
- Press [W], [T] and [P]. They play C♯, F♯ and the D♯ an octave up from the [A] key's C. [A] and [S] still play C and D.
PATTERN AND SONG KEY #
MM manual p.1-5
[PATTERN/SONG] switches between playing a pattern and playing a song. Click <PLAY> in the second line of the LCD. It reads PAT or SONG, what the machine reports, and each click switches. The Song workspace has the same switch.
[FUNCTION] + [PATTERN/SONG] switches POLY mode. In the editor the Perform workspace has a Poly key in the Keyboard card. Poly mode plays the track selected on the machine with [TRACK]; the editor presses that key for the track you select. Chapter 5 describes poly mode.
- Click Perform.
- Click the key of track 3 in the title of the Assign card, then click Poly. The machine's poly mode is on, on track 3.
- Click the key of track 5. Poly mode moves to track 5.
- Click Auto track to switch poly mode off.
To switch between pattern and song:
- Click Song.
- Click the SONG key. The machine reports song mode.
- Click the PATTERN key. The machine reports pattern mode.
ENTER, EXIT AND ARROW KEYS #
MM manual p.1-5
The machine's [ENTER/YES] and [EXIT/NO] confirm and cancel. The editor asks in dialogs on the page: answer with the dialog's buttons, and close one with [ESC].
The arrow keys of the machine move the cursor and set the octave of the TRIG keys. In the editor [←] or [→] and [↑] or [↓] step a focused value, and [Z] and [X] set the octave of the note keys.
BANK KEYS #
MM manual p.1-5
The machine's BANK GROUP and BANK keys choose the pattern bank. The pattern chooser shows all eight banks A to H at once. Press [A–H] inside it to jump to a bank.
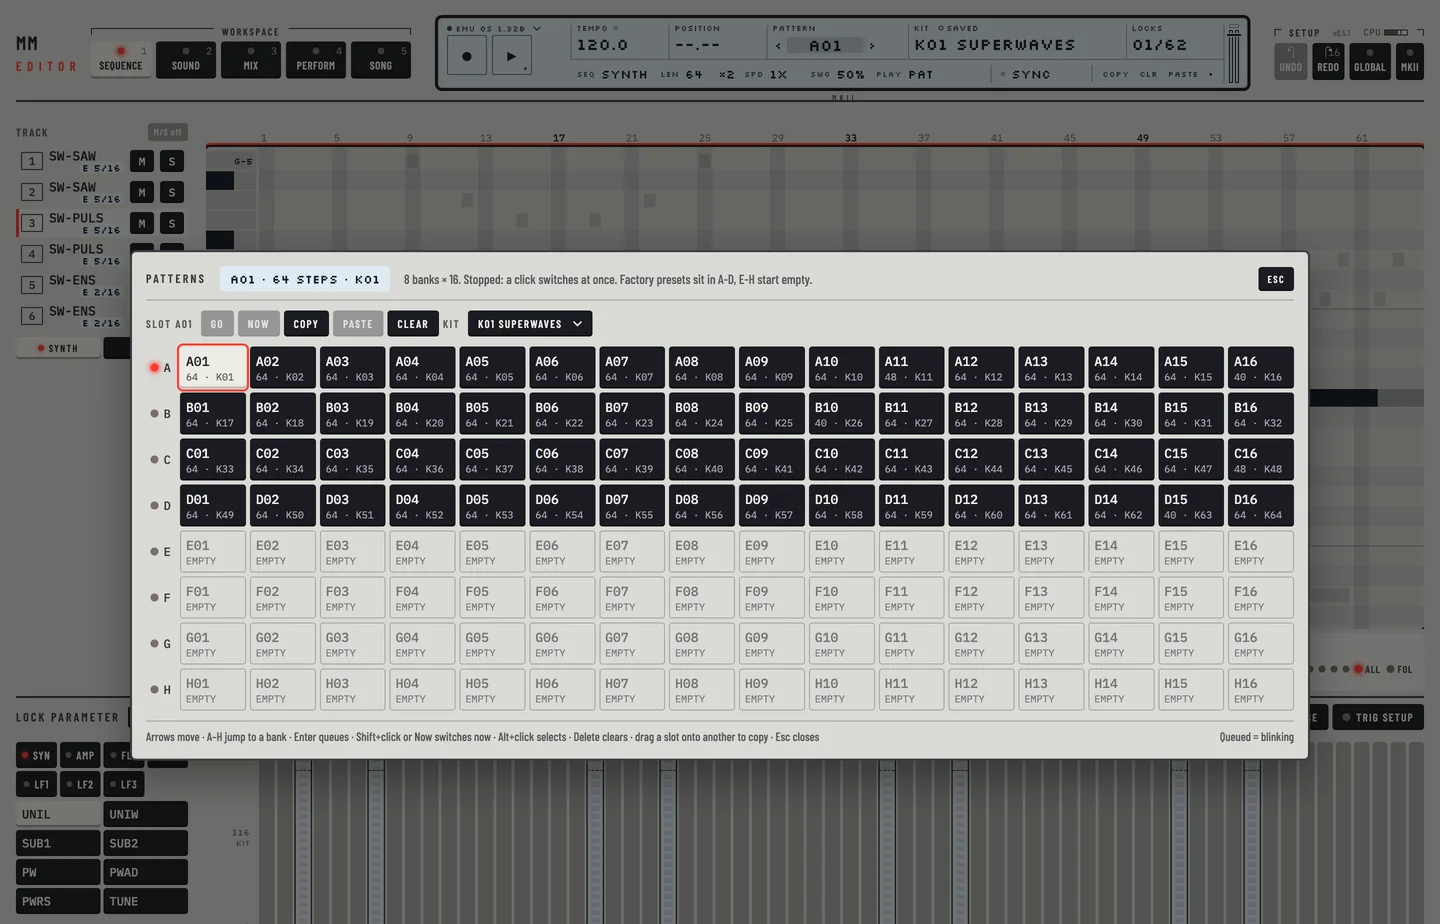
- Click <PATTERN> on the LCD. The chooser lists the 128 patterns A01 to H16, with the eight bank keys A to H.
- Each tile gives the length of its pattern and the kit it recalls. An empty pattern reads EMPTY.
- Press [D], then [E], then click the key of bank G. The selection moves into that bank each time.
- Click a pattern that recalls another kit. The machine loads that kit.
[FUNCTION] + [BANK GROUP] opens the mute window: it is the Mutes card in Perform, and the prepared mutes described above.
The keys that open the secondary windows, ARP, TRANSPOSE, SWING and SLIDE, are as follows.
- Arp and Transpose are tabs of the dock in the Pattern workspace. The Kit workspace has keys that go to them.
- Swing is Swing in the step menu of the Pattern workspace, and the <SWG> field of the LCD's second line.
- Slide is Slide in the step menu of the Pattern workspace.
RECORD, PLAY AND STOP #
MM manual p.1-5
The record and play keys are at the top right of the LCD.
- Press [SPACE] or click the play key. The machine plays. Press it again to stop. After clicking in the piano roll, wait for the pattern to reach the machine. If the editor says the panel is busy, press the key again.
- Click the record key while the machine is stopped to switch grid recording on. Editing steps on the page does not need it.
- Press [⌥] + [SPACE] to start live recording, the machine's [REC] + [PLAY]. Press it again to stop recording.
To record live:
- Click Pattern and pick track 1 in the rail.
- Press [⌥] + [SPACE]. The machine plays and records.
- Play [A], [S] and [D]. The machine records the notes.
- Click the record key to switch recording off, then stop the machine.
Grid recording is not needed to edit steps with the mouse. Hold [⇧] and click the record key while the machine is stopped to start step recording, the machine's [STOP] + [REC]. The key shows STEP. See "Step recording" in chapter 11.
- Click Pattern and pick a synth track whose first step is empty.
- Hold [⇧] and click the record key while the machine is stopped. The cursor sits on step 1.
- Press [A]. The note is written to step 1 and the cursor moves on.
- Press [→] for a rest. The cursor moves to step 3.
- Press [←] twice to go back to step 1, then press [DELETE] or [BACKSPACE]. Step 1 is cleared and the cursor moves on.
- Press [ESC] to finish.
On a MIDI track the same click starts step recording without a track key: [ESC] ends it and the editor goes back to the synth tracks.
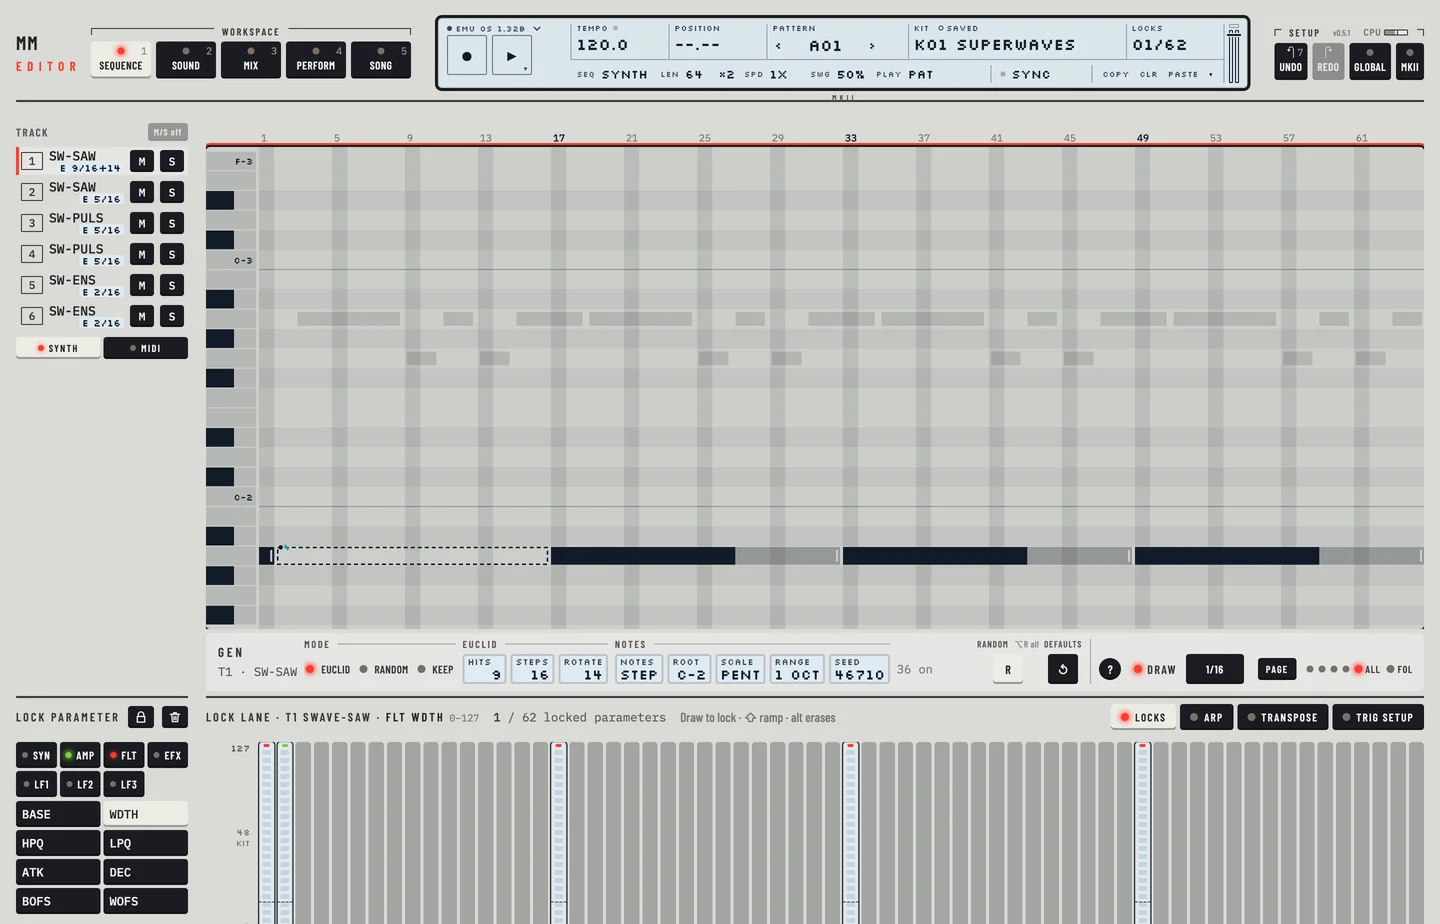
On the machine a second press of [PLAY] pauses. In the editor:
- Hold [⇧] and click the play key, or press [⇧] + [SPACE]. The machine holds its step. The play key blinks and <POSITION> keeps the step.
- Click the play key, or press [⇧] + [SPACE] again. The machine goes on from the step it held.
- To end the pause instead, choose Stop in the transport menu. <POSITION> reads --.--.
The transport menu has Play or Stop, Pause or Continue, Live record and Panic, each with its key. Right-click the play key to open it. With the play key focused, Shift+F10 or the menu key opens it too.
On the machine a double press of [STOP] rewinds the pattern and silences the notes. In the editor this is Panic.
- Press the play key. The machine plays.
- Right-click the play key. The transport menu opens with Panic in it.
- Click Panic. Every note goes off and the machine stops.
Right-click the play key for the same menu, or press [⌘] + [.]. The editor sends All Notes Off on the channel of each track and stops the machine. The notes fade out with their release.
COPY, CLEAR and PASTE are the three keys under the LCD, <COPY>, <CLR> and <PASTE>, with [⌘] + [C], [DELETE] or [BACKSPACE] and [⌘] + [V]. What they act on depends on the workspace:
| Workspace | They act on |
|---|---|
| Pattern | the selected steps, or else the page of steps shown |
| Kit | the machine of the selected synth track, with all seven DATA pages |
| Perform | the assign tabs of the selected track |
| Song | the selected song row |
[⌥] + [DELETE] or [⌥] + [BACKSPACE] on Pattern clears the whole pattern. Clicking <CLR> with [⌥] held does the same.
To copy and paste steps:
- Click Pattern. Click a note with [⌘] held to select it.
- Press [⌘] + [C], or click <COPY> on the LCD.
- Click an empty step with [⌘] held, then press [⌘] + [V], or click <PASTE>. The note lands at the selected step.
- With nothing selected, [DELETE] or [BACKSPACE] clears nothing. Click <CLR> to clear the page shown.
- Press [⌘] + [Z] twice to put the track back as it was.
To paste the same steps into several tracks, select the steps, press [⌘] + [C] and press [ESC]. Shift-click the headers of the tracks to mark them and press [⌘] + [V]. Each marked track gets the copied steps.
SCALE KEY #
MM manual p.1-5
The machine's [SCALE] key shows one page of 16 steps. In the editor press Page in the Pattern workspace, or press the square bracket keys, to step through the pages. Four lights show the pages the pattern has and which one is shown.
- Click Pattern, then switch ALL off. The roll shows one page of 16 steps.
- Click Page. The next page shows, when the pattern is longer than 16 steps.
- Press [[] or []] to go back. Click ALL to show every step again.
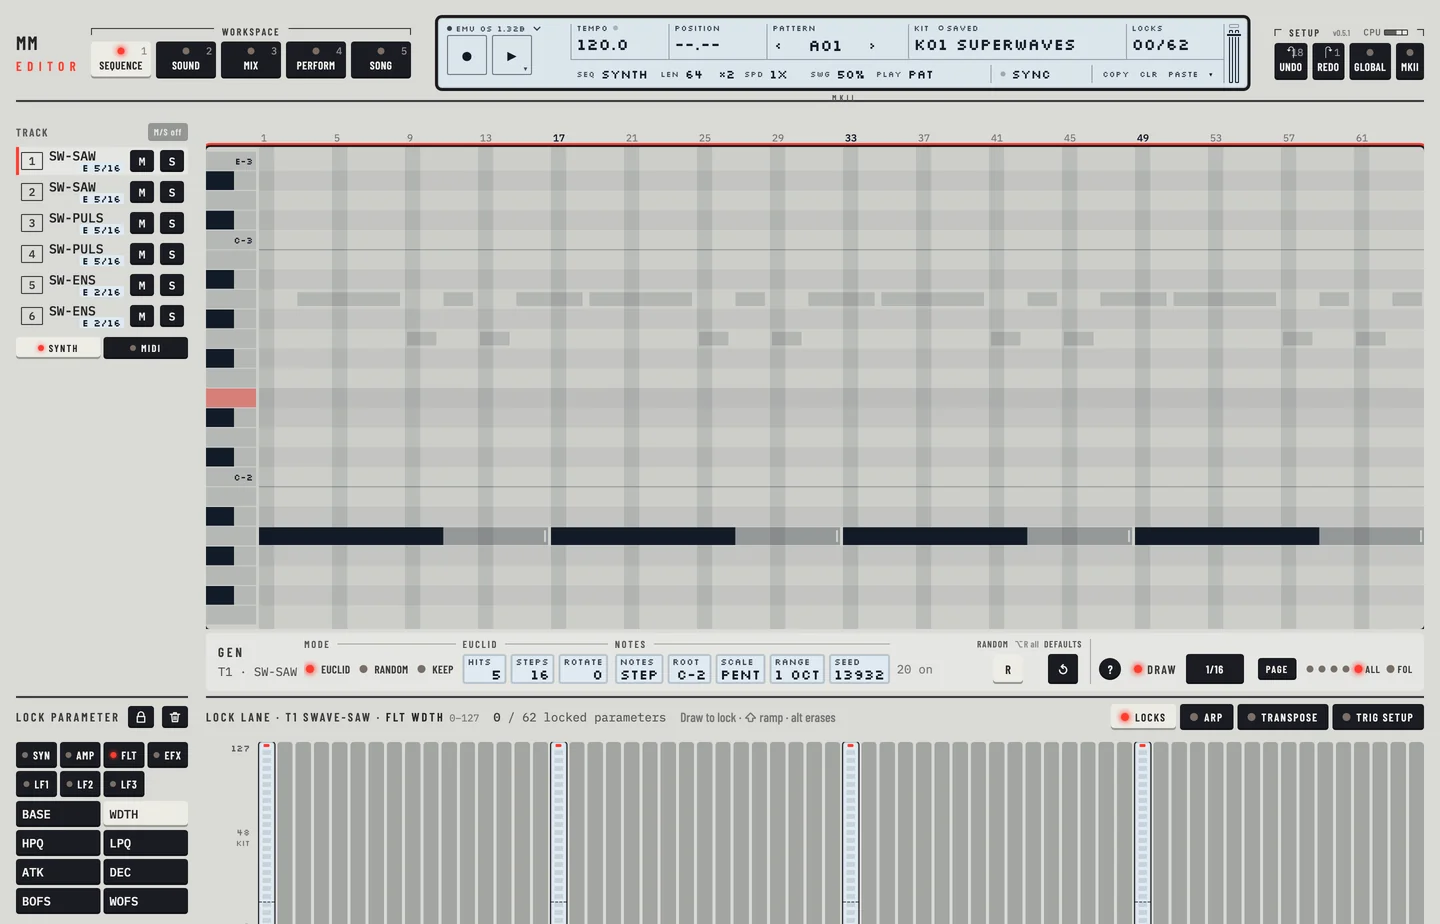
[FUNCTION] + [SCALE] opens the scale set-up. In the editor its fields are in the LCD's second line on Pattern: <LEN> sets the pattern length and <SPD> the speed. Click a field to step it. Chapter 11 describes both.
- Click <SPD> on the LCD four times. It reads 1X, 2X, 3/4X and 3/2X in turn.
- Click ×2 on the LCD. The pattern doubles and the new pages copy the first.
TRIG SELECT KEY #
MM manual p.1-5
On the machine [TRIG SELECT] chooses which trig track the TRIG keys edit: AMP, FILTER, LFO or ALL. In the editor you choose the envelopes of a trig in the step menu of the Pattern workspace: Envelopes, then Amp, Filter or LFO. On a selection it sets every trig in it. A note that fires only some envelopes shows their letters on its bar. A trig that fires none is trigless.
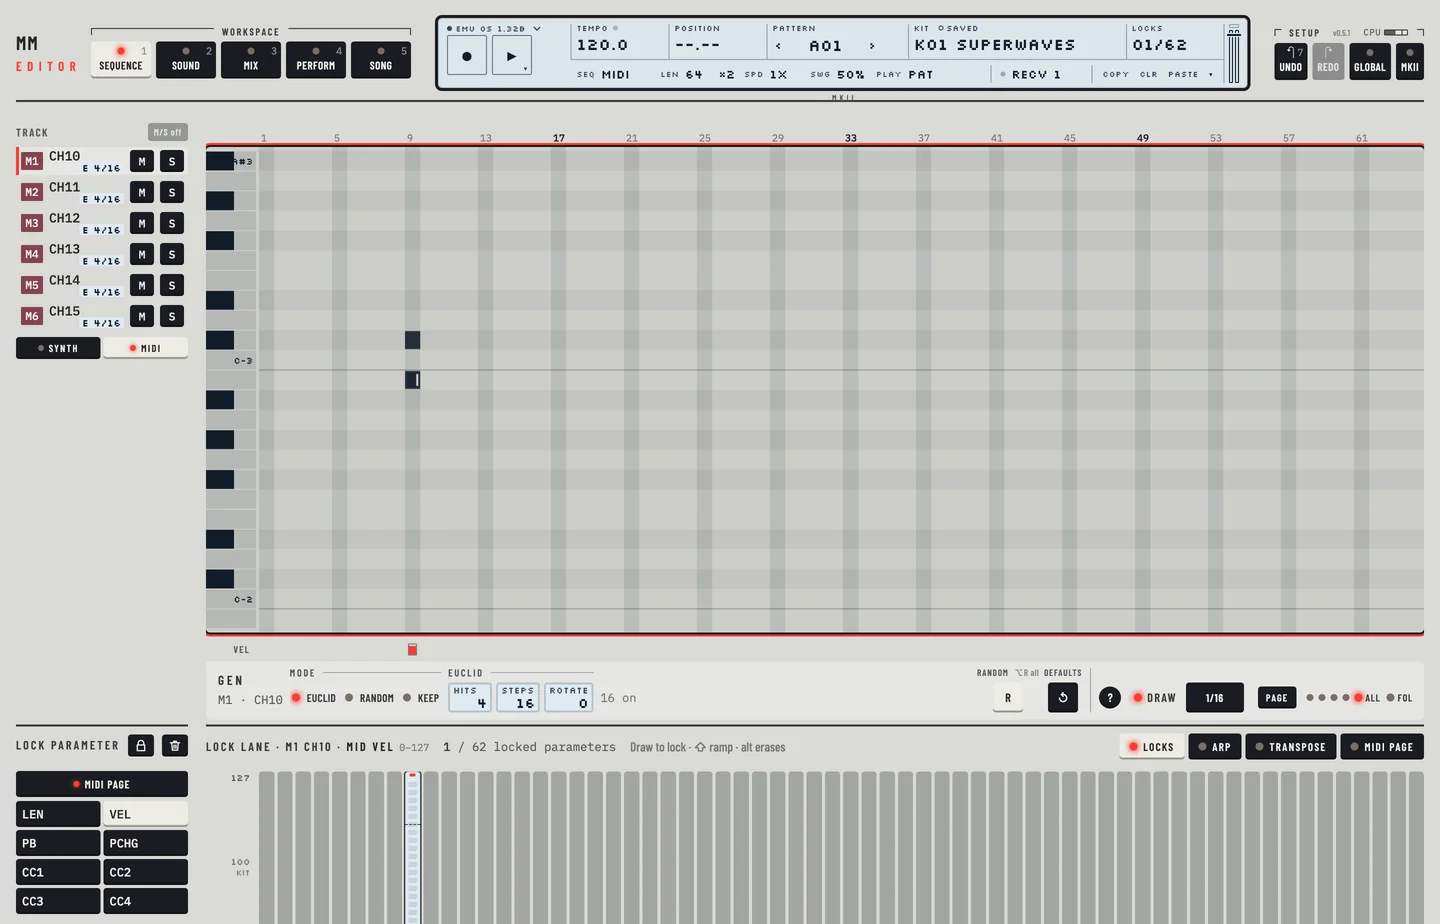
[FUNCTION] + [TRIG SELECT] edits the MIDI tracks. In the editor use the Synth and MIDI keys in the track rail, or the <SEQ> field in the LCD, to change between the six synth tracks and the six MIDI tracks.
- Click Pattern, pick track 1 and click MIDI. The rail shows the MIDI tracks M1 to M6, each with its own roll.
- Click a note into each of the six MIDI tracks. Only that track changes.
THE KEYBOARD (SFX-6) #
MM manual p.1-6
The SFX-6 has a keyboard and a joystick. The editor has the same functions on the Perform workspace.
- The Keyboard card plays notes. It has four modes: Auto track, Multi trig, Multi map and Poly.
- The Assign card has a joystick pad. Drag the stick. It springs back when you let go. On the machine's tabletop models the pad sends pitch bend, CC 1 and CC 2. HOLD keeps the stick where it is. RANDOM moves the stick by itself inside a region that you draw with REGION.
- Multi trig and Multi map are keys of the card.
- The Octave stepper moves the on-screen keyboard over all 128 notes, from MIDI 0 up to 127.
- Follow moves the keyboard to the octave of a note you play. It moves only for a note outside the four octaves shown, and only when no other key is held. A click on the keys never moves it. Press Follow again to turn it off. The Octave stepper works as before.
To use the Perform keyboard and joystick:
- Click Perform, then click a key of the keyboard. The note goes to the machine.
- Hold a key with the mouse. It is lit. Let go and no key is lit.
- Drag the joystick of the Assign card and let go. The moves reach the machine and the stick springs back. Click HOLD and drag the stick again. When you let go, the stick stays where it is and the machine keeps the value. Click HOLD again. The stick returns to the middle. Click REGION, drag a rectangle on the pad and click REGION again. Click RANDOM. The stick moves by itself inside the rectangle. The Speed stepper sets how fast it moves, from 1 to 10. Click RANDOM again, press STOP or press Panic to end it. STOP and RANDOM return the stick to the middle, and Panic also ends HOLD. Play a note with a MIDI keyboard that lies outside the four octaves shown. With Follow lit, the keyboard moves to its octave.
- Click Multi trig, then SPLIT KEY. Click the first mode again, then Auto track.
- Click Multi map. The map table opens. Click Split selected range to add a range, and click × on the new range to take it away.
The computer keys play notes too: [A S D F G H J K L] and [W E T Y U O P]. A key of the on-screen keyboard is lit while you hold it: with the mouse, with the computer keys, or on a MIDI keyboard connected to the editor (the MIDI input of the standalone, or the MIDI track of the plug-in in your DAW). The piano roll shows the pitches the machine plays.
REAR PANEL #
MM manual p.1-7
Power, the voltage selector and the fuse belong to the hardware. The editor has no counterpart.
MIDI sockets
The standalone editor has the AUDIO / MIDI panel for its MIDI. Press [,] or choose AUDIO/MIDI… in the engine menu. The MIDI card lists the inputs, with a light for each that is on, and an output. A button pairs a Bluetooth MIDI device. No MIDI input is on until you switch it on there. The list follows the system: a device plugged in or out appears or goes at once, and an input or output you had chosen comes back when its device returns. The Monitor row counts what came in and went out. A red line under the output warns when a virtual bus, such as an IAC bus, is both an input and the output: switch the input off or send to another bus. See "MIDI and sync" in the installation guide.
In a plug-in the host routes MIDI. The machine's own MIDI out, which carries notes, controllers, program changes, pitch bend, pressure and clock, reaches the plug-in's MIDI output. Its SysEx never does.
Not in the editor yet: The editor has no MIDI THRU.
Audio inputs and outputs
The audio the host gives the plug-in goes to the machine's inputs. In the Mix workspace each FX machine has an In selector: NEIBOR, INP A, INP B, INP AB or a bus. This is where you choose which input the machine reads.
Each track has Out keys AB, CD and EF. The routing keys under the strips set the global routing: 3xSTEREO, 3xSTEREO + AB = MIX or 6xMONO. A multi-output VST3 host receives the extra pairs. Other hosts receive the main pair.
The headphone output has no counterpart. It is a copy of the AB pair.
CONNECTING #
MM manual pp.1-8, 1-9
Mounting, cabling, cleaning and the battery are matters for the hardware. The editor needs only the firmware image, which it asks for on the first start.