Beyond the hardware
The editor runs the real Monomachine operating system and adds a few things around it. This chapter describes them.
MACHINE MEMORY #
A Monomachine keeps what you save when you switch it off: its kits, patterns, songs and globals stay in its memory. The editor does the same. When you save on the machine, the editor writes what you saved to a file on your computer, slot by slot. A new session starts from factory memory with the saved slots put back in.
Only a save writes the file: a kit, pattern, song or global stored into its slot. That is SAVE KIT, a change to a pattern (the machine stores pattern edits as you make them), SAVE SONG, a change to a global, a SysEx dump the machine takes in, a storage image you load. It makes no difference whether you save in the editor or on the machine's own keys. The editor writes the file a second or two after the save. Turning a knob, automation from a DAW and changes to the kit that plays that you have not saved write nothing, and neither does playing. In a DAW the machine follows the DAW's clock; that setting is never saved.
A new session is a new plug-in in a DAW project, a new DAW project, or a start of the standalone editor. It has every slot you saved, wherever you saved it. The standalone editor also keeps the kit that played when you quit it, with its unsaved changes.
Start from factory memory
- Choose RESET MACHINE… in the engine menu, the drop-down at the left of the LCD.
- Click Start from factory memory…. The editor asks a second time.
- Click Start from factory memory. The machine restarts with its factory memory, as on a new install, and the saved memory file is deleted. This takes a few seconds.
New sessions now start from factory memory until you save again. The reset has no undo: click Export SysEx… in the question first to keep a way back.
Turn it off
Choose KEEP MEMORY: ON in the engine menu. It reads KEEP MEMORY: OFF, and new sessions start from factory memory. The editor no longer writes the file. The file stays, so when you turn it on again, new sessions start with the memory you saved before.
Two editors at once
Two Monomachine editors open at the same time, in one DAW project or in two, share the same file. Each writes the slots it saves and leaves the others. When two editors save the same slot, the last save wins.
When the file cannot be used
The file is written in one step, so a crash leaves the old memory or the new one. If the file is damaged, the machine starts from factory memory and the editor says so. It keeps the file beside the new one as machine-memory.unusable with the date and time in its name, and your next save writes a new memory file. If the file was written by a newer editor, the editor leaves it as it is and saves nothing over it. It says so; move the file away to save again.
If the editor cannot write the file, because the disk is full or the folder is read only, it says so and keeps the old file. It tries again at your next save and when it closes. Your saves stay in the session. The standalone editor starts with them next time, not with the old file, and writes them then.
The file is machine-memory.bin in the memory folder of the editor's data folder: Documents/Gearmulator Preview/Monomachine/memory. It holds the slots you saved, nothing else. It holds no firmware.
FACTORY SONGS PLAY #
The songs of the factory memory are in the song slots of the editor, and they play.
- Press [5], or click the Song tab.
- Click a song slot. It is only selected, and the machine keeps the song it has.
- Click Load, or press [ENTER]. The machine takes the song while it is stopped, and the arrangement on the right shows its rows.
- Click the SONG key in the middle of the page, so that the machine plays the song and not a pattern.
- Press [SPACE]. The machine starts, the step moves and the song goes on to a later row. The output is not silent.
- Press [SPACE] again. The machine stops.
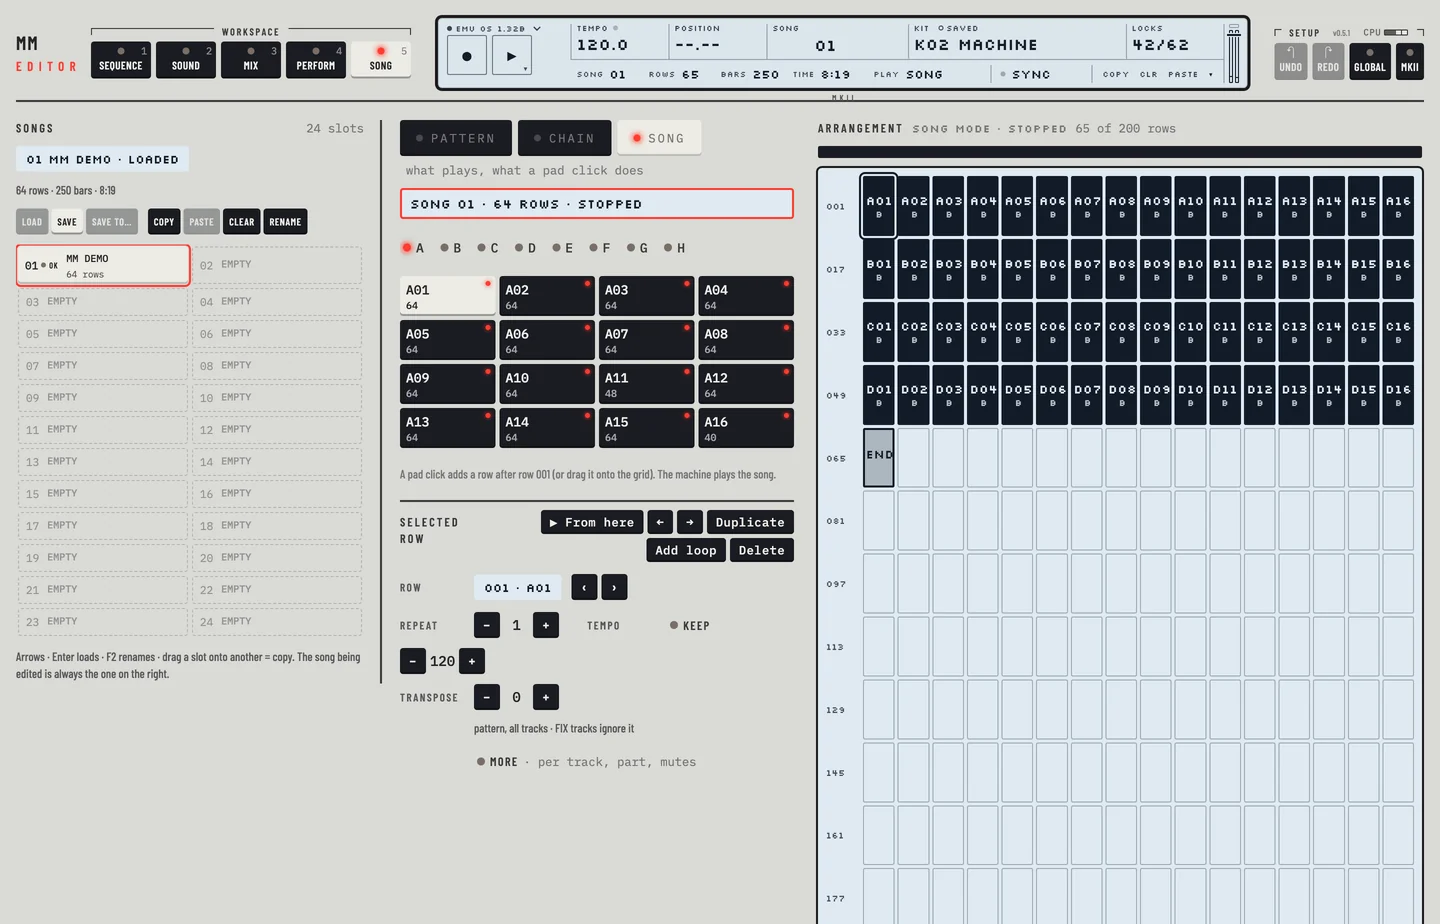
Every factory song that holds rows plays this way. The arrangement follows the machine as it plays. See "LOAD SONG" in chapter 17.
FACTORY PATTERNS PLAY #
The patterns of the factory memory are there too, A01 to H16.
- Click the pattern field of the LCD. The pattern chooser opens.
- Click the pattern you want. The machine goes to it and loads the kit it recalls.
- Press [SPACE]. The step moves through the pattern and the output is not silent.
- Press [SPACE] again, and pick another pattern.
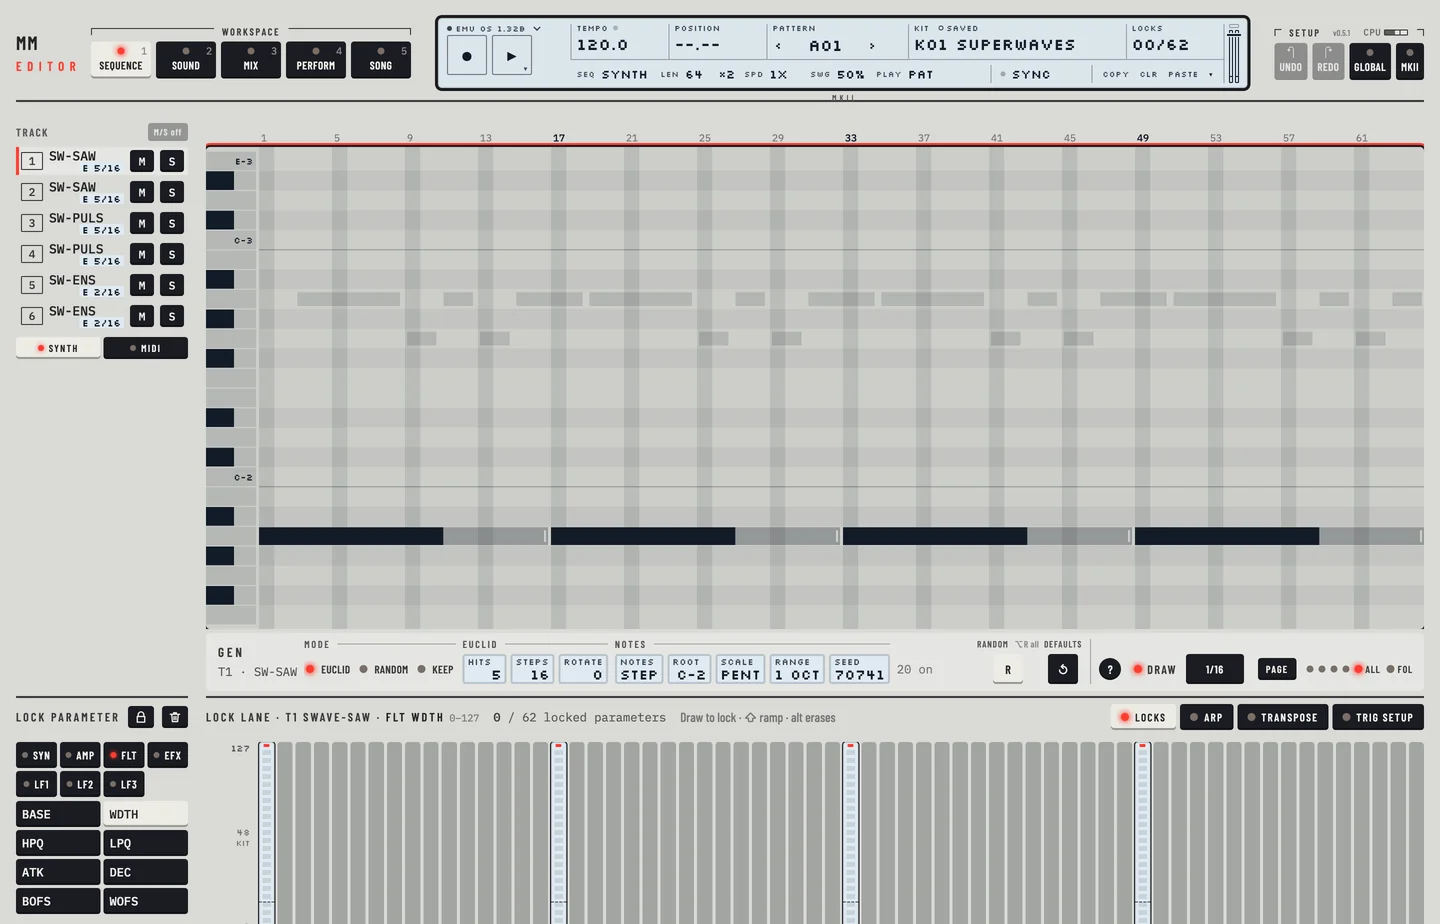
Patterns that hold notes, spread over all 128, play the same way one after the other.
GEN ROLLS A RHYTHM #
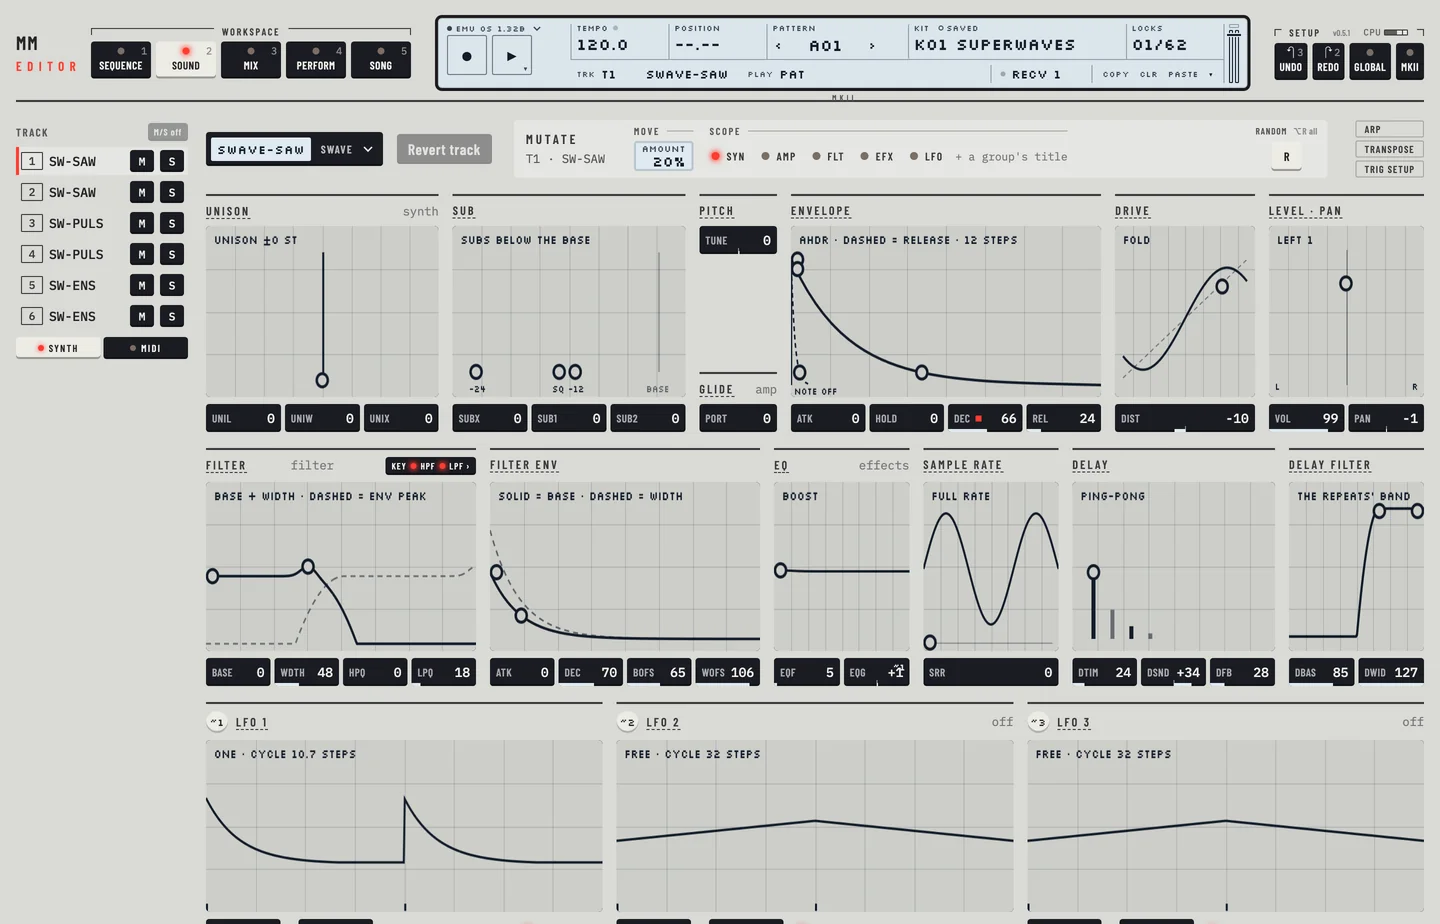
The machine has no such function: you set the hits by hand. The GEN bar on Pattern rolls a rhythm for the selected track from a few settings. It writes ordinary trigs, so you can edit the result as any other.
- Press [1], or click the Pattern tab, and pick a track on the rail.
- Read the GEN bar under the roll. It offers the generator of that track. Its modes are EUCLID, RANDOM and KEEP.
- Click the R key, or press [R], until the notes change. Each press rolls a new variation.
- Click a value of the bar, for example Hits with a Euclid setting or Density with RANDOM, to change it. A click steps the value up, a [⇧]-click down.
- Press [⌘] + [Z]. The whole run of rolls goes back in one step.
Hold [⌥] and the bar changes every track at once, over the whole pattern. Defaults puts the bar back to its starting values.
MUTATE CHANGES A SOUND #
The machine has no such function. MUTATE nudges the sound of the selected track at random. It sits at the top of Kit, beside the machine name.
- Click the Kit tab and pick a track on the rail.
- Click the R key of MUTATE. The sound changes. Click it again for another roll.
- To keep the change to one part of the sound, click the chips of the Scope: SYN, AMP, FLT, EFX, LFO. Switch FLT on and SYN off, and only the filter moves.
- Click the Amount value to say how far a roll goes.
- Click UNDO in the top bar, or press [⌘] + [Z], to bring the sound back.
CLEAR #
When you play with a sound, Clear puts the selected track back as the kit's slot stores it. On a synth track it restores the machine, the seven pages, the level, the outputs and input, the assign rows, the key tracking, portamento and legato switches and the track the notes are forwarded to. On a MIDI track it restores the MIDI page. The other tracks, the multi envelope, MULTI TRIG and the kit name stay as they are. The kit library's Reload loads the whole kit again. Clear does one track.
- Click the Kit tab and pick a track on the rail.
- Turn a few knobs. Clear turns on.
- Click Clear. The values are the stored ones, and the key is off again.
- Press [⌘] + [Z]. Your edits are back, and the key is on.
Clear is off while the track is as stored. Saving the kit makes the saved sound the stored one.
SOLO #
S on a track plays that track alone. The mutes you had come back when you let go.
- Click S on the strip of a track on Mix, or on its entry in the rail. The other synth tracks are muted.
- Click S again. The mutes are as they were before.
The solo is saved with the project, in the DAW and in the standalone editor. Open the project again and the solo is on, the other synth tracks are muted, and the mutes you had before the solo come back when you end it.
UNDO AND REDO #
The machine has no undo. Every edit of the editor can be taken back and done again, across kits, patterns and songs.
- Make an edit, for example click an empty cell of the piano roll.
- Press [⌘] + [Z], or click UNDO in the top bar. The edit is gone.
- Press [⌘] + [⇧] + [Z], or click REDO. It is back.
A drag, a paint or a run of rotates is one undo step. A SysEx import and the Empty reset are one step each: Undo writes back the kits, patterns and songs they overwrote. A global is not put back (chapters 19 and 20). A kit you leave without saving is kept as the machine's UNDO KIT: choose it in the kit library to get the edited kit back, still unsaved, in its own slot.
TYPED VALUES #
Instead of turning a value, you can type it.
- Click the Kit tab and pick a track.
- Hold [⌘] and click a value box, for example in the filter. A field opens over it with the value it shows. Press [ENTER] on a focused box and the field opens as well.
- Type a number and press [ENTER]. The box shows it and the machine has it.
- A number out of range is refused: the field stays and nothing is sent. Press [ESC] to leave the field with the value as it was.
A value that shows names, such as a waveform, takes a name. Type it in small letters if you like. A name the value does not have is refused, and the message lists the names it has.
With a value focused, press [↑] or [↓] to step it, and [⇧] for larger or finer steps. Double-click a box to put it back to its default. [⌘] + [Z] takes back a typed value in one step.
SELECT, COPY AND PASTE STEPS #
You select steps with the mouse and copy, paste and clear them, in one track or in several.
- Click the Pattern tab and pick a track that has a note.
- Hold [⌘] and click a note in the roll. It is selected. Hold [⌘] and drag to select a block of steps. Hold [⌘] and [⇧] and click a step of another track to take that track in.
- Press [⌘] + [C], or click COPY in the top bar.
- Hold [⌘] and click an empty step. Press [⌘] + [V], or click PASTE. The block lands there from its first step and track.
- Press [⌘] + [D] to repeat the block right after itself.
- Click CLR. Only the selected steps are cleared.
- Press [ESC] to leave the selection, and [⌘] + [Z] for each step you took.
To paste into several tracks, copy the steps, hold [⇧] and click the headers of the other tracks to mark them, and press [⌘] + [V]. All of them take the copy, and the rest of their pages stays as it was. A paste puts the steps on the page you look at, not on the first page of the track.
The keys of the computer reach the operating system as well: [⌘] + [C] and [⌘] + [V] work from the keyboard as from the top bar.
COPY, PASTE AND CLEAR WHAT #
The machine's super copy and super clear choose the parts of a track to take. The editor has the same in its what menus.
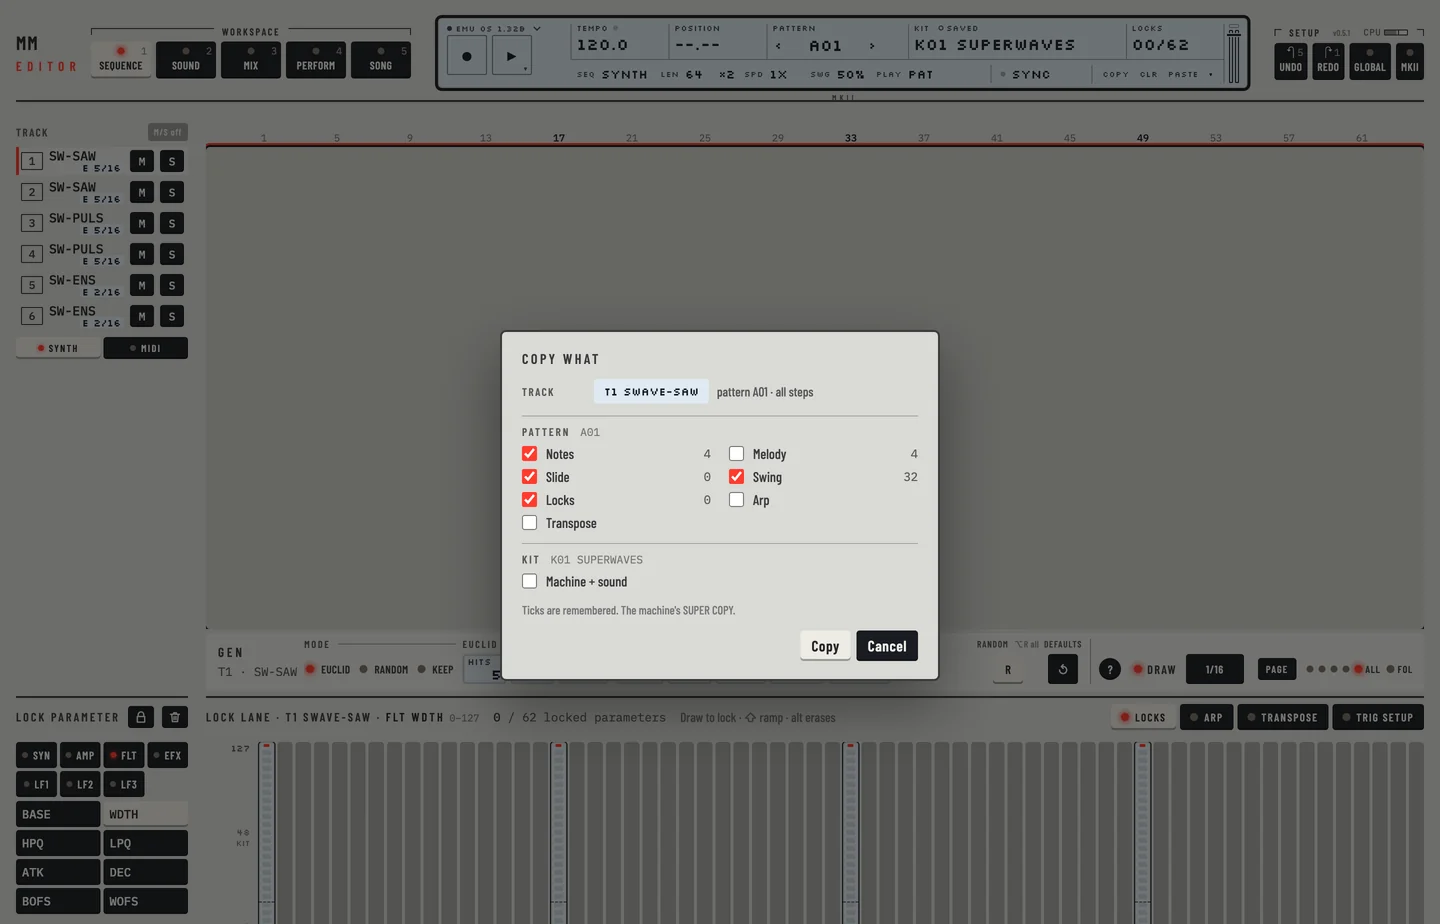
- Click the Pattern tab and pick a track that has notes.
- Click the arrow beside COPY CLR PASTE and choose Copy…, or press [⌘] + [⇧] + [C].
- Tick the parts to take: Notes, Slide, Swing, Arp, Transpose, Machine + sound and the others in the list. Click Copy.
- Pick the other track on the rail.
- Click the arrow again and choose Paste…, or press [⌘] + [⇧] + [V]. Click Paste into 1 track. The parts you ticked are the first track's.
- Press [⌘] + [Z]. The whole paste is one undo step.
To clear parts, press [⌘] + [⇧] + [BACKSPACE], tick Notes alone, and click Clear. The notes go and the slides stay.
DROP A FILE ON THE WINDOW #
Drop a SysEx file on the window of the editor, and the import window opens with a preview of it. It is the same as IMPORT SYSEX… in the engine menu. See "FILE" in chapter 19.
- Drag a .syx file from your computer onto the window of the editor. The import window opens with the preview of the file.
- To leave it, click Cancel. The window closes and nothing is sent.
SYSEX IMPORT WITH A PREVIEW #
The machine takes a SysEx dump without showing you what is in it. The editor lets you look inside the file before it sends anything.
- Choose IMPORT SYSEX… in the engine menu.
- Read the preview. It has a tab for each kind and a grid of the slots.
- Tick the kinds you want, and choose where each one goes with the Place row.
- Click Import, or Verify only to compare without writing. A report says what happened to each slot.
The tick Read back and compare beside Verify only decides whether the import reads the slots back after it sends them. The full procedure is in "FILE" in chapter 19.
NOTES FROM A MIDI KEYBOARD LIGHT THE TRACK #
The track you play lights up. The number of the track on the rail and its light on Mix show it while a note is held.
- Click the Perform tab.
- Hold a key of the keyboard on the page with the mouse. The key is lit. Let go and it goes dark.
- Hold [A] on the computer keyboard. Its key is lit while you hold it.
- Play a MIDI keyboard on a channel the machine plays. The keys of the notes you hold are lit, and each goes dark when you let go of it. On a channel the machine does not play, none is lit.
THE SELECTED TRACK FOLLOWS THE LAST TRACK PLAYED #
The machine has no such function. With it on, the track you select changes to the last synth track you played from a MIDI keyboard. It is off until you turn it on, and the project keeps the choice.
- Open the engine menu and choose FOLLOW PLAYED TRACK: OFF. It reads FOLLOW PLAYED TRACK: ON.
- Play a MIDI keyboard on the channel of track 4. Track 4 is selected.
- Play it on a channel no synth track plays. The selection stays where it was.
- Choose the entry again to turn it off.
A track's channel is the base channel plus the track's number, inside the CHANNEL SPAN of the global. The keys of the computer keyboard never move the selection. With the HW MIDI engine it does nothing, since the port then carries the machine's own MIDI. While a question is open, or LEARN waits for its note, the selection stays where it is.
A DUMP FROM THE DAW WITHOUT SYSEX RECV #
The machine takes a kit, pattern, song or global dump only on GLOBAL > FILE > SYSEX RECV. The editor's AUTO RECEIVE takes it on any screen, as the Machinedrum does: a dump that reaches the editor on its MIDI in (a MIDI track in the DAW, a Max for Live device, a librarian sending to the standalone) lands on the machine by itself. It is on until you turn it off, and the project keeps the choice. A project saved by 0.8 or earlier has it on.
- Send a kit, pattern, song or global dump from the DAW to the editor. The editor opens SYSEX RECV on the machine, sends the dump as IMPORT SYSEX… does, and goes back to the main screen a few seconds later. A message names what went.
- Press [⌘] + [Z] to put back what the dump replaced. A burst of dumps is one step.
- To have the machine's own behaviour (a dump outside SYSEX RECV is dropped), open the engine menu and choose AUTO RECEIVE: ON. It reads AUTO RECEIVE: OFF. Choose it again to turn it back on.
The machine plays on while it takes the dump. A dump into the kit that plays replaces your unsaved edits of that kit, as on the machine. With the HW MIDI engine it does nothing: open SYSEX RECV on the machine yourself.
THE CPU METER AND THE SPEED-UPS #
The machine has no such function. The emulation needs processor time, and the CPU meter at the right of the top bar, after the version, shows how much of the audio time it takes.
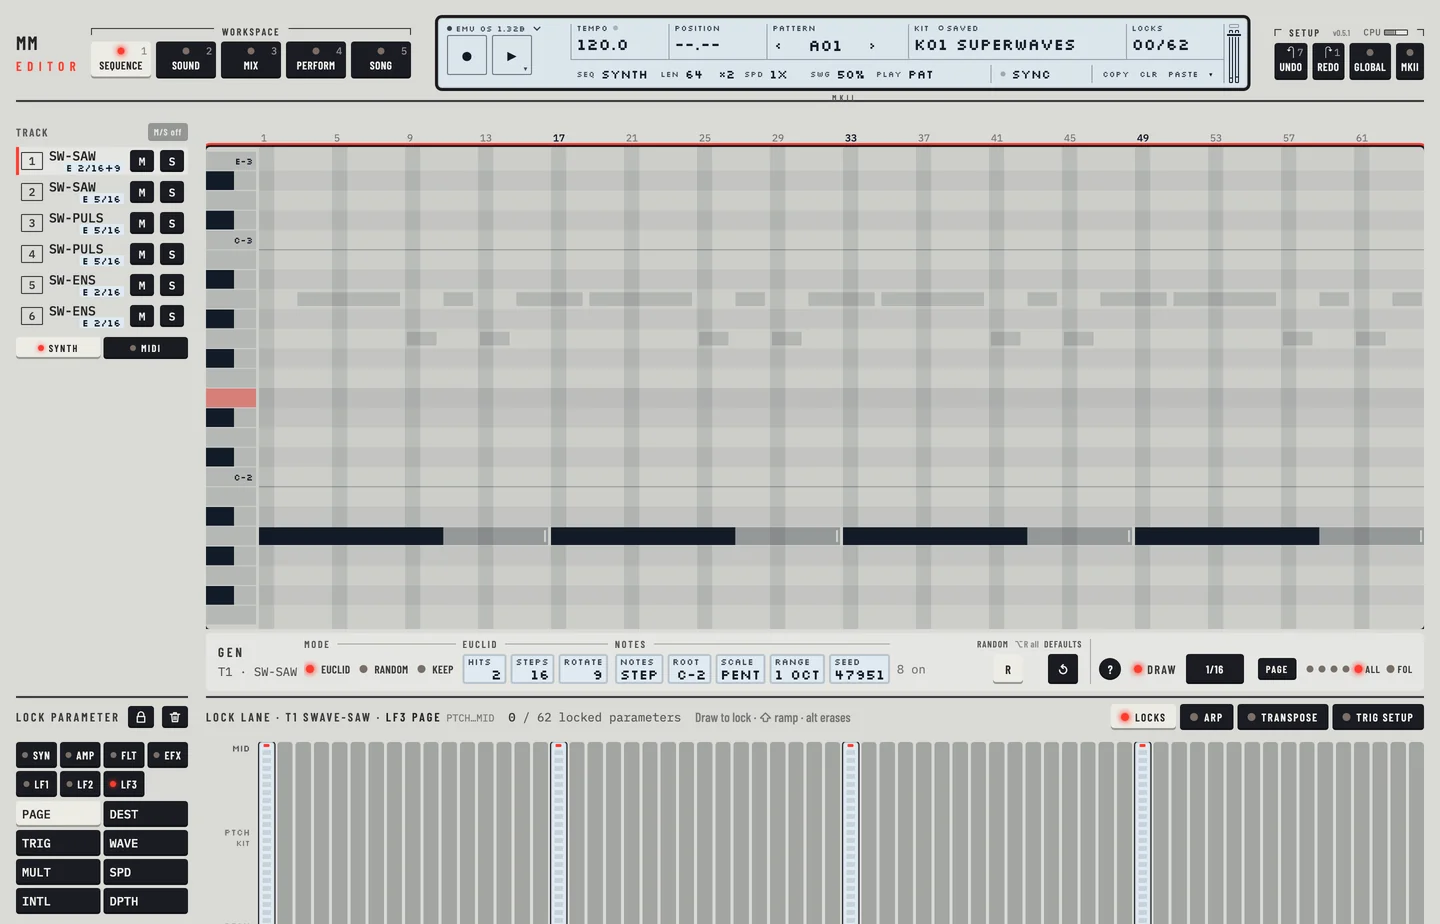
- Press [SPACE]. While the machine plays, the meter moves.
- Click the meter. Its details open under it: the average, the worst block, the speed of the machine, the rate and block size, the speed-ups, and whether the editor runs native or under Rosetta.
- Press [ESC] to close the details.
The speed-ups make the emulation use less time and do not change the sound. They are on by default. To switch them, choose Speed-ups in the Developer part of the editor's menu, or in the details of the meter. Speed-ups (each)… in the details lists every one of them to switch alone.
THE OUTPUT METER AND VOLUME #
At the right end of the LCD, two bars show the level of the left and right outputs, and a volume line sits beside them.
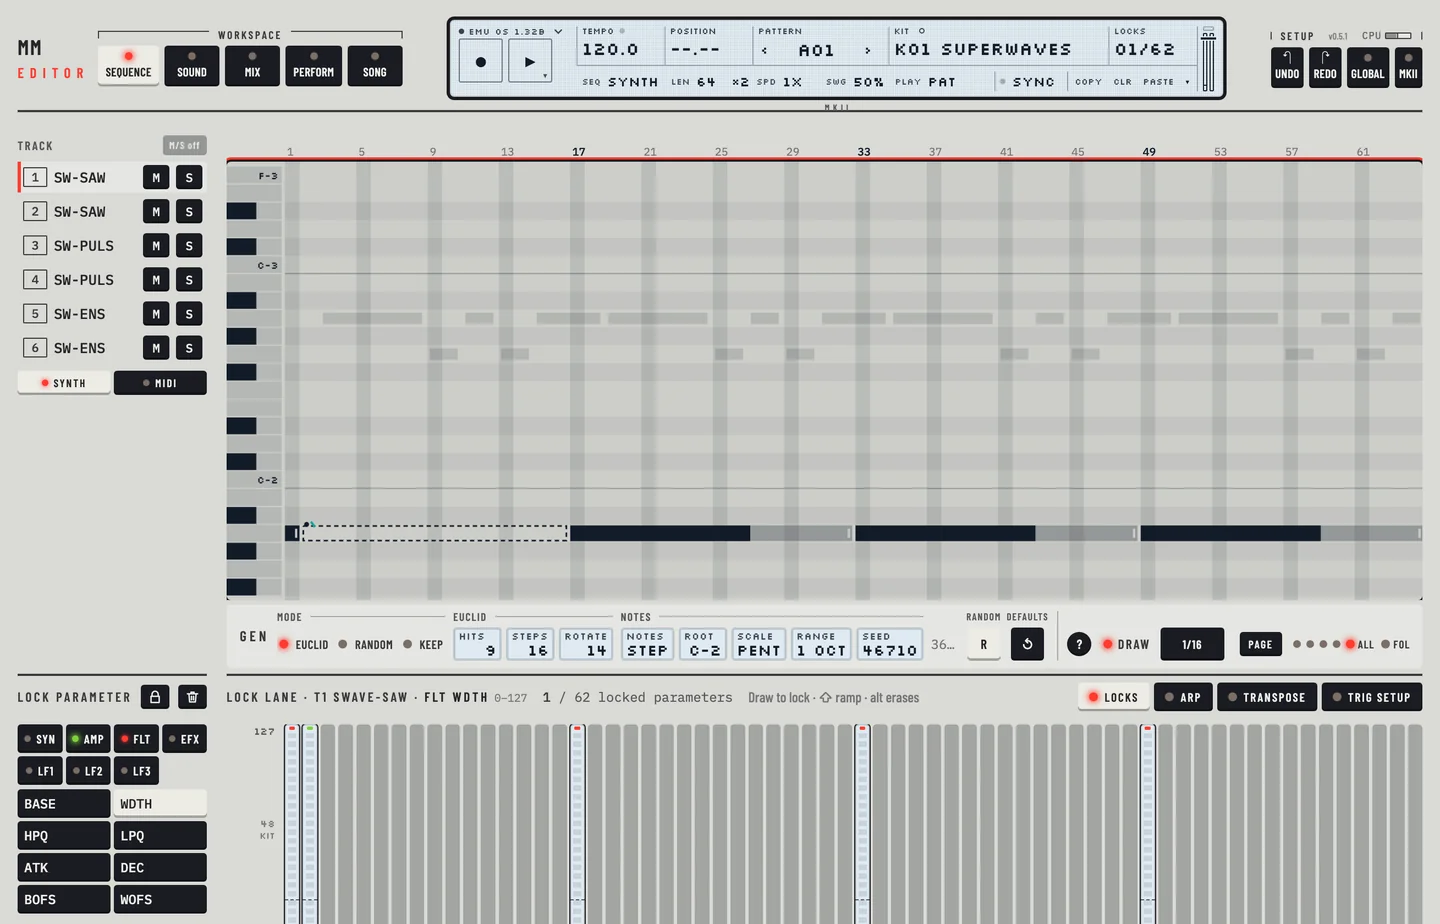
- Drag the volume line down. A readout under the LCD says the level while it changes, for example -6 dB, and goes a moment after you let go.
- Scroll a notch up. The volume rises by 1 dB.
- Drag it to the foot to switch the output off.
- Double-click it to put it back to 0 dB.
- Press [SPACE]. The bars follow the peaks of the output.
THE KEYBOARD VIEW #
The keyboard view shows a drawn keyboard with the words of each key, and a search.
- Press [?], or click the ? key in the top bar. The view and the list of keys open.
- Look for a key, or type in the search to find it.
- Press [ESC] to close it.
THE COMPUTER KEYBOARD PLAYS #
The letter keys play the selected track from any workspace.
- Click the Pattern tab and pick track 1 on the rail.
- Press [A]. Track 1 plays a note.
- Press [W], [T] and [P] for the black keys. [A] and [S] are still the white keys C and D.
- Press [Z] or [X] to move the octave, and [C] or [V] for the velocity.
On the Monomachine Editor [T] is a black key, so tap tempo is [B].
TAP TEMPO #
Tap a key to the beat and the editor takes the tempo you tap.
- Press [B] five times, about half a second apart. The tempo follows, for example 119 BPM.
- On Pattern, where [B] switches Draw, press [⇧] + [B]. It taps on every workspace.
The tempo is the average of your last taps.
PATTERN QUEUE AND CHOOSER #
The pattern chooser shows all 128 patterns, A01 to H16, in eight banks, with each pattern's length and the kit it recalls. Empty ones read EMPTY.
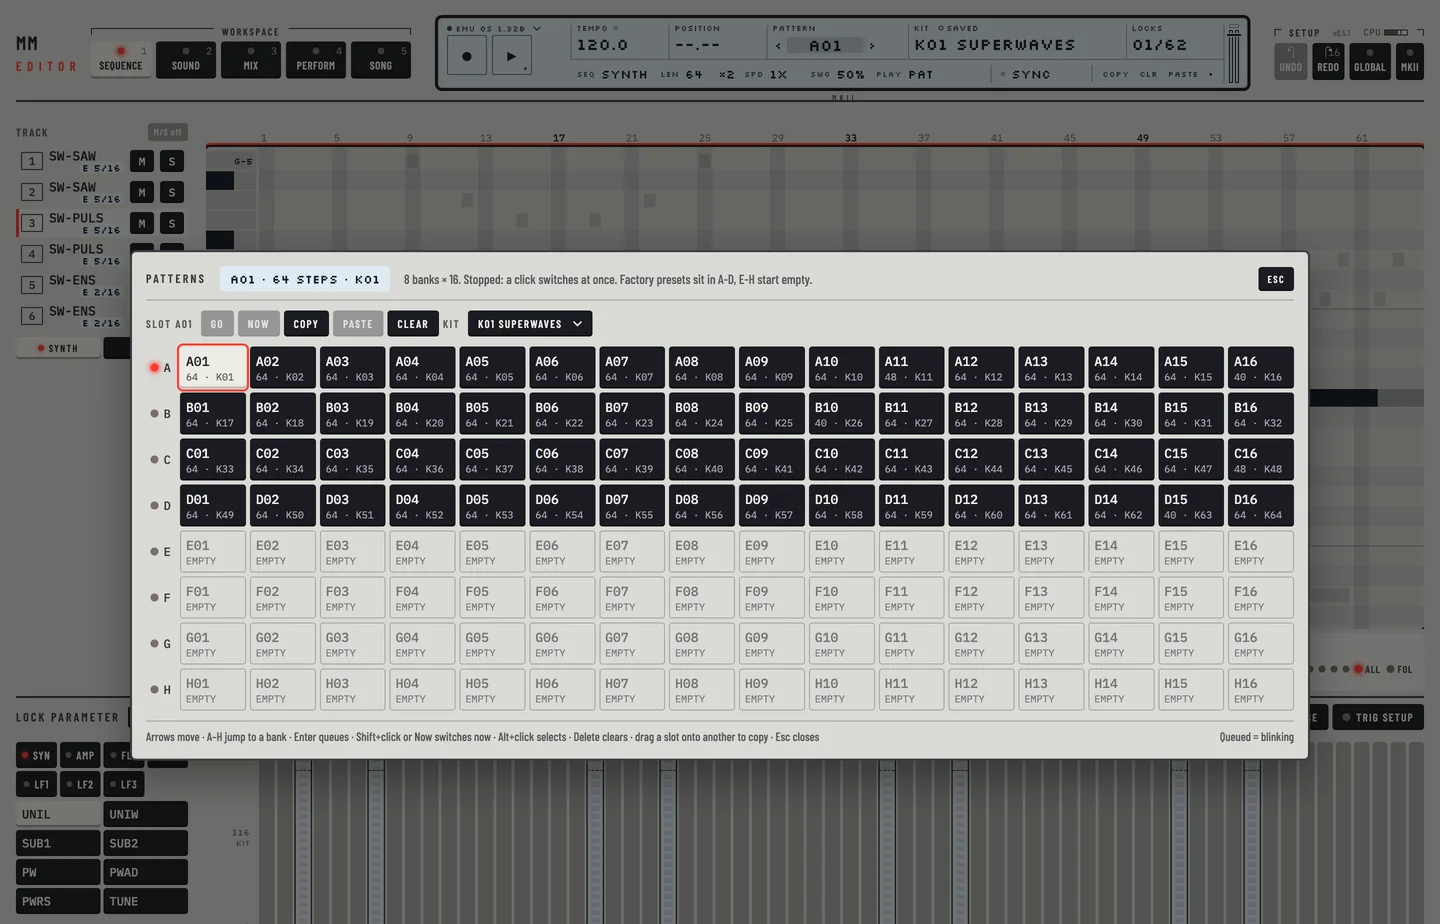
- Click the pattern field of the LCD. The chooser opens.
- Press a letter, A to H, or click a bank key. The selection moves to that bank.
- Click a pattern. The machine goes to it, and loads its kit.
- Press [ESC] to close the chooser.
While the machine plays, a pattern you choose is queued. Click › on the LCD and the next pattern waits. It starts at the end of the pattern you hear. Hold [⇧] and click to go at once. With the machine stopped, a click goes there at once.
In the chooser you can copy a pattern, clear it and paste a copy of another into it. Each is one undo step, and a clear asks first.
KIT AND SONG SLOTS #
The kit library and the song slots work with the same keys: load, copy, paste, rename and clear a slot. Each can be undone.
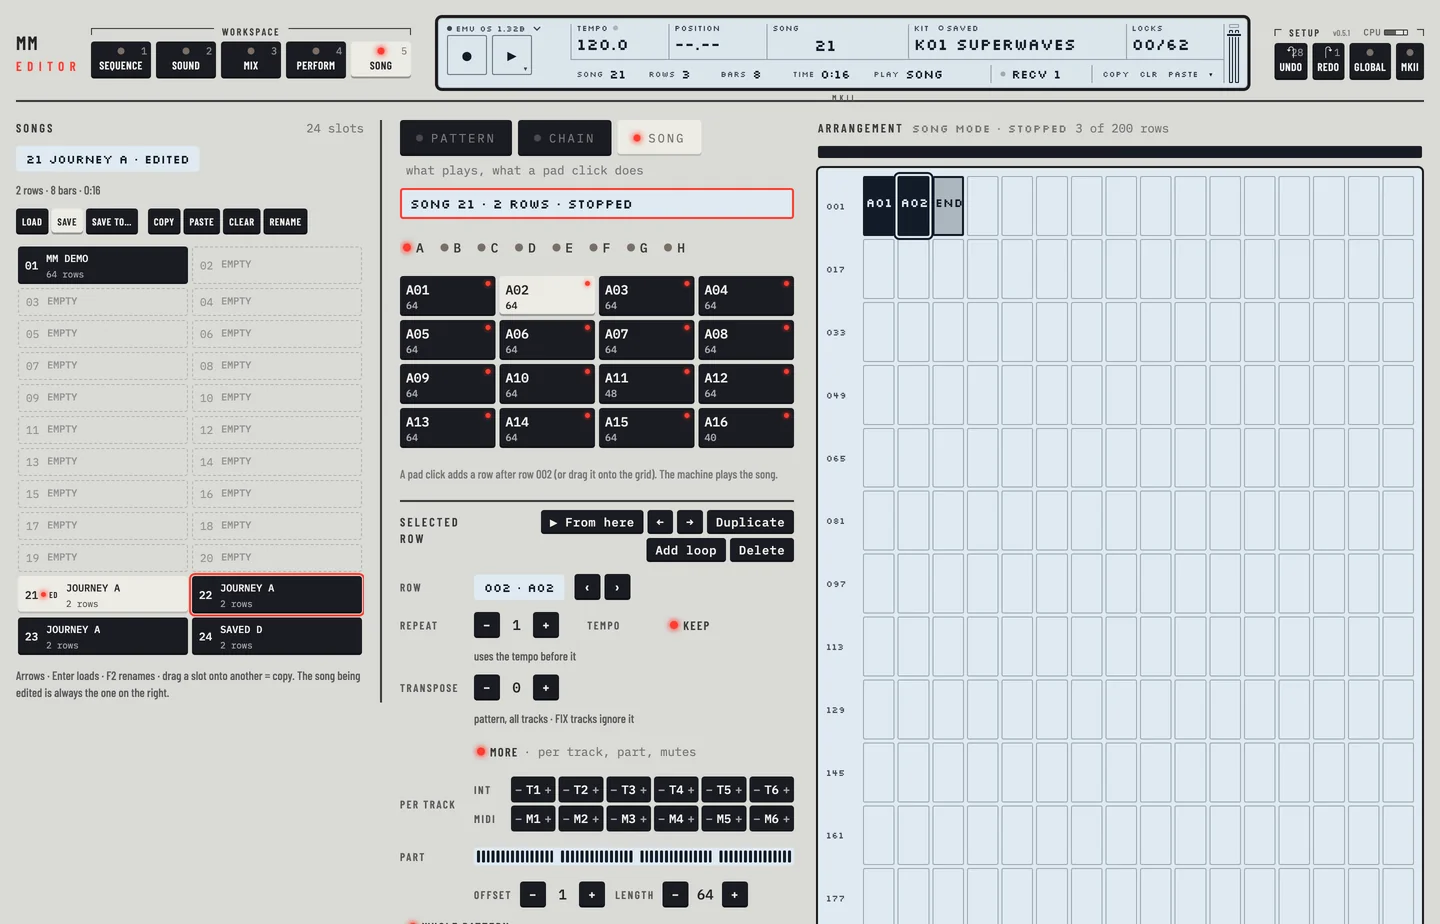
Kits
- Click KIT on the LCD. The kit library opens.
- Click a kit. It loads. Hold [⌥] and click to select a slot without loading it.
- Click Copy, hold [⌥] and click another slot, and click Paste. Press [⌘] + [Z] and the slot is back as it was.
- Click Rename, type a name and press [ENTER]. The editor asks before it writes. Or press [F2].
- Press [DELETE] and answer the question. The slot is cleared. A kit you leave without saving is kept as the UNDO KIT.
- Press [ESC] to close the library.
Songs
- Click the Song tab.
- Click a slot to select it. Click Load to give its song to the machine.
- Press [F2], type a name and press [ENTER].
- Click Copy, select another slot and click Paste. No question is asked. You can also drag a slot onto another to copy it.
- Select a slot, choose Save to…, type a name and press [ENTER]. The machine's song goes into that slot.
- Click Clear. The editor asks first. Answer it, and the slot is empty. [⌘] + [Z] brings the song back.
PIANO ROLL #
The roll on Pattern draws notes with a length and moves them. There is no mode to switch: it always draws. It writes the same step data as the machine's own entry.
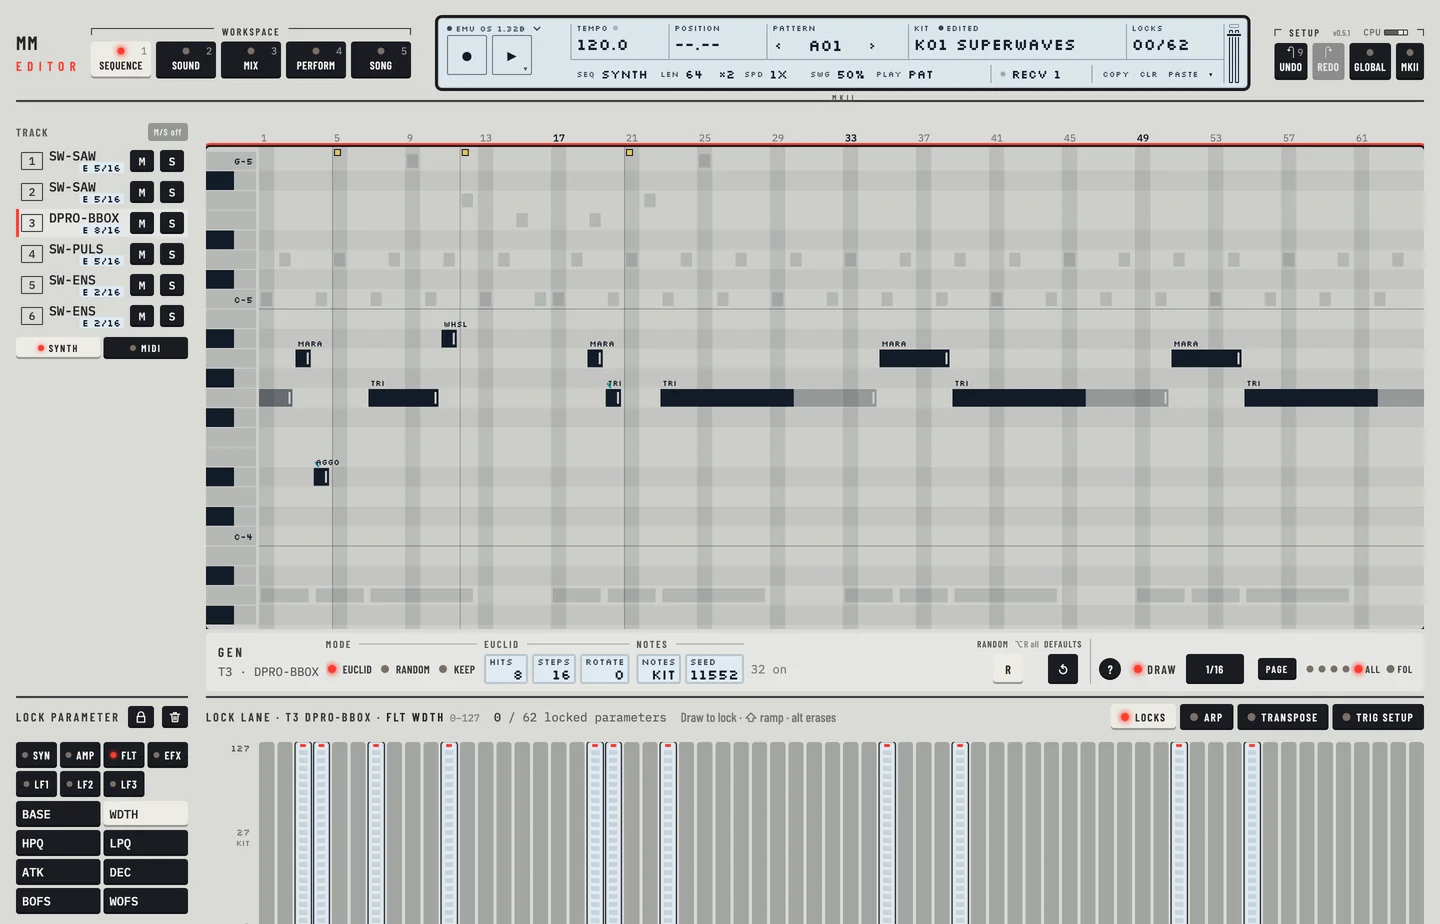
- Click the Pattern tab and pick a track.
- Set Len to 1/16.
- Click an empty cell. A note of that length is there, and a NOTE OFF on the step after it, so that it does not run into the next note.
- Click Len to 1/8 and click another cell. The note is two steps long.
- Drag the end of a note over more steps to make it longer. It then lasts up to the next note.
- To paint, press an empty cell and drag sideways. Every step you cross gets a note at that pitch. Hold [⌥] and drag over them to erase them. Each paint or erase is one undo step.
- Drag the body of a note four steps right. It moves, with its NOTE OFF. Drag it up or down to change its pitch.
- Click a note to select it. It stays selected. Press [DELETE] or [BACKSPACE], or double-click the note, to remove it. The editor writes no NOTE OFF for the removed note, so the note before it runs on.
- Hold [⌘] and drag over steps to select them, then press [DELETE] or [BACKSPACE] to remove what is selected.
- Press [⌘] + [Z] for each step you took.
The keys at the left of the roll play the track. A key is lit while you hold it with the mouse, with the computer keyboard or with a MIDI keyboard, as on Perform.
On Transpose, click a key of its keyboard to set the transpose of the track. On a MIDI track the length is a number of ticks: a 1/16 note is 6, and three steps are 18.
WHAT YOU DRAW IS WHAT PLAYS #
What you enter in the sequencer is what the machine plays. The notes you draw reach the machine, and when you clear the pattern the machine plays silence.
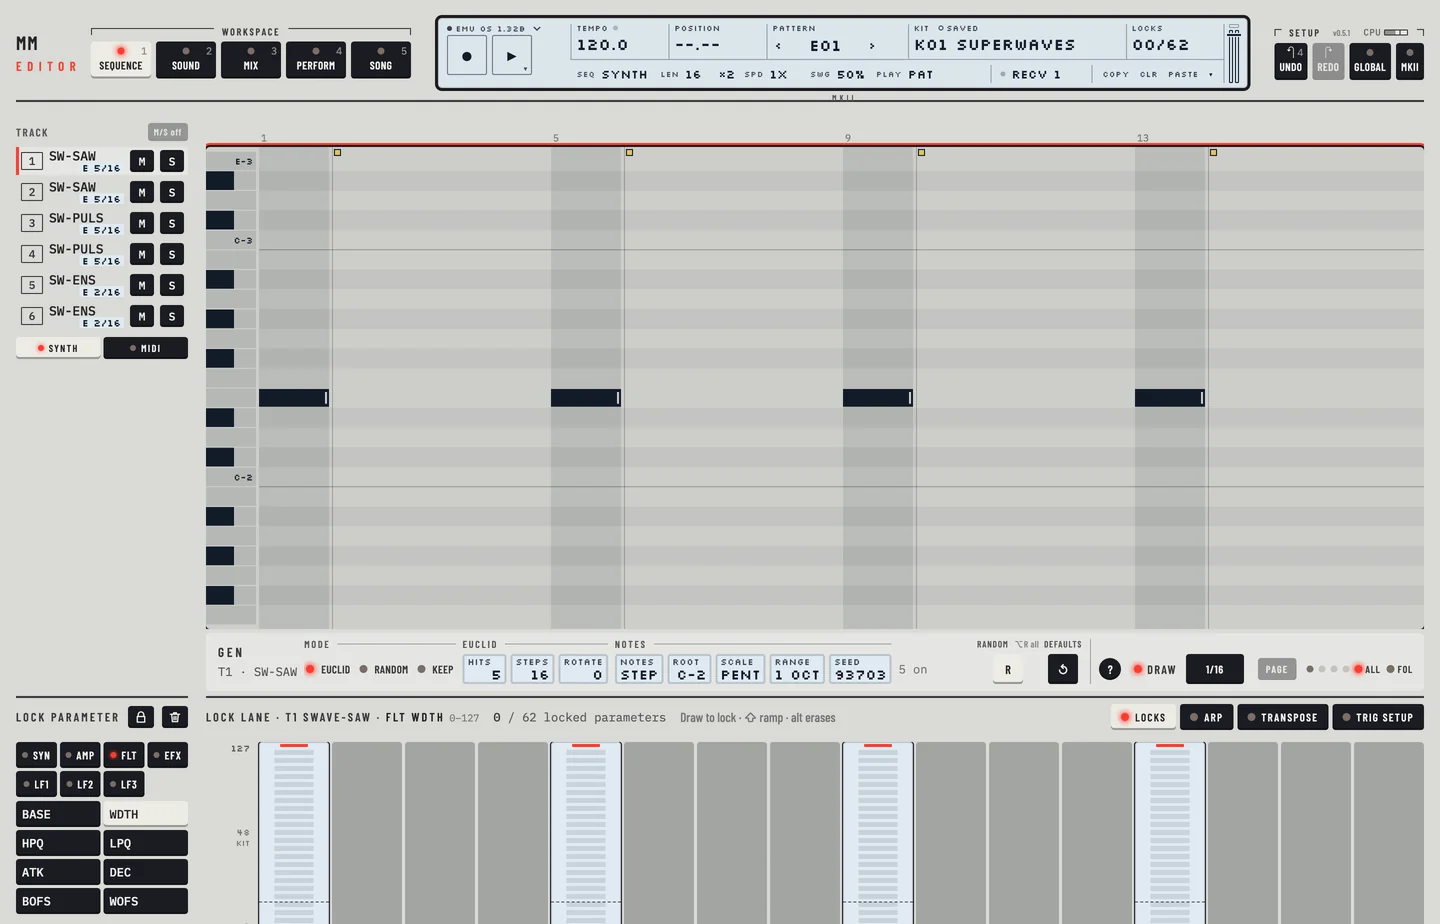
- Click the Pattern tab.
- Click the pattern field of the LCD and pick a pattern with no notes.
- Pick track 1 in the rail.
- Click four cells of the piano roll. Each click draws a note.
- Press [SPACE] and let the pattern run. The position moves through the pattern and the output is not silent.
- Press [SPACE] to stop. Press [⌥] + [DELETE] or [⌥] + [BACKSPACE]. The pattern is cleared and the notes are gone.
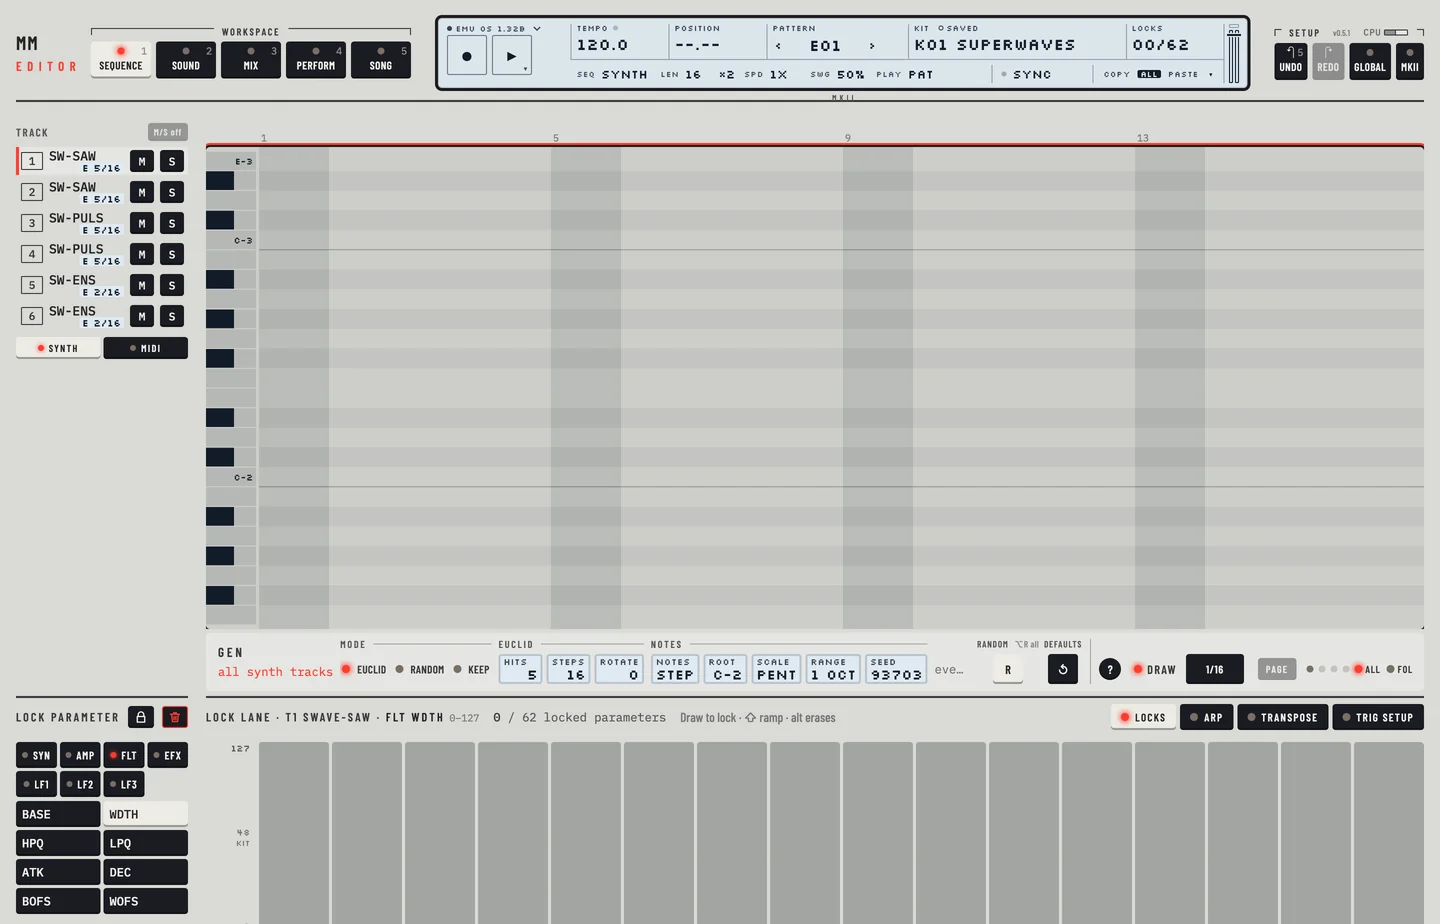
- Press [SPACE] again. The position moves through the pattern and the machine plays silence.
MIDI LEARN #
The Monomachine has no such function. With MIDI Learn a knob or fader of your controller moves any value of the editor, on any track. The machine's own CC map stays for everything you do not map.
- Click the Control key in the Setup group, right of Learn, or press [6]. Click it again to leave.
- Press Learn (L). The key lights.
- Click a value, for example the DEC of the amplifier on track 1.
- Turn a knob on your controller from one end to the other and back. The mapping is made, and the knob now moves that value.
- To reverse a mapping, select it in the list and click the INV key. To remove it, click the × key.
- Press [ESC] to leave Learn.
Every value of the page can be learned. Values that belong to no track are learned too: the tempo, the master tune on the Global page, the five values of the multi envelope on the Perform tab and the SWG value of the playing pattern. So are the transpose of the pattern and of each track (with its scale and key), everything of the arpeggiator (play, mode, range, speed, octave jump, length, the envelope switches and the value of each of its steps), the assign table of each synth track (the page, destination and amount of every row, and mirror, HPF and LPF) and every value of the six MIDI tracks (the MIDI page, the four CC numbers and the channel). Click one in Learn as you would a track value. On the Control page they have a column of their own, FX, at the right of the matrix. To add one without learning, choose Global values in the first list under Add, then the value in the second. A learned CC moves the value as a click on the page does, and a turn of a knob is one undo step. A choice, such as an arpeggiator mode or an assign page, is learned over its entries: the CC spreads across the list. The effects of a synth track are on its EFX page and are learned like any other track value. Names cannot be learned.
A button that sends 127 and 0 is learned as the highest and lowest value. Only control changes are mapped, 128 at most, and they are saved with the project. A learned CC wins over the machine's own CC on that channel: the page says what it hides, for example "Overrides the machine's CC 21 on channel 1: T1 DEC", and removing the mapping gives the CC back. Learn is off while the HW MIDI engine is in use, and the page says why.