Track effects
The sound of a machine passes through the same chain on every track: amp, filter, equaliser, sample rate reduction and delay. The chain is the same for every machine, so these parameters mean the same on every track. All of them are on the Kit workspace, in the groups under the machine's own. Select the track, press [2] and drag the values.
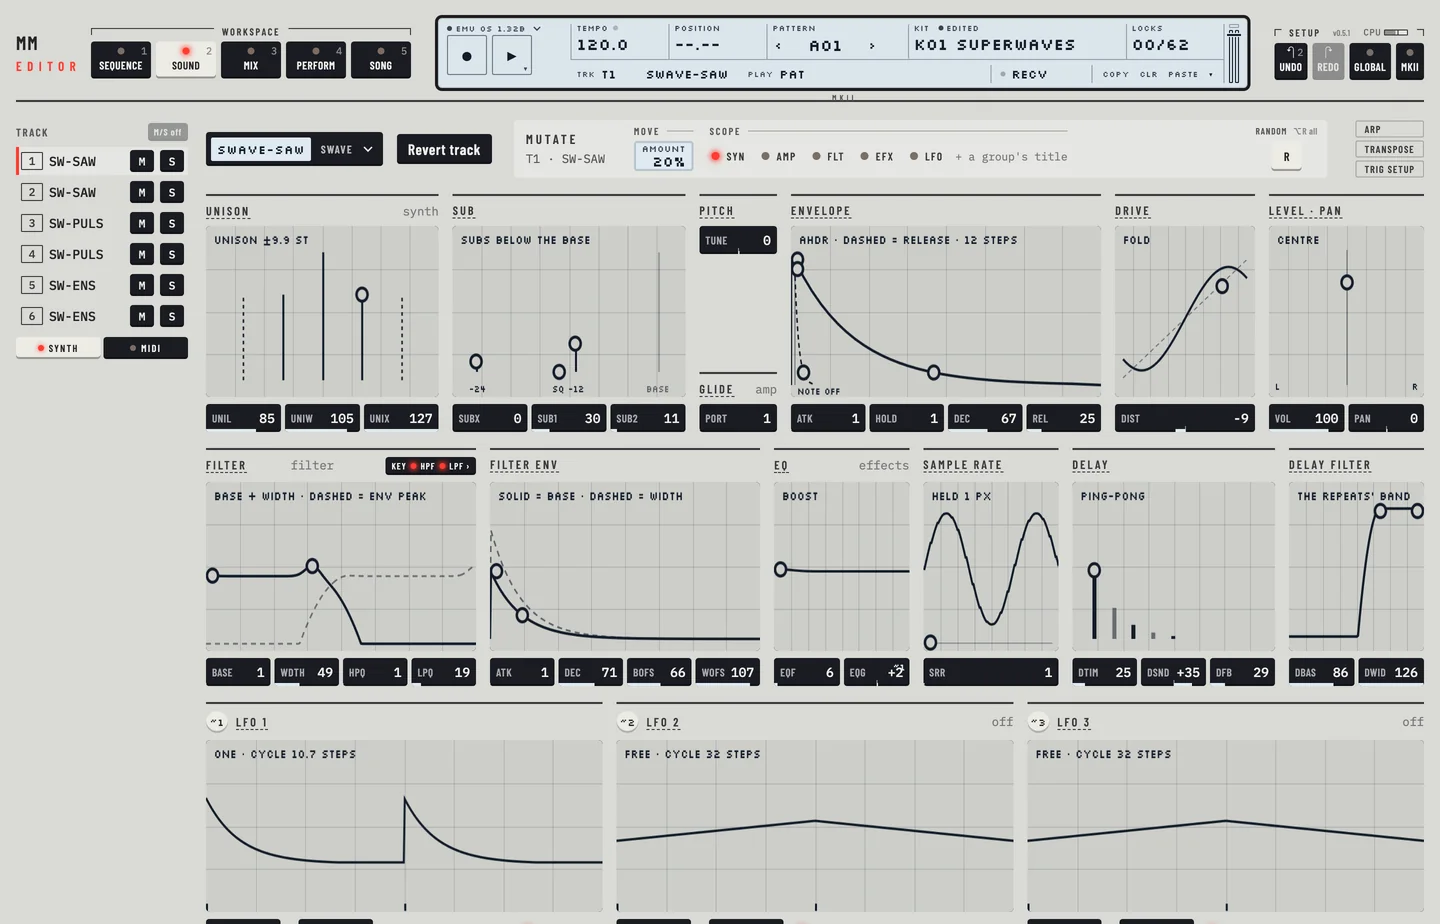
A value box changes when you drag it, turn the wheel over it or press an arrow key on it. Double-click it for its default. Where a group has a picture, drag the dots in the picture to change the values they stand for.
LEVEL #
MM manual p.1-26
LEVEL is the track's mix level, at the end of its path. It is the LEVEL fader of the track's strip in the Mix workspace. It can neither be locked on a step nor moved by an LFO. To balance tracks against each other use LEVEL. For movement inside the sound use VOL.
AMP ENVELOPE #
MM manual pp.1-26, 1-27
The Envelope group of the amp page holds four values.
| Value | What it sets |
|---|---|
| ATK | the attack: how long the level takes to rise after a trig |
| HOLD | how long the level stays up, before the decay starts |
| DEC | the decay: how long the level takes to fall |
| REL | the release: how long it falls after a NOTE OFF |
ATK, DEC and REL are times. Each 8 more about doubles the time. ATK 64 reaches 90 percent of the level in about 0.14 seconds, and DEC 64 falls 20 dB in about 0.55 seconds. DEC 127 holds the level until the NOTE OFF, and REL 127 never fades. HOLD counts in steps of the pattern: HOLD 8 is one step, so it follows the tempo.
The picture shows the shape as the machine plays it, with the release dashed. Drag its dots to set the values.
DISTORTION #
MM manual p.1-27
DIST is in the Drive group of the amp page. Drag the dot in its picture up or down, or use the value box. Above 0 it overloads the sound. Below 0 it adds headroom: the sound is quieter and cleaner.
TRACK VOLUME #
MM manual p.1-28
VOL is the volume of the voice. It is in the Level · pan group of the amp page, and it is the trim at the top of each strip in the Mix workspace, as AMP VOL. VOL comes before LEVEL in the path. Unlike LEVEL you can lock it on a step and an LFO can move it.
PAN #
MM manual p.1-29
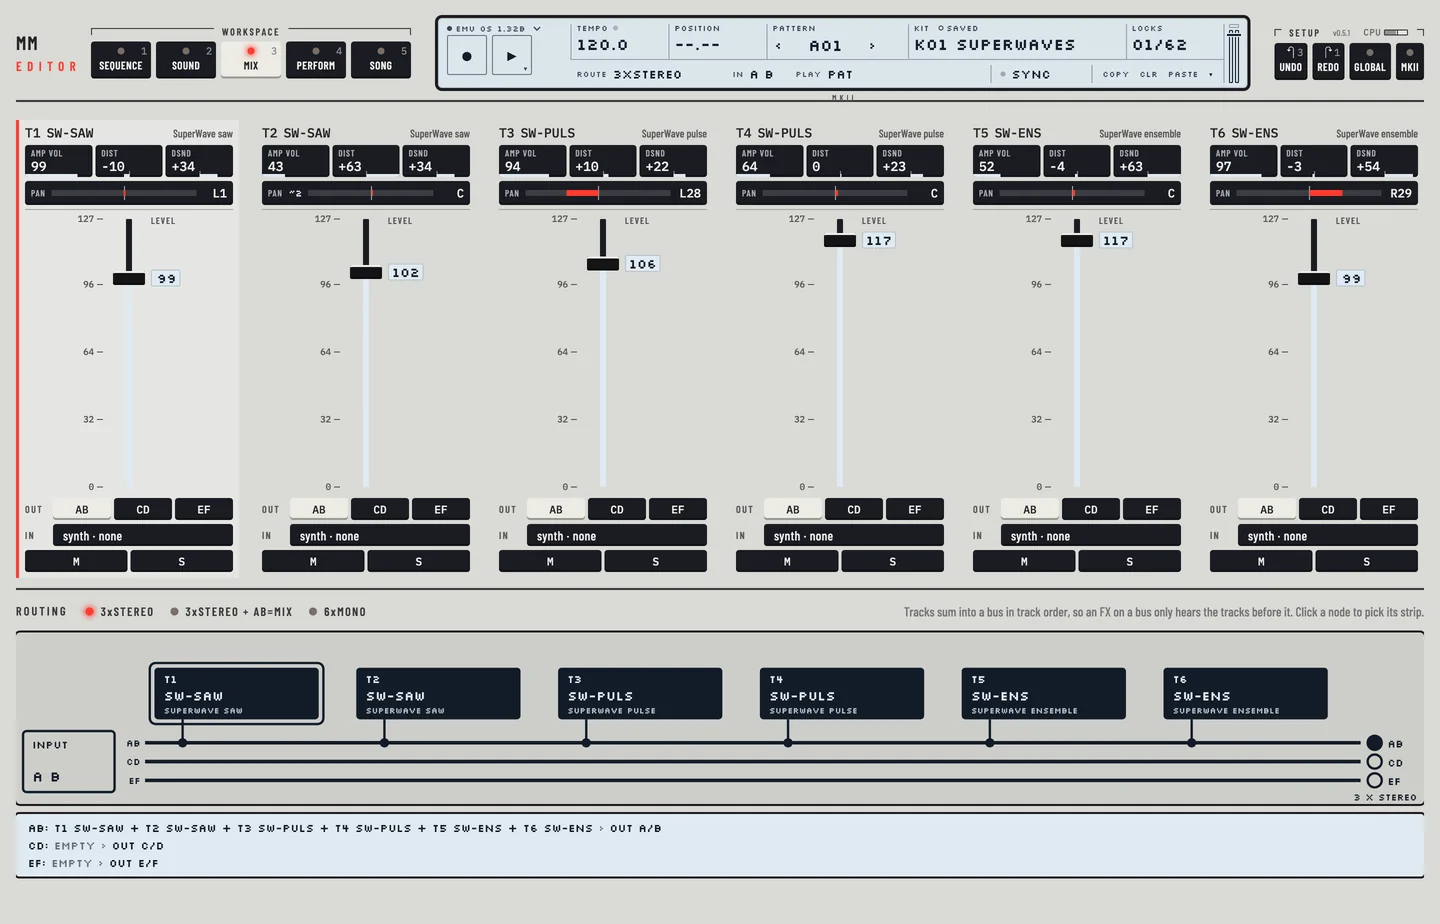
PAN places the track in the stereo field, from L64 to R63. It is in the Level · pan group and in each strip of the Mix workspace.
- Click the Mix tab, or press [3].
- Drag the PAN bar of a strip sideways. The box at its right reads, for example, L28 or R28, and a red bar shows how far the track lies from the centre.
- Double-click the bar for the centre.
- Press [⌘] + [Z] to put the pan back where it was.
PORTAMENTO #
MM manual p.1-29
PORT sets how long the pitch glides from the note before to the next note. It is in the Glide group of the amp page and in the Trig setup plate of the Pattern workspace. In the plate, Port chooses when it glides: ALWAYS glides to every note, and LEGATO glides only between notes that overlap.
FILTER #
MM manual p.1-30
The filter of each track is a 24 dB filter built from a high-pass and a low-pass. The Filter group of the filter page holds four values:
| Value | What it sets |
|---|---|
| BASE | the cutoff of the high-pass |
| WDTH | the gap from the high-pass up to the low-pass |
| HPQ | the resonance of the high-pass |
| LPQ | the resonance of the low-pass |
In the picture, drag the dots sideways for BASE and WDTH and up for HPQ and LPQ. A dashed line shows where the filter envelope takes the filter.
FILTER ENVELOPE #
MM manual p.1-31
The Filter env group holds ATK and DEC, the attack and decay times of the filter envelope, and BOFS and WOFS, how far the envelope moves BASE and WDTH: -64 to +63, 0 not at all.
The screen has two parts. The large part is for BOFS and WOFS: a line for each, solid for BOFS and dashed for WOFS, with -64 at the left edge, 0 on the vertical line and +63 at the right edge. Drag a dot left or right; it covers the whole range. The small square at the right shows the shape of the envelope only, with a dot for ATK and a dot for DEC.
FILTER TRACKING #
MM manual p.1-31
Both filters follow the pitch of the notes. With tracking off a filter stays where BASE and WDTH put it, whatever note plays: under a low LPF the high notes go quiet, and a high HPF lets them through.
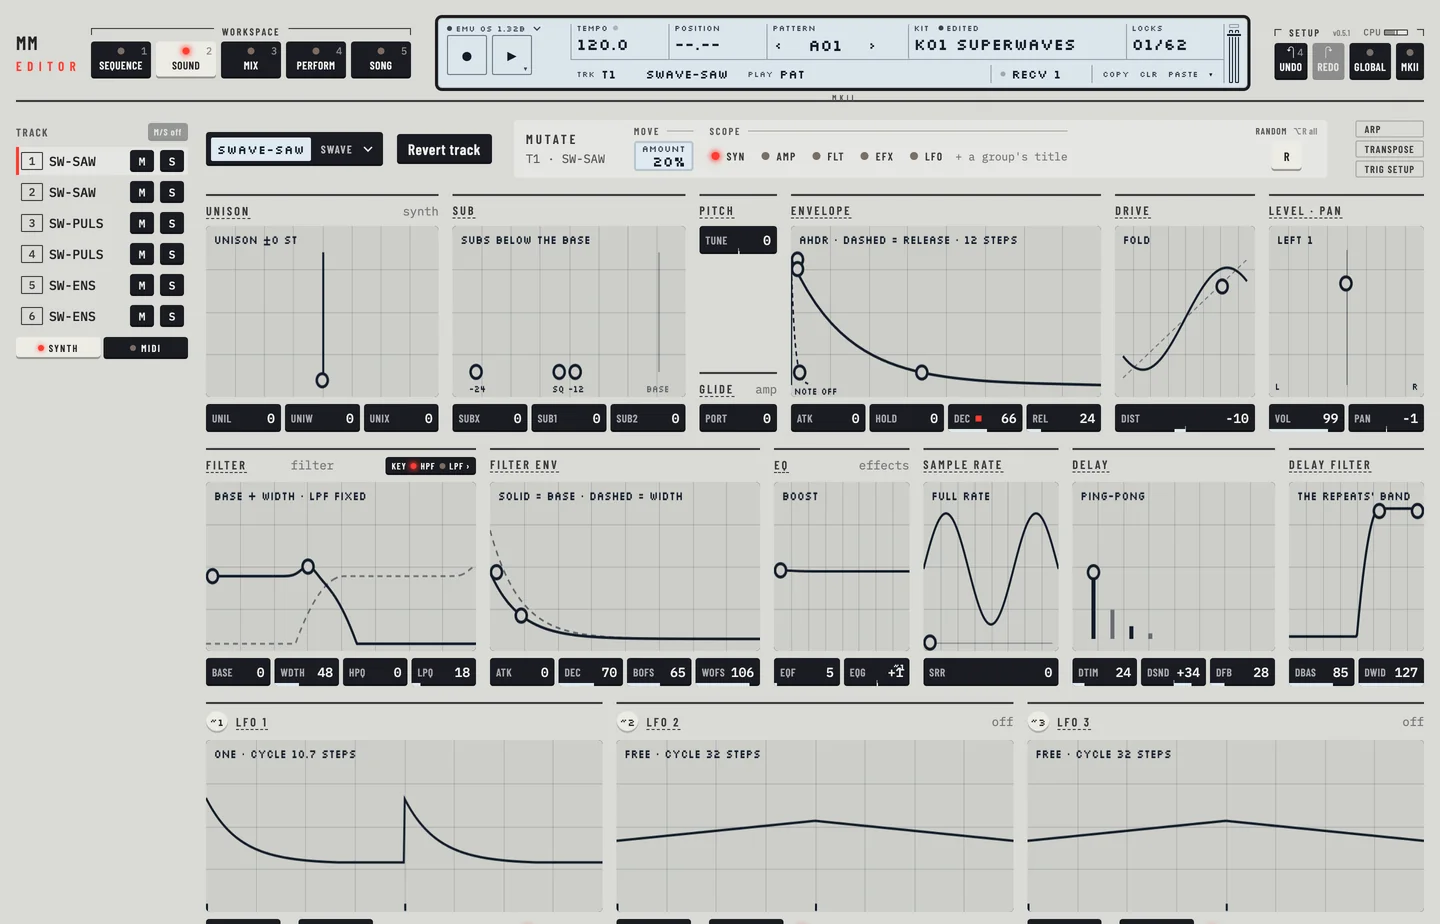
The title of the Filter group shows the state: KEY with a lamp for HPF and one for LPF, lit while that filter follows the notes. The label of the filter's screen says which filter is fixed. The switches are on the Perform workspace, in the Assign card.
- Click KEY in the title of the Filter group. The Perform workspace opens on the KEY tab of the Assign card, for the same track.
- Click HPF tracks keys or LPF tracks keys. A lit key means the filter follows the keys. Click it and the key goes dark: that filter stops following the notes, and the KEY title of the Filter group on Kit shows it off.
- Press [⌘] + [Z] to switch it on again.
EQ #
MM manual p.1-32
The EQ group holds EQF, the frequency of the equaliser band, and EQG, its gain. A negative EQG cuts the band and a positive one boosts it.
SAMPLE RATE REDUCTION #
MM manual p.1-32
SRR, in its own group, reduces the sample rate of the track for a lo-fi sound. Drag its dot, or the value box.
DELAY #
MM manual p.1-33
Each track has its own delay, synchronised to the tempo. The Delay group holds three values and the Delay filter group two.
| Value | What it sets |
|---|---|
| DSND | the send into the delay. A negative value keeps the stereo image, a positive value is ping-pong, 0 is no delay |
| DTIM | the delay time, in 256th notes |
| DFB | the feedback. The editor warns above 64 |
| DBAS | the base of the filter in the feedback path |
| DWID | the width of that filter |
DSND is also in the trim row at the top of each strip in the Mix workspace, with VOL and DIST.