Additional sequencer features
The arpeggiator and transpose are tabs in the header of the lock lane on Pattern: Arp and Transpose. Click a tab to show its keys in the rail and its values and picture under the roll. Swing and slide are in the step menu.
THE ARPEGGIATOR #
MM manual pp.1-61, 1-62, 1-63
Each of the twelve tracks has its own arpeggiator, six synth tracks and six MIDI tracks. A pattern holds all twelve. The arpeggiator turns the chord notes of a trig into a run of notes.
- Select a track and click Arp.
- Write a chord: hold [⇧] and click the steps at the other pitches in the roll.
- Set the mode and the other values below.
The light notes in the roll show what the arpeggiator plays. Press [⌘] + [Z] to take the change back.
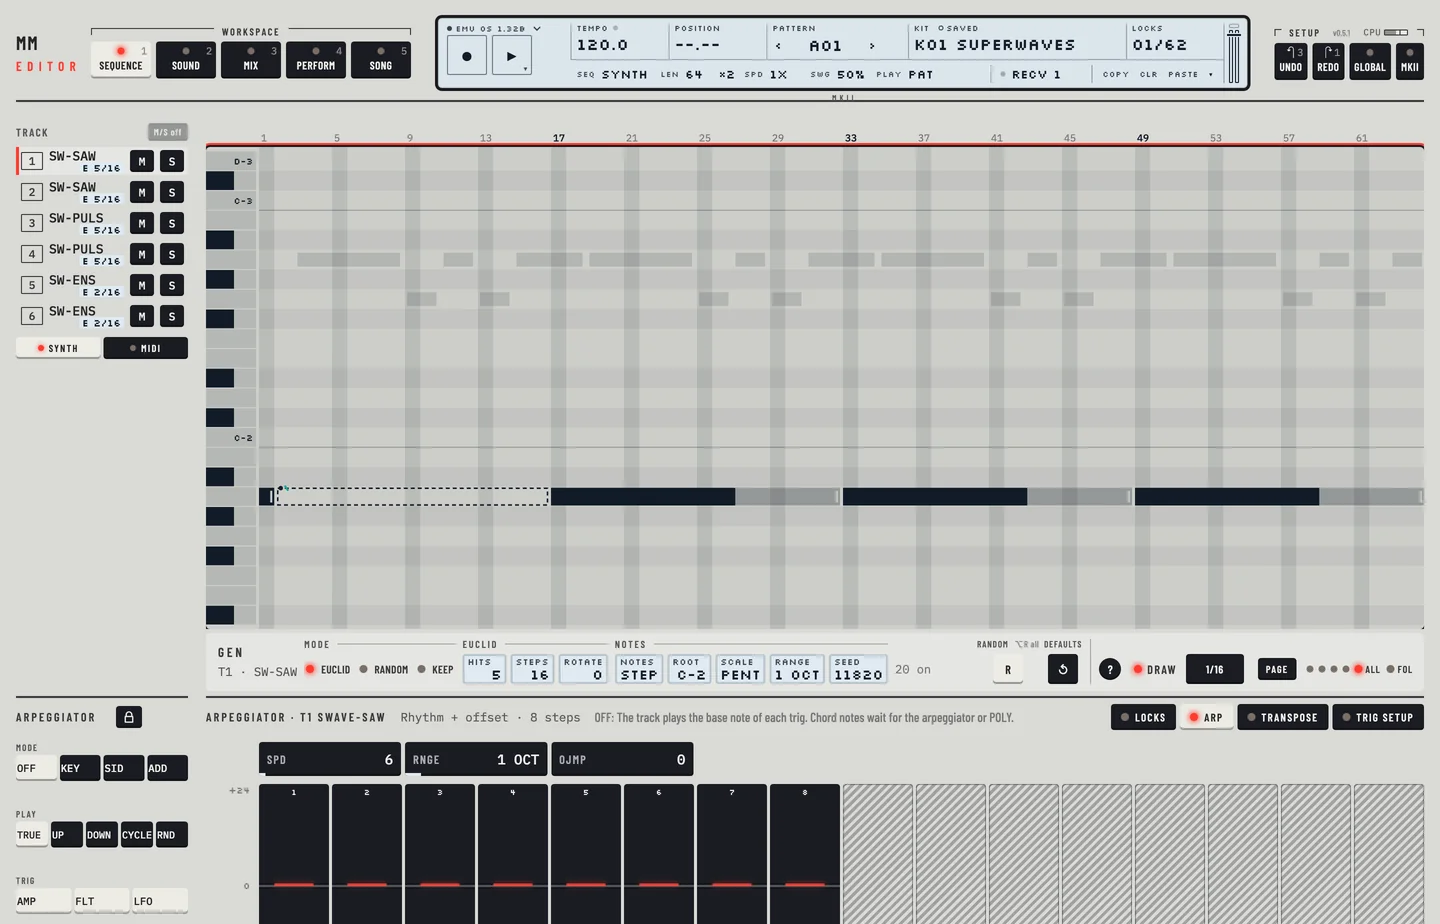
ARPEGGIATOR BASIC SETTINGS
- SPD is the speed. 6 is a sixteenth note, so the light notes follow one to a step.
- RNGE is the number of octaves the run covers. Scroll over it to raise it. It stops at 9 OCT.
- OJMP is the octave jump. Type a value in it.
Each track keeps its own settings: a mode key you click changes the arpeggiator of the selected track and no other.
Mode keys:
- OFF: the track plays the base note of each trig.
- KEY: one held note repeats, or the arpeggiator cycles through the held chord. Release every note to stop it. A trig holds its note until its NOTE OFF or the next trig, so a note you click in the roll while the arpeggiator is on has no NOTE OFF: it repeats up to the next trig. Drag the end of the note to make the run shorter.
- SID: it needs two or more notes. They stay in the cycle after you release them, until a new chord.
- ADD: it starts on the first note. Each extra key joins while one key is held.
Play keys: TRUE plays the notes in the order of the chord, UP from low to high, DOWN from high to low, CYCLE up and then down, and RND in a random order. With RND the roll draws the notes outlined, because the pitches vary.
To copy, paste or clear the arpeggiator of a track:
- Click ▾ beside COPY, CLR and PASTE on the LCD, then Copy….
- Tick Arp (and anything else the track should carry) and click Copy.
- Select the other track, open ▾ again, choose Paste… and click Paste into 1 track. The track now has the arpeggiator of the first.
- A clear from Clear… turns the arpeggiator off.
Each is one undo step: press [⌘] + [Z] to take it back. See chapter 11, "Super copy".
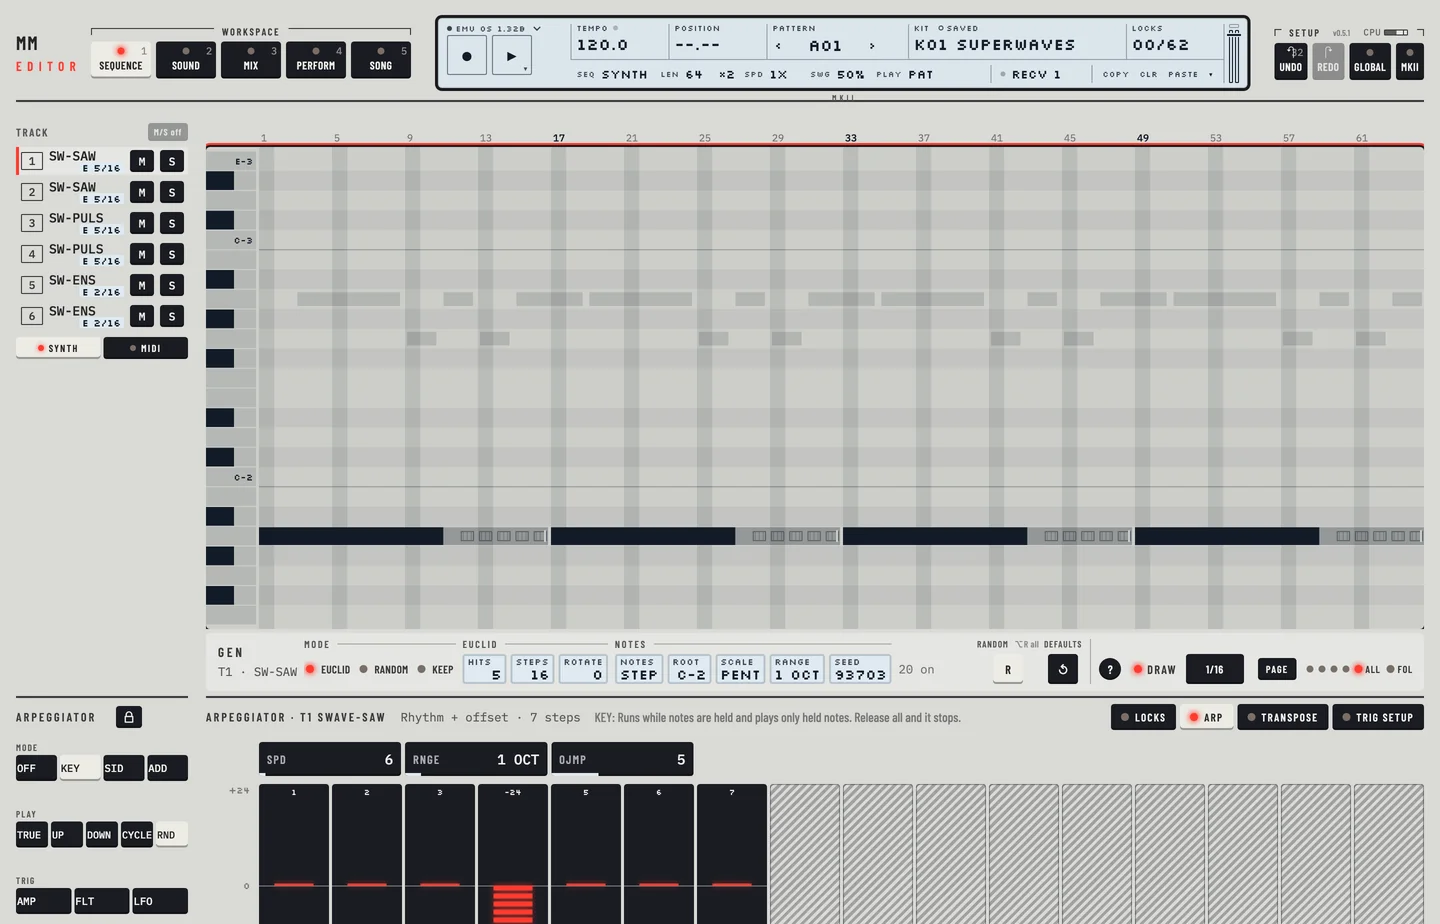
ARPEGGIATOR ENVELOPE TRIGGING SWITCHES
The Trig keys AMP, FLT and LFO choose which envelopes the arpeggiator's notes fire again. A MIDI track has no envelopes, so the keys read "none on MIDI".
ARPEGGIATOR RHYTHM AND OFFSET TRACK
Under the values is a strip of cells, one per step of LEN, up to 16. It repeats while the arpeggiator runs. ON plays the step and OFF rests; click a cell or focus it and press Enter or Space to toggle it. The words have the same meaning on both plates.
- Click a cell to mute it. Click it again to switch it on.
- Drag a cell up or down to give its note an offset from minus 24 to plus 24 semitones. Drag past the top for +24 and past the bottom for minus 24.
- Click a cell past the end, or a key of the LEN row under the strip, to set the length of the strip from 1 to 16.
TRANSPOSE #
MM manual pp.1-63, 1-64
Transpose changes the pitch of the notes while they play. The programmed notes stay as they are. Click Transpose.
- Set TRACK, the transpose of the selected track, by dragging the box. The value runs from −64 to +63 semitones. You can also click a key of the keyboard picture, for example G.
- Set PAT · all, the transpose of the whole pattern, for example by typing +5. All tracks follow it and no track's own transpose moves.
- Under Scale choose ---, FIX, MAJ or MIN.
Transpose works while the pattern plays. Press [SPACE], click the E key and the pattern goes on playing with the new transpose. Press [⌘] + [Z] to take it back.
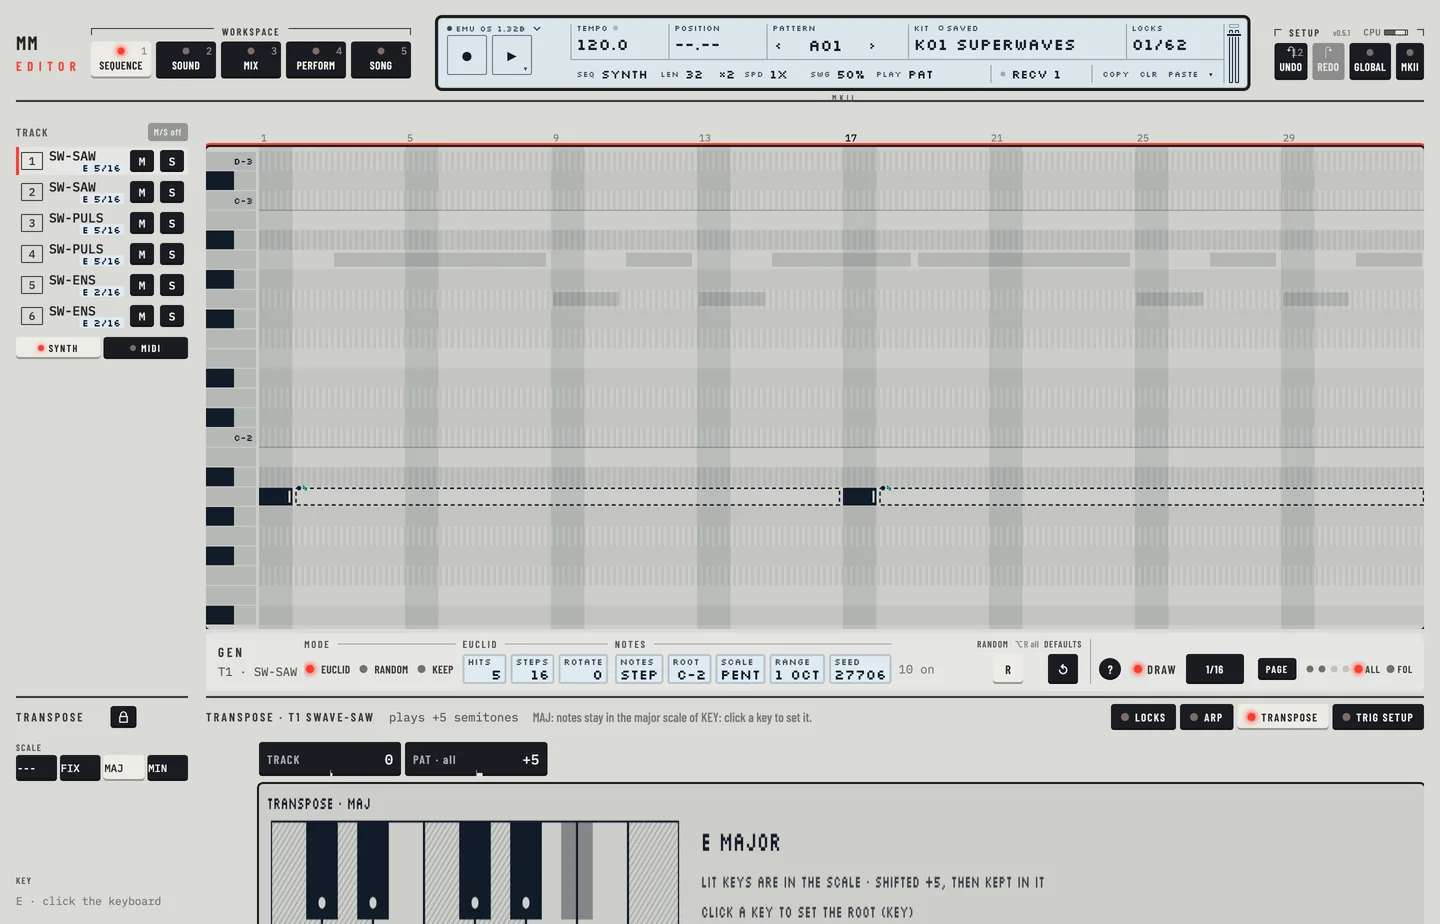
The line above the keyboard picture says what the track plays, for example plays +5 semitones.
- ---: no scale. The transposes of the track, the pattern, the song and the multi trig add up. Any note can sound.
- FIX: only the track transpose acts. Use it for drums and effects.
- MAJ and MIN: transposed notes stay in the major or minor scale of the key. Keys outside the scale are hatched, in the picture and in the roll.
For MAJ and MIN, click a key of the keyboard picture to set the root key. A click on E sets the key to 4. With --- and FIX, a click on a key sets the track transpose so that C plays that key, upward from C. Hold [⌥] and click to go down to it. The note also sounds while you hold the button.
SWING #
MM manual pp.1-64, 1-65
Swing delays every other sixteenth note. The SWG field of the LCD sets the amount for the pattern, from 50 to 80 %. Drag the field up or down, or scroll over it.
THE SWING TRACK
Each step of a track can swing. A step that swings comes late by the amount of SWG. Swing does something only on a step with a trig.
- Right-click a step in the roll (Ctrl-click on a Mac), or select steps and click the ⋯ on the selection.
- Choose Swing. A tick shows when every selected step swings. On a selection it sets every step: on when one of them has it off, else off. It is one undo step.
- A small teal slant over a note shows that its trig swings.
To swing four steps at once:
- Click Pattern and pick track 1 in the rail.
- Drag over four steps in the roll with [⌘] held, then choose Swing in the ⋯ menu. Swing is on for all four, in one undo step.
- Press [⌘] + [Z]. All four are as before.
Each track has its own swing steps. The marks show for the selected track. A new pattern swings every second 16th step, so most off beat notes carry the mark.
To copy, paste or clear the swing row of a track, tick Swing in Copy…, Paste… or Clear… of the LCD's ▾ menu (chapter 11, "Super copy"). A clear sets it back to every second 16th step. Press [⌘] + [Z] to take each back.
SLIDE #
MM manual p.1-66
A slide makes a locked value glide to the next lock of that parameter instead of jumping. Without a lock on the step, or without a later lock, a slide does nothing. The glide ends on that lock whether its step has a trig or not. A trig in between that does not lock the parameter plays the kit value, and the glide goes on from there to the lock. The glide of a pitch is PORTAMENTO, in the trig setup.
- Right-click a step in the roll, or select steps and click the ⋯ on the selection.
- Choose Slide. A tick shows when every selected step slides. On a selection it sets every step, in one undo step.
- A small ramp over a note shows a step that slides and holds a lock. In the lock lane the glide is drawn from one lock to the next.
You can also draw it in the lock lane. Press on the dot at the top of a lock bar and drag sideways to the right. A dotted ramp shows where the glide goes: to the next lock of that parameter, on a step with a trig or without one, whatever further you drag. Trigs between them without a lock do not stop it. Let go and the step slides, in one undo step. A slide belongs to the step, so every parameter locked there glides to its own next lock. If the parameter has no later lock, the lane says so and nothing is set. Click the ramp's line to take the slide off. Dragging up or down from the dot changes the lock as before.
Shift-drag from a lock draws a slide. Shift-drag from an empty step draws a ramp of locks. Hold Shift on a lock bar and drag sideways out of its column. A line follows the pointer and the next lock of that parameter is marked as the target. Drop on that lock and the step slides, in one undo step. Drop anywhere else, press Esc, or move left of the start, and nothing is set. If there is no later lock, the line still follows and the drop does nothing.
To copy, paste or clear the slide row of a track, tick Slide in Copy…, Paste… or Clear… of the LCD's ▾ menu (chapter 11, "Super copy"). Press [⌘] + [Z] to take each back.
THE MUTE MODE #
MM manual pp.1-67, 1-68
Mutes are global: they do not belong to the pattern. The machine holds them.
- Click M on a track in the rail, or on the Mix workspace, to mute it. Click S to solo it.
- Press [M] with a track selected to mute it. Press [M] again to unmute it. [⌥] [M] mutes every synth track and [0] unmutes every track.
- Press [M] to mute or unmute the selected track.
- Press [⌥] + [M] to mute every track. When none is audible, it unmutes every track.
- Press [0], or click M/S off in the rail, to unmute and unsolo everything.
- Drag across M or S keys to set every track you cross as the first one became.
The Perform workspace has a Mutes card with all twelve tracks, T1 to T6 and M1 to M6. A lit key means the track is audible.
Prepare mutes
To change several mutes together:
- Open Mix.
- Hold [⇧] and click two M keys. Each key shows + or X for the change to come. Nothing is sent yet.
- Let go of [⇧]. Both tracks mute together.
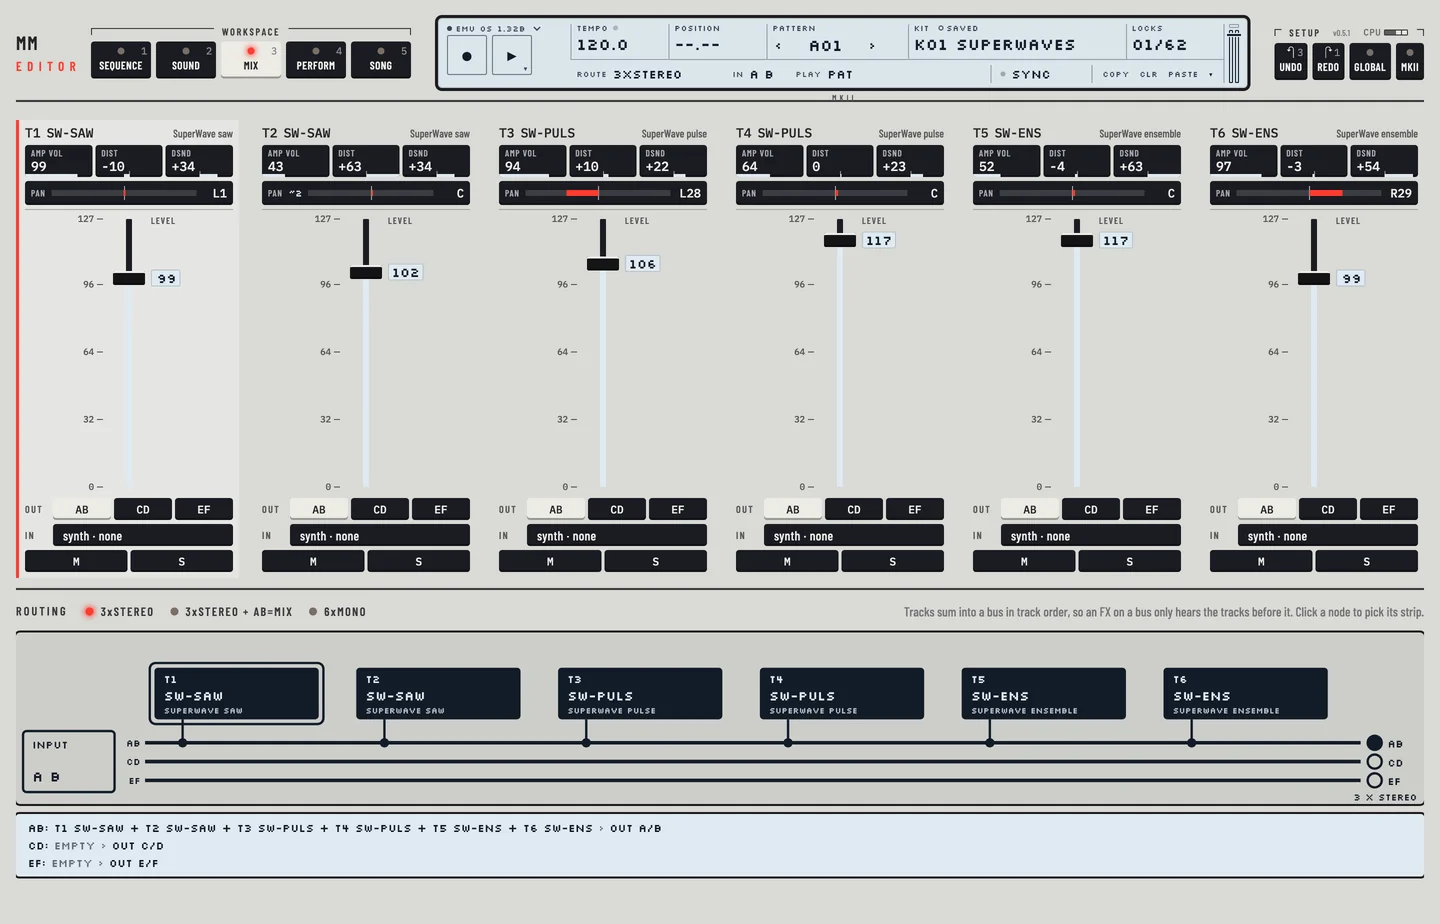
MINIMISING THE MUTE WINDOW
The mute window of the machine is a screen of its own. The editor has no such window, so there is nothing to minimise.
POLY MODE #
MM manual p.1-69
In poly mode all six engines play the track in focus, with six voices. The sequencer then plays the chord notes of that track's trigs as chords. Out of poly mode a trig plays only its first note.
- Press [4].
- Select the track with the numbered keys in the title of the Assign card.
- In the Keyboard bar, click Poly. The machine's poly mode is on, on that track.
- Click another numbered key. Poly mode moves to that track.
- Click Pattern. The rail marks the poly track ×6 and dims the others.
- On Perform, click Auto track to switch poly mode off.
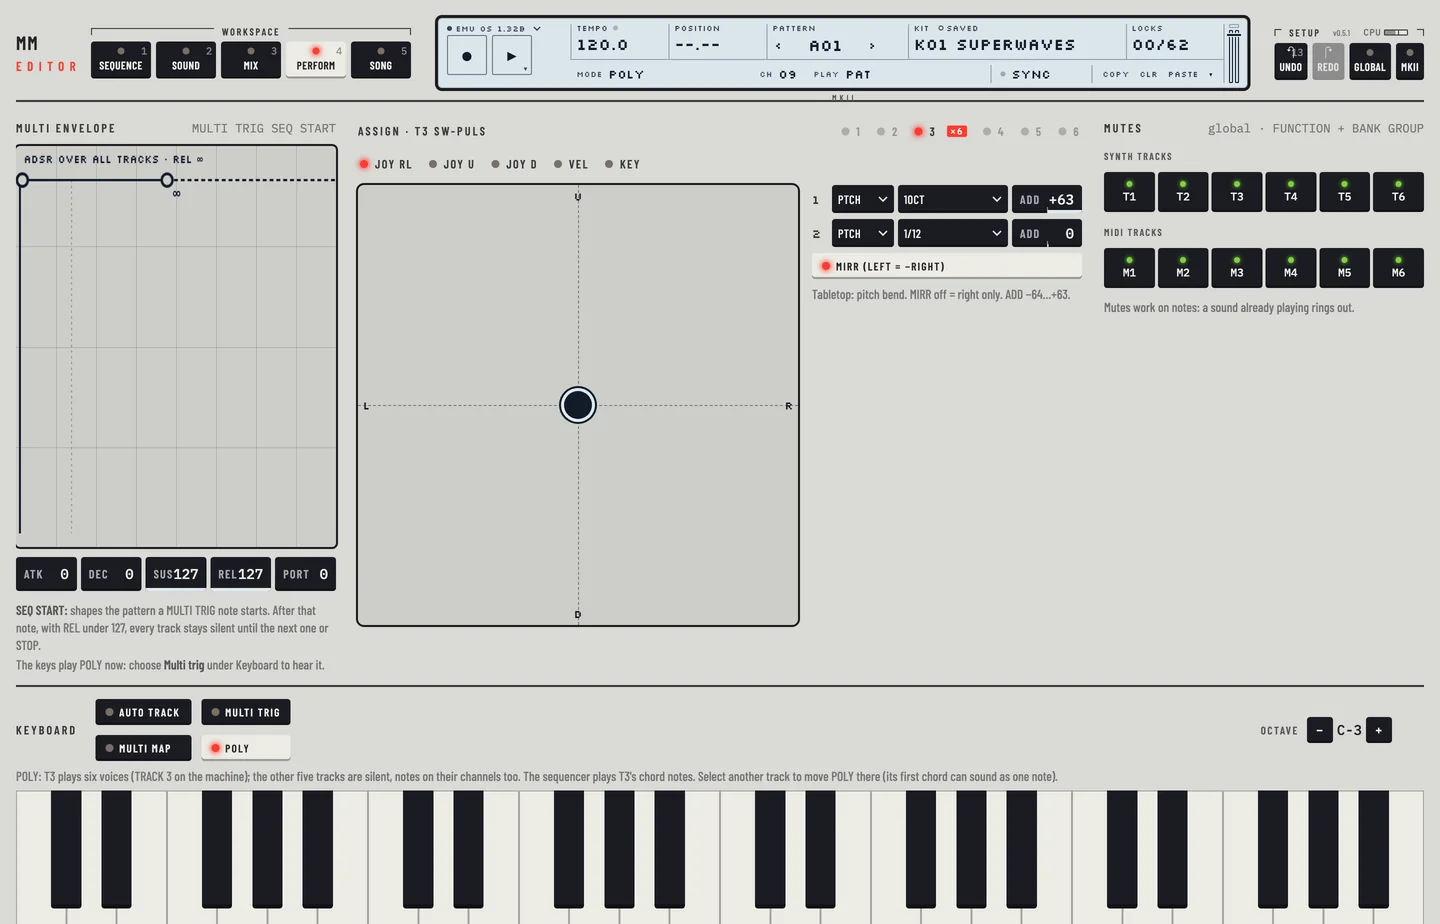
The other five tracks are silent until you leave poly mode. The line under the keyboard modes says so, and on Pattern the rail dims those tracks and marks the poly track ×6. Chapter 5 describes poly mode.